I already mentioned that I think it’s very tough to write actually useful articles about the subject as to how to play any particular game of
Magic correctly. Decisions are just too fluid, there are too many factors to take into account, and different decks need to value different resources,
well, differently. At the same time, though, there are a number of fundamental principles and concepts that generally apply, and even if the decision how
to value different resources is context dependent, it at least helps to be well aware where and when you are making tradeoffs.
That’s what I’d like to talk about today, though fair warning to all you seasoned veterans out there: These are fundamentals and as such, many
among you are likely aware of most or all of these ideas anyway. I hope you’ll still enjoy the read, and who knows, maybe I touch on something you didn’t
actually know yet. Well, that’s the mission statement. Time to get going!
How Magic Works
Stripped of all the fantasy trappings, Magic is at its heart nothing more than a resource management game. You get a number of different resources that
develop in different ways throughout the game and the player that does so in a more efficient and effective way is going to win the game. To start
understanding how to manipulate them, the first step is to make yourself fully aware what these resources are and what it is that makes them special. Let’s
take a fast look at the three absolutely fundamental ones that define Magic (which are what we’ll be looking at today):
Life Total.
Life is the least important resource in the game until it suddenly becomes the most important one. It doesn’t actually do anything for you, but if you run
out, you lose the game. That’s where the golden rule of playing control stems from: It’s only the last life point that matters. Life is also a resource
that is static in a vacuum. That is to say, as long as neither you nor your opponent take any particular actions towards doing so, the life total is never
going to change all by itself.
Accessible Cards.
Accessible cards – those in a zone that lets you take advantage of them, typical your hand or in play – on the other hand, are the clear most important
resource in Magic – if you don’t have any, you’re doomed to utter inactivity. This is where the concept of card advantage comes in; if you have more
accessible, active cards then your opponent, you’re most likely on the road to winning the game, and the easiest way to make sure that’s the case is to get
ahead in card count compared to your opponent. Cards are a growing resource – by the natural flow of the game, you get at least one new card every turn.
Mana.
The second most important resource in the game, mana is what you will use to actually make use of those cards you’ve been drawing. Like cards,
mana is a growing resource courtesy of the player having the option of playing a land on every one of their turns. It is, however, dependent on cards in so
far as you need to have those lands (or alternative mana sources) available to make use of them in the first place.
Due to how the mana system works in Magic (lands tap, then can be reused the next turn), there are actually two different elements to mana management: You
want to make sure your overall mana supply keeps developing (using your “land drop resource”), but you also want to try to use every reusable mana source
you have access to every turn – it’ll be fresh and new next turn anyway.
There are a number of other resources in the game – cards in your graveyard or library, all kinds of permanents with activated abilities, creatures to
attack and block with or card-dependent resources such as artifacts in play for affinity and metalcraft – though most of these can still comfortably be
boiled down to expressions of the core resources I just mentioned and those that can’t are definitely not needed in a rather introductory article like this
one.
What understanding these resources teaches us is that the player who more adroitly manipulates them efficiently (that is to say in the shortest possible
timeframe) and effectively (to draw the most advantage possible out of each resource spent) will win the game. Sounds like something we should definitely
learn if we want to be good at this game, doesn’t it?
Life
Life is, in my opinion, one of the easiest resources to understand, in spite of the basically universal beginner mistake of overvaluing your life total
(and therefore chump blocking on turn 2). The reason it’s so easy? Life total is actually a free resource for the most part. As the old control player
dictum goes, it’s only the last point of life that matters.
Why is that? Well, think about it. Is there really any difference in playing the game at 15 life or at 30? Unless you’re in a race, it really doesn’t
matter, does it? The only moments life really matters to how you need to play the game is a) when you’re under clear threat of losing the last one and
therefore, the game b) when you have so much life that your opponent can’t ever hope to deal enough damage to actually beat you and c) when you’re relying
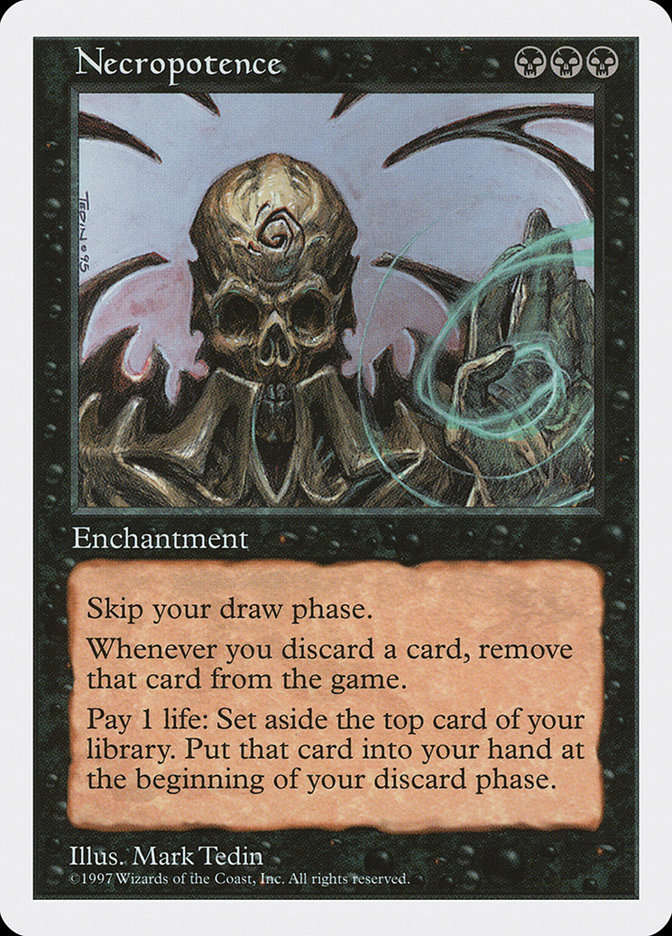
on cards like fetchlands or Necropotence that do what you want to do with your life total – use it.
And that’s why the life total is the easiest thing to manage – oftentimes, the secret isn’t to spend life correctly, it’s finding a useful way of spending
it at all. After all, we’re given all these points of life at the beginning of the game, and unless we find some way to do something productive with them,
there’s just a giant waste of unused resources. In essence, winning the game without ever adjusting your own life total down isn’t, in fact, the sign of a
perfect game, quite the contrary – it means you wasted resources that might have helped you get ahead faster or further.
So how do we spend life? Well, the obvious way is the circumstantial one built into the game – absorbing damage from creatures and spells to buy time (as
in extra turns during which you can do things). The cleanest example of this is your archetypical Wrath of God control deck. Instead of using your sweeper
on their 3/3 on turn 4, you leave it onboard, hitting you once or twice and wait for them to either deploy more threats (so that you can use your Wrath to
trade with more than one creature) or enough mana to deploy your own high impact plays (a 3/3 takes a while to kill you and generally isn’t very good
against, say, Elspeth, Sun’s Champion). You usually get a pretty low return per life invested in this case, though.
The other – usually more efficient – way to spend your life is to find cards that let you trade life total for a more relevant kind of resource.
Necropotence allows you to turn life points into cards, Channel lets you trade them for mana, and something like Fastbond means you can spend it for faster
permanent mana development. There’s a reason these sample cards are considered among the most broken cards in the game – they trade life total super
efficiently and effectively into resources that actually impact the game.


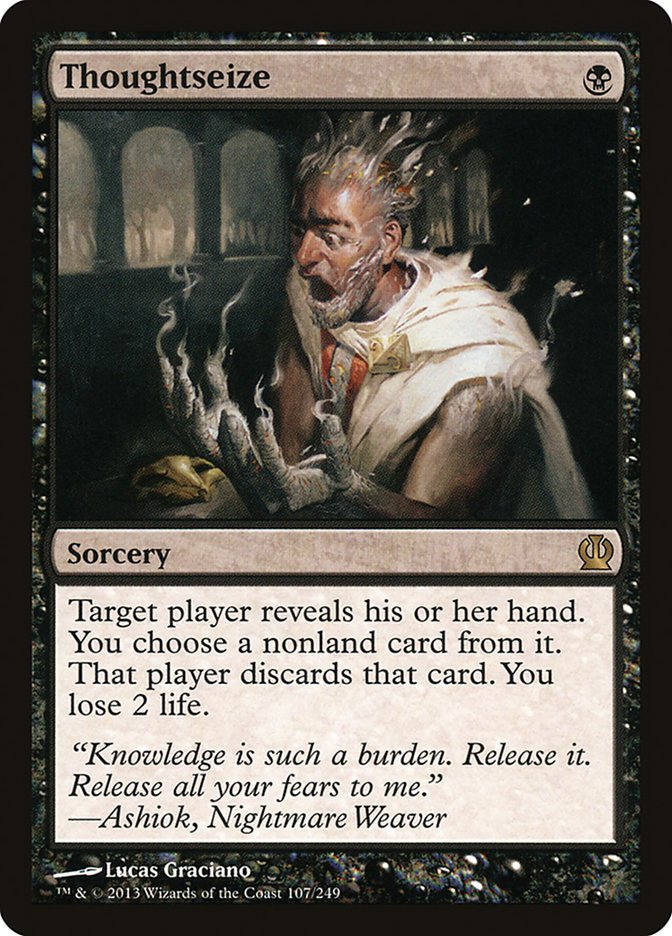
Even much lesser examples still remain extremely powerful, though, simply because they allow you to actually take advantage of your life total. Fetchlands
like Polluted Delta and Arid Mesa ask for the smallest possible life payment to give you excellent mana, and Thoughtseize allows you to save two mana on
Coercion by paying two life. These kinds of cards are awesome because they allow you to spend your otherwise useless life points to pay for powerful
effects that would otherwise have cost you more relevant resources.
That being said, this doesn’t mean you should just spend your life willy-nilly. You do lose the game if your life total hits zero, so there’s always an
important balance to keep – you want to spend as many life points as safely as possible, but no more. As such, you always need to be aware how your deck
plans to utilize its life total both during deck construction (don’t put playsets of Thoughtseize, Skeletal Scrying, fetchlands, Dismember, and Spoils of
the Vault all into the same deck), and while playing the game (that turn 2 chump block might be just what the doctor ordered when you can Channel plus
Emrakul them next turn).
Cards
Magic is a card game and that leads to a rather intuitive first understanding of the value of the card resource. It should be very obvious that, generally
speaking, having access to more and/or better cards than your opponent is A Good ThingTM. The most evident way to take advantage of that
concept? Cards that make it so your opponent straight up discards multiple cards for one of yours or cards that allow you to draw more than one card by
themselves.


By the way, that’s fundamentally what the often-bandied around concept of card advantage is all about. If you have access to more active cards (in play, in
hand, or anywhere you can actually use them, in fact) than I do, you’re likely to win this game. In fact, this fundamental principle was one of the first
discovered by the Magic community, and as a result, WOTC has become a lot more careful with cards that allow you to easily get ahead in this way (outliers
like Treasure Cruise excepted). Straight up drawing cards and forcing discards isn’t the only way to get ahead in this part of the resource war, though.
In fact, at this point in the game, the most common way we’re allowed to get ahead on cards is what is usually termed “value grinding.” Value grinding is
about forcing trades with your opponent, which put you marginally ahead of your opponent in resource count. Snapcaster Mage is a poster child example of
this kind of operation. You cast a spell (say Thoughtseize) that trades with your opponent. Then, a turn or two later, you cast Snapcaster Mage and
Thoughtseize again (once again trading a card for a card). However, you also end up with a 2/1 body in play that in effect hasn’t cost you a card compared to your opponent.
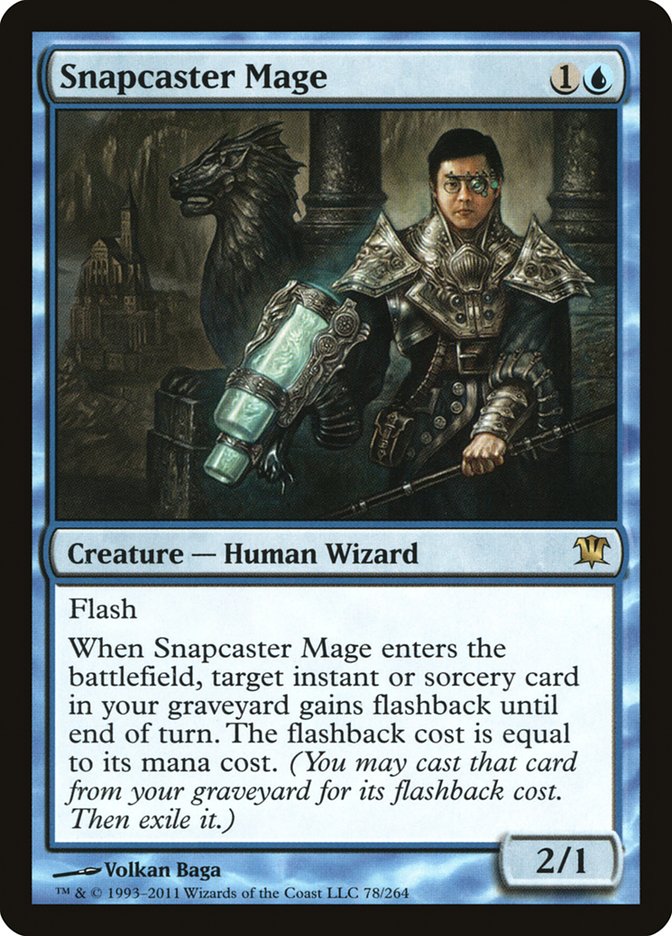
Now, a 2/1 for effectively three mana isn’t a great card (in fact, a 2/1 is rarely actually worth a full card almost no matter the cost outside of specific
contexts like extremely aggressive decks), but in this case, you’re essentially getting it for free (card-wise). So even though the 2/1 body might
only be worth about half a card in general, you are, in fact, up that half-card over your opponent now. By playing the game to accumulate these tiny
advantages you pull ahead little by little and can “grind out” your opponent.
Another facet of the card resource battle is what has often been called virtual card advantage and what I like to think of as card quality advantage.
Remember that we’re dealing with active cards when we consider who is ahead in the card metric. Any active cards you have access to that don’t
have the ability to effect the game are essentially dead weight. You might have five cards in hand to my one, but if they’re all Doom Blades and Ultimate
Prices and my deck doesn’t run any creatures vulnerable to these spells, you might as well be empty-handed, meaning I’m ahead on cards anyway even though
it looks the exact opposite on first sight. On the other hand, if my deck is all small green creatures, I’m very much getting buried at this point.
Similarly, if you’re playing an aggressive Mono-Red deck and deploy all your spells and creatures by turn four while my hand is full of six-mana spells, or
if you’re playing Temur Delver and stop me from playing any spells by Wasteland-ing and Stifle-ing my lands, I most likely won’t be able to play my cards
before I run out of life total to play the game, meaning those expensive cards might as well not be in my hand at all.
Aside from deckbuilding, there are in-game ways to take advantage of this. The most straightforward examples here are the Legacy-defining library
manipulation cantrips and point discard spells.
On the surface, these cards trade one-for-one. I spend a card to either replace it with a new one or take one of yours away. However, because I get to
choose which cards to keep/make you discard, these spells make it much more likely that you end up with more dead cards than me. That’s also what makes
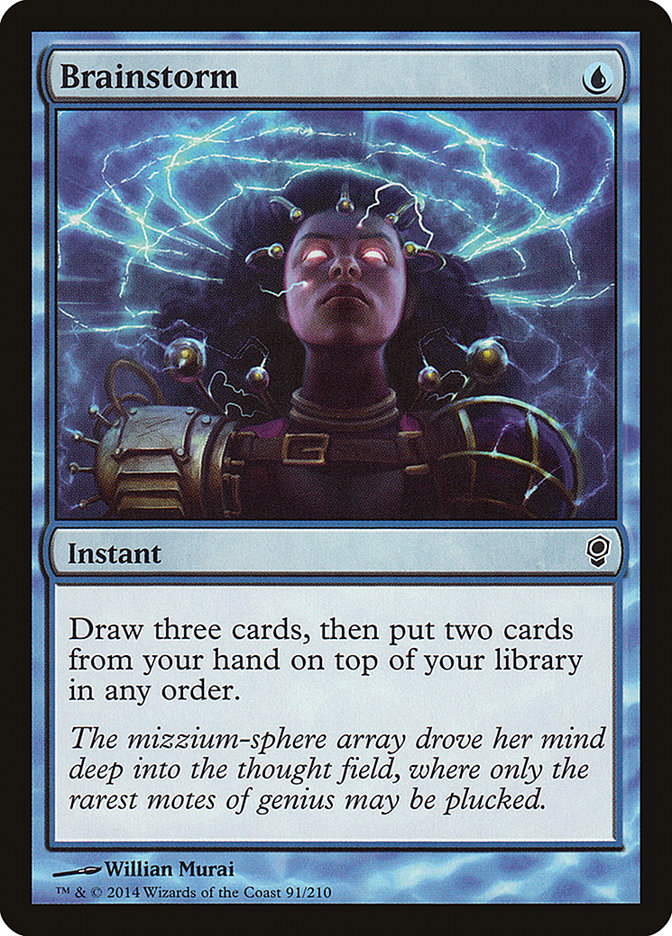
Brainstorm such a format-defining card. While most of these card quality tools only allow us to affect a single card, Brainstorm trades two dead
cards away if combined with a way to remove them from the top of our library.
Combine this with the fact that we naturally tend to accumulate dead cards during games of Magic – either because some of our cards aren’t useful in the
matchup at hand or simply because lands become mostly useless once we have all the mana we could want – and you can see how potent tools that allows us to
turn dead cards into new ones actually are. It doesn’t have to be straight up messing with our draws, either. Something like Pack Rat is awesome not only
because it can easily spiral out of control in the earlygame, but also because it allows us to turn anything we can’t really use into yet another rat –
which can then at least attack and block as necessary.
Mana
Finally, probably the most complex resource of the bunch: mana. Mana is particularly hard to get a firm grasp on because it usually has two complementing
facets we need to keep in mind: permanent mana development and mana saturation.
Mana development basically means land drops, the natural progression of the game in which each player takes advantage of their land drop during their turn
to give themselves access to more mana to spend on each subsequent turn. Breaking this rule through things like Explore and the Moxen – effectively lands
in function if not card type – is extremely potent because it has repercussions for possibly much later in the game – we have one mana more to spend than
we should naturally have every turn until we miss a land drop (at which point we fall back to our naturally expected mana count for the turn).

That also means that ways to make sure we don’t actually miss any land drops – be it Crucible of Worlds, Courser of Kruphix, or simply drawing more cards
so that we find lands to play – is quite powerful, assuming our deck has the tools to spend all that mana turn after turn.
Spending our mana every turn is where mana saturation comes in – if you aren’t using your permanent mana sources, you might as well not have them, and as
such, we’re losing out on maximizing our resources. As mentioned before, there’s a reason lands become dead draws for most decks at some point during the
game.
The reason this is important is simple: Assuming our cards give us our mana’s worth when cast, spending all our mana every turn when our opponent doesn’t
means that we’re producing more impactful plays turn after turn, which means we’re pulling ahead somewhere – which angle we’re winning on depends
on what deck we’re playing.
To maximize our deck’s ability to saturate its mana, what we want is to make our curve as low as possible (if our hand is all one-mana spells, we can
obviously find some combination of spells that will use up all our mana – assuming we have enough cards in hand – while having a four-mana card and a
six-mana card in hand means we can never successfully saturate five mana, for example). In fact, if you look at Temur Delver in Legacy, you can see a deck
that really takes that idea to the extreme.
Deckbuilding isn’t the only time we should take this into consideration. When playing the game, you always want to try to spend as much of your mana as
possible while denying your opponent the ability to do the same. An example to illustrate:
In current Standard, your U/B Control-wielding opponent passes on turn 4 without playing a spell with only a single card in their graveyard. You, with a
developed board, have the ability to bestow a Boon Satyr on your turn to attack for four more points of damage, or to wait for your opponent’s end step.
The correct play here is almost definitely to hold back and wait. Yes, you lose out on damage should your Boon Satyr resolve. However, given U/B Control’s
play pattern, your opponent is likely holding up Dissolve at this point and casting a spell does nothing but allow them to saturate more of their mana. On
the other hand, turn 5 is usually when they want to be casting Jace’s Ingenuity (saturating their mana). By playing the Boon Satyr during their end step,
we not only force them to waste the four mana they’ve held open this turn, but also to decide between playing their draw spell or dealing with our threat
with Dissolve (which is likely to leave them with another two mana they can’t saturate).
In addition, to increase the likelihood of always being able to saturate your mana. you want to prefer high cost drops that saturate your mana over lost
cost ones (assuming no particular other reasons push you towards casting your cheap cards). To illustrate:
It’s turn 4 and your hand has Hero’s Downfall, Siege Rhino, Rakshasa Deathdealer, Fleecemane Lion, and a couple of lands against a tapped out opponent. You
can now either deploy Siege Rhino or play a Rakshasa Deathdealer and a Fleecemane Lion. All else being equal, Siege Rhino is the superior play here. You
can use up all your mana either way, yet by holding back the Deathdealer and the Lion, you give yourself the opportunity to play another threat and the
Hero’s Downfall on five mana, and you might even rip another Siege Rhino to let you saturate turn 6 also.
The general principle is simply to keep the spells in your hand as cheap as possible to make piecing together full saturation easier in the following
turns, though that’s only the tip of the iceberg. You can, after all, calculate the likely and possible amounts of mana available to you on the following
turns (by judging the amount of lands you have in play and in hand/might draw – which then means you won’t draw a spell) and can start figuring out how to
best saturate your available mana turn after turn, starting on turn 1, and play accordingly.
That leaves us with one last element of the game that makes manipulating mana more complicated: one shot mana sources, what I like to think of as “Ritual
effects.” One shot mana sources like Black Lotus, Dark Ritual, and Seething Song allow us to spend cards to give us access to more mana than we should by
rights have at that point in the game. While not as impactful in the long run as permanent mana acceleration, these effects have a different advantage:
They allow us to get ahead on spending our mana much more rapidly then something like Explore* (which already eats up a part of our turn).
The Moxen are special here – and as absurdly busted as they are – because they work as both permanent mana acceleration and Ritual effects because
they produce more mana than they’ve cost us the turn they’re played.
If we saturate four mana on turn 3, that’s pretty strong but only slightly ahead of the curve. On the other hand, if we manage to saturate eight mana on
turn 1, we’re extremely far ahead because our opponent has less mana to catch up (please ignore the fact that successfully spending this much mana
that early – and having access to it in the first place – usually means we’re playing combo, and full saturation ends up straight up killing them instead
of just putting us far ahead).
You can think about it this way: Assume both players can always saturate all of their mana and manage to hit every land drop, and every mana spent is of
equal value towards winning the game. Our opponent straight up plays one-drop into two-drop into three-drop into four-drop. By turn 4, they’ve spent ten
mana total. If we play a Mox on turn 1, we’ll have spend 2+3+4+5 = fourteen mana on turn 4 – we now have managed to get 40% more of the power of our spells
deployed in the game instead of it waiting in hand. Similarly, if we cast two Dark Rituals on turn 1 to play a five-drop, then continue the game normally
under the assumed conditions, we’ll have spend 5+2+3+4= fourteen mana on turn 4. Compared to our opponent, we’re ahead the same amount of mana spent at
this point. However, during turns 1 to 3, the Mox meant we were ahead one mana on turn 1, two on turn 2, and so on. With the Rituals, on the other hand,
we’re four spent mana ahead starting on turn 1, a situation that allows us to take advantage of the extra-power provided by the mana boost for a longer
time, putting us ahead even further than the Mox would, even though we’ve spent the same overall amount of mana. Basically, the power progression of the
three decks looks like this (each mana spent counting as a point of power harnessed in the game):
No acceleration: 1, 3, 6, 10
Mox: 2, 5, 9, 14
Rituals: 5, 7, 10, 14
The no acceleration deck is obviously far behind from turn 1 onwards, however, by looking at the preceding turns, it becomes equally visible that the
Ritual deck is ahead of the Mox deck until we reach the break-even point on turn 4 – at which point that mana-spent advantage likely has translated into
some other form of advantage that can be carried forward.
The Rest of the Iceberg
As I said in the beginning, at its heart, Magic is nothing but a game of correct resource management. The difficult part is correctly assessing the value
of each resource at any given moment in time and sculpting your play in such a way that you trade off the correct resources at the correct time in the
correct way – and let me tell you, the the value of each of these resources at our disposal fluctuates immensely from matchup to matchup, game to game,
turn to turn; heck, sometimes between one play and the next depending on our opponent’s reaction.
So, while this is already quite the lengthy piece, these are really just the most basic rules of efficient play in Magic. There is a lot of interesting
theory out there that explores the reasons and implications of all of them in more detail or in more specific contexts, and I encourage you to read as much
of it as you can get your hands on. Knowing what you do really helps with winning!
P.S. It sure looks like you guys love the midrange, as you’ve voted the Liliana-white splash builds to
the next round of You Choose the Brew with more than two-thirds of the total votes. Tune in for season two episode four next week!