
In a format as focused on the early turns of the game as Legacy, one of the most important skills you need as a player is that of mulliganing correctly.
This is never more true than in dedicated combo decks – which should make sense, given that these decks often aim to compress the game as much as possible,
going for game-winning moves only a turn or two into the game. At the same time, combo decks have the widest range of unusual opening hands that are
actually keepable and also hands that look fine to the inexperienced player but are actually clear mulligans. This combination of factors means that combo
decks are the archetype in which most players tend to spew win percentage by mulliganing incorrectly.
And yet mulliganing with combo decks isn’t actually that hard, it just requires a different set of evaluation tools than we would use in more “normal”
decks. This process of evaluating your opening hand correctly is what I’d like to go over today, outlining the basic process I tend to go over when I look
at my first seven cards and which characteristics/tools I’m looking for when having to decide if I’d rather have an unknown six. However, instead of doing
this on a purely theoretical level, I’ll take a couple of opening hands from Storm and Sneak and Show to highlight the particular concerns I have when
looking at the seven cards I’ve been dealt. Trying to explain these kinds of things purely in the abstract becomes confusing quite rapidly and makes it
hard to apply these ideas when you’re sitting down at the table – or at least that’s how I feel. I hope this slightly more “hands on” approach makes things
easier for you.
A short note, all these hands will assume that we’re looking at a game 1 situation without knowledge about our opponent’s deck. Anything else would lead to
far too specific considerations for what I want to do today. Also, for your convenience, sample decklists for the decks I’ll be referring to:
Lands (15)
Spells (45)
- 1 Sensei's Divining Top
- 1 Tendrils of Agony
- 4 Brainstorm
- 4 Cabal Ritual
- 3 Duress
- 4 Dark Ritual
- 1 Grim Tutor
- 3 Cabal Therapy
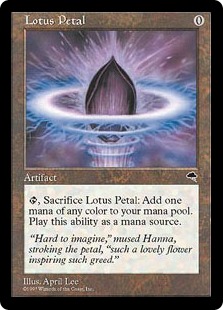
- 4 Lotus Petal
- 4 Lion's Eye Diamond
- 4 Infernal Tutor
- 4 Ponder
- 1 Ad Nauseam
- 2 Preordain
- 4 Gitaxian Probe
- 1 Past in Flames
Sideboard

Creatures (8)
Planeswalkers (2)
Lands (19)
Spells (31)
Ready? Alright, draw!
The Easy One
The first thing I usually do when opening a hand with a combo deck is to check for the most broken option possible: the turn 1 kill. Hands like these:
Opening Hand #1
(Sneak and Show):

or
Opening Hand #2
(ANT):
The goal is to put the opponent on the test on turn 1. If they don’t have disruption, they’re just dead. I’d always keep these on the play (they are at
about 40% to have the Force of Will even if they’re a blue deck and if you give me 60% plus the potential for them to not even be running Force of Will to
win any given game, I’m likely to take that offer) and usually do so on the draw unless I have a strong feeling my opponent knows what I’m up to and is
going to have turn 1 disruption going. At that point it starts to matter what those Cyclopean Mummies actually are (no, I don’t suggest you actually put
that card into your decks).
Does It Do Anything?
Once the straight up turn 1 kill is out of the question, the most important thing we need to ask ourselves when looking at an opening hand is if it is
going anywhere. Oftentimes, especially in so-called fair decks, the answer to this can be easily found by checking if we can play our spells. In combo,
this can be a lot more deceiving.
Check out this Sneak and Show opening hand on the play:
Opening Hand #3
(Sneak and Show, on the play):
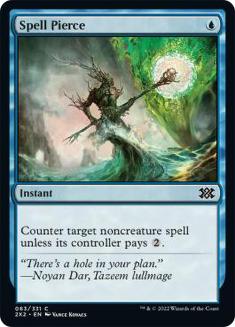
I imagine this hand looks like a snap keep to many non-combo players. We have blue mana to cast our Spell Pierce and also double Force of Will active to
start the game. We even have enough additional mana sources to cast pretty much any spell in our deck (that is meant to be cast). Yet I’d mulligan this
hand in a heartbeat in this situation. In spite of being able to cast all your spells, this hand simply isn’t going anywhere.
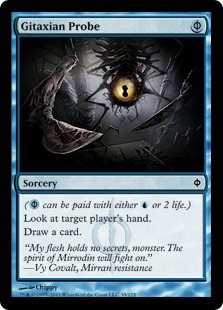
We’re playing a dedicated combo deck that is planning to set up a fast kill involving a two-card combination. Yet this hand doesn’t have access to either
half of the combo, its only way to dig is drawing a single card with Gitaxian Probe, and we’re on the play to boot. That means by turn 3 we’ve likely only
seen three more cards, two of which we’d need to be combo pieces in the correct combination (one enabler and one fatty – getting two of either doesn’t
help). Given that we have only eight pieces of each half of the combo plus about eight Brainstorms/Ponders to help out by giving us filtered redraws, the
likelihood of actually hitting both of them in a reasonable timeframe is quite low.
Our mana situation makes this even worse as we only have the Lotus Petal to provide red mana, meaning that we need to even draw an additional mana source
of a specific color to make half of our enablers – the Sneak Attacks – do any real work.
In the end, yes this hand can cast its spells and defend its position quite well, but it is terrible at the one thing the deck is meant to do. The question
of the hand “doing anything” in a combo deck isn’t about being able to react or even just casting its spells, it’s about forward movement towards killing
the opponent.
That doesn’t just mean there are bad hands that look keepable to the uninitiated though, it also means there are hands that look terrible but should
actually be kept. Case in point:
Opening Hand #4
(ANT, on the play):
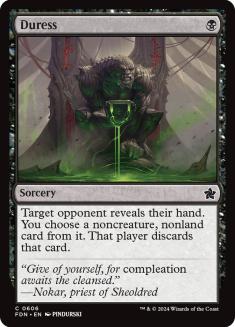
No lands = snap mulligan, right? Actually, I would never mulligan here. I mean, look at the array of spells in this hand. We have everything we need to set
up either an unprotected turn 1 Past in Flames kill or a Duress-protected Ad Nauseam – other than a mana source to start our spell-chain. We need a single
type of card – the most common in our deck, a starter mana source – to turn this into an instant win. We even have the potential to integrate disruption
into our gameplan should that be necessary – and we will know if it is thanks to those Gitaxian Probes. If this hand can hit its starting mana
source, it’s about as good as it gets for ANT.
So ignoring the potential to hit more Gitaxian Probes for the moment, we have 14 lands that straight up allow us to go for it with the ability to slow down
by a turn to enable that Duress as well as four more draws that allow for the turn 1 kill in Lotus Petals. That means we have 18 outs in 53 cards to draw
with the first Probe and 18 in 52 to hit off the second if the first didn’t. That means our chance to not hit a mana source is 35/53 * 34/52 (or about
43%), giving us about 57% to get there on turn 1. This hand is good enough, however, that I believe we’d be winning quite a few games in which we only hit
our mana source on turn 2, which adds another card drawn and reduces the chance of missing to roughly 28%–so over 70% of the time our opponent needs turn
1 disruption to even get a second turn. Even assuming our opponent is playing a blue deck, there are also roughly 34% of games in which our opponent just
dies before getting a turn (the 57% where we hit on turn 1 times the roughly 60% in which they don’t naturally have a Force of Will). And there is no risk
of running head-first into that Force of Will if they do have it as we have Gitaxian Probe to provide (un)fair warning.
Missing Pieces
Most hands won’t be as lopsided as those two. In most games we will draw something a lot more reasonable that is neither completely devoid of business nor
completely tricked out to get a turn 1 kill as long as our percentages hold up. Instead, many hands are likely to look a little like this:
Opening Hand #5
(Sneak and Show, on the play):
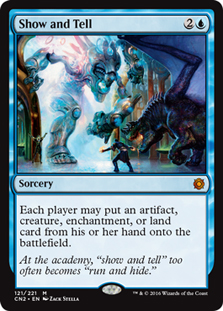
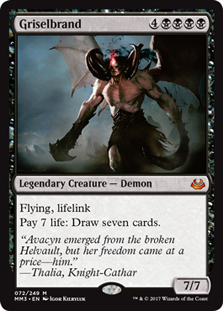
So in this hand we have access to one half of our combo – the Griselbrand – all the mana we’re likely to need this game, some protection, and a cantrip to
help find the other half of our combo (either a Show and Tell or a Sneak Attack). This looks like a reasonable hand and it is – in fact this is the kind of
hand I consider the baseline for a keepable combo hand, the kind of draw you want to and can expect to get on average. That information doesn’t
really help you evaluate any particular opening hand though, so let’s break it down.
The foundation for our considerations here should be how likely we are to reach the going off point at the expected time – our theoretical fundamental
turn. When that is obviously differs between different combo decks, so make sure you know when your deck is supposed to be ready before you start playing
it. The two decks I’m using today have pretty similar flashpoints, usually tending towards turn 3 with a decent potential for turn 2 wins.
Getting back to the hand at hand (sorry), we’re half-way to completing our combo and casting it, a big step in the right direction. We also have the tools
to protect our hand from disruption or to push our combo through once protected, a nice safety blanket to have in a format as focused on early interaction
as Legacy. So essentially we have all the tools we need with just a single piece missing to complete the voltron. To find this single piece before turn 3
we have two draw steps plus a Ponder, meaning we can see at least six more cards until then, plus possible extra cards should we draw into more library
manipulation along the way.
To roughly evaluate our chance of getting there, we can simply treat our ability to look six cards deep as drawing six cards and figure out how likely one
of those six would be the missing piece. In this case, there are eight cards we want in our 53 card library, giving us a 8/53 shot for each draw to be what
we want, resulting in a 45/53 chance that we don’t get there each time. That means we’re (45/53)^6 or roughly 37% to not get there by turn 3
(meaning we get there ~63% of the time).* Now, this isn’t mathematically exact – we’d need to figure in the depleting library size, for example – but it’s
a reasonably easy and close enough way to estimate our chances.
*Aside: Calculating (45*44*43*42*41*40)/(53*52*51*50*49*48) – roughly 35% – would already be closer to correct, though it doesn’t figure in Ponder or the
fetchland correctly. Going over exact calculations becomes extremely long and complicated once you try to figure in additional cantrips, fetchland
shuffles, and other things happening, so I generally just rely on easy to calculate/remember guestimates. If you’re happy and able to put in the work,
tables outlining the chances to hit different numbers of missing pieces depending on possible hits in the deck, different numbers of cantrips present and
the other factors that would go into calculating exact numbers would probably be much appreciated by the combo community as a whole. I know I’d be
grateful, at least.
So that means we’re slightly above 60% to get where we want to be assuming we don’t draw anything else useful in the meantime and that the disruption we
have in hand is enough to cancel out our opponent’s plans to stop us. Given that the basic idea behind playing our combo deck in the first place is that
getting there should win us the game in addition to the fact that we aren’t necessarily losing if we don’t – we’re just not winning as early as we were
planning to in a vacuum – being clearly above 50% to win the game should be good enough to keep.
This estimation of how much we’re missing and how many looks we get to find it is the fundamental logic behind evaluating most combo hands in general.
However, don’t be afraid that you’ll need to keep doing long-winded calculations every time you draw an opening hand. Between being able to calculate
numbers in advance and simple experience, you’ll rarely have to do these calculations completely on the fly when playing a combo deck. After some time of
playing these decks, you’ll often simply know if your opening hand is likely enough to get there with the tools it has or not, and as a result, you’ll
oftentimes be able to create some hard and fast rules to follow.
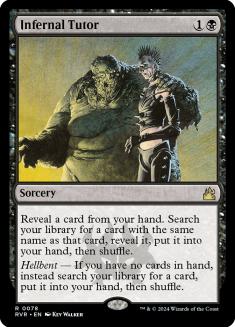
For example, in Storm I mulligan any seven card hand that doesn’t have either Ad Nauseam, a cantrip, or a tutor already in it. You have from five to seven
actual pieces of business to hit (four or five tutors plus Ad Nauseam, and in certain cases, Past in Flames or Tendrils of Agony) so when you’re relying on
your draw step alone to get you there, you have between fifteen and eighteen draws that are actually useful plus four Gitaxian Probes to reduce your
library size. Now, if all of those eighteen hits were Tutors that just end the game, that would give us a decent – over sixty percent – shot of getting
there of our two or three draw steps by turn 3. However, as the majority of our hits are just cantrips that will let us see more cards without any
guarantee of getting there, and those cantrips will eat up mana we might need to go off on turn 3, I’ve learned over time that these hands have a higher
chance of failing than I’m comfortable with.
Playing It Long
So far we’ve looked mainly at the short game potential of our hand, checking how close it is to simply implementing our gameplan and killing the opponent.
However, outside of dedicated all-in decks like Belcher, trying to rely on always finding a super-fast kill isn’t a valid strategy as our deck simply isn’t
built to only thrive on turns 1 and 2. There has to be a second way to win other than just blitzing people down, the equivalent of edging out advantages in
the long game for more usual decks. For combo, edging out percentages is about building the perfect hand.
The secret here lies in understanding how combo decks work on a fundamental level. An aggressive deck can measure its progress by board presence and the
opponent’s life total. Those things are easy to observe and measure. A combo deck’s position in the game on the other hand, by and large, isn’t judged
correctly by looking at the on-board game state but by the quality of its hand and the availability of opposing answers. Where an aggressive deck is
furthering its gameplan with every threat it deploys and every point of damage it deals, a combo deck advances by collecting the right cards in its hand to
enable its kill while answering the opponents disruption.
As such, the long game potential of a combo deck depends on how efficiently it can spend its mana to sculpt its hand and how close we are to knowing what
the ideal hand we are working towards actually is at this point. The faster the quality of our cards improves, the better our potential to win in the long
run.
Look at this hand, for example:
Opening Hand #6
(ANT, on the play):
This hand has nothing but lands and cantrips. At this point, we’re pretty far from going off as we need at least two to three pieces of mana acceleration
as well as a business spell to get there. So even ignoring the ability of our opponent to mess with our plans, we’re missing between three and four pieces
here – a death sentence for this hand if we look at it only from the angle of trying to get there asap. Yet this is the kind of hand I’m extremely happy
with against unknown opponents because of how many options it gives you.
Yes, this hand is pretty bad as far as early game potential is concerned. On the other hand, it has extremely stable mana to make sure our library
manipulation will get cast, shuffle effects to make sure we can maximize both Brainstorm and Ponder, and a whopping three pieces of strong library
manipulation to start with.
The combination of these tools makes it essentially impossible for this hand to really brick off in the long run. Outside of extremely fringe scenarios,
our turn 3 hand should already be very good, especially as our first cantrips are extremely likely to hit cards that will be of use to us, as most cards in
our deck are something we want to draw at this point.
After every cantrip or natural draw step, we gain additional information as to what it is we are still missing, and the large number of cards this hand
allows us to see in a very short time should mean that we can easily locate those missing tools one by one.
In addition to this awesome sculpting potential, we have a Gitaxian Probe to let us know what exactly our opponent is up to before we even cast the first
cantrip. Instead of blindly casting our cantrips with the goal of just accumulating combo pieces or trying to guess how much discard we’ll need to
successfully go off, we actually get to sculpt with perfect information.
If they have a draw (or deck) that is basically all-in on racing, we get to just maximize our potential to find fast mana and a business spell starting
turn 1. However, if they do have tools to interact with us, we can shape our game to aim for a later kill, filtering for the exact amount of disruption we
need to beat what they have while accumulating additional resources we now don’t need to filter for any more with every natural draw step.
Evaluation Complete
While combo decks may appear to be difficult to mulligan with on first sight, the whole shebang actually isn’t all that hard. The perceived difficulty
stems from how different the requirements you pose on your hand are from those of a deck that follow a more traditional strategy but essentially boil down
to two relatively basic considerations: how close am I to completing whatever strange interaction I’m aiming for and how fast is my hand going to improve
from here on out.
Looking for these two elements and doing a bit of mental arithmetic – don’t be afraid to round things like 35/53 to roughly 3/5 if you’re forced to do the
math on the spot, just be aware that you’re going to get slightly worse numbers than your real chances – should generally be enough to provide you with a
solid guideline to make your mulligan decisions.
Is there anything you do differently, anything I’ve missed, or some additional information that you think would be helpful in this context? Or maybe you
already have that table with all the possibilities for potential draws I mentioned? The comments are below, ready and waiting!