If the MPL and Rivals League Weekend solidified anything about Kaldheim Standard, it was the extent to which different Adventures decks had diverged: Naya Fury with its explosive Showdown of the Skalds and Unleash Fury combo-kills, Huey Jensen and Reid Duke’s controlling Naya Adventures build built around The Great Henge, Márcio Carvalho’s aggressive Embercleave-focused Gruul Adventures deck, and then on top of that Temur Adventures (Obosh) with Alrund’s Epiphany allowing you to win games out of nowhere. Meanwhile, over in Arena’s Qualifier Weekend, Naya builds centered on Toski, Bearer of Secrets and Clarion Spirit were putting up solid results with their wide battlefields and constant flow of card advantage.
Whereas in Zendikar Rising Standard there was only really the one Gruul Adventures deck that you could lightly tune to your tastes depending on the current metagame, now there are myriad and deeply different ways to take advantage of Edgewall Innkeeper and friends. So my first question is, when should you play each individual version of these decks, and what different strengths do they have? On top of that, I’ve been playing a lot with Naya Fury specifically, including registering it for this past League Weekend, so I intend to close the article with some play advice and sideboarding strategies for the deck alongside a very slightly updated decklist.
Creatures (22)
- 4 Lovestruck Beast
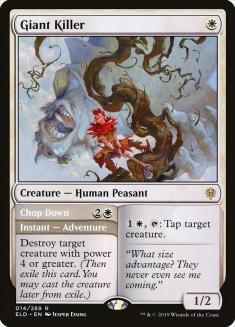
- 4 Giant Killer
- 4 Edgewall Innkeeper
- 4 Bonecrusher Giant
- 2 Shepherd of the Flock
- 4 Goldspan Dragon
Lands (16)
Spells (22)

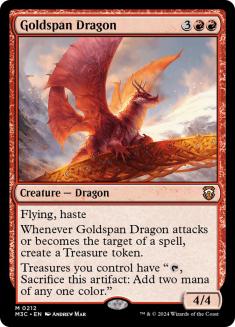
A substantial amount of the difference between the Adventures variants comes down to what late-game they want to have access to. In Naya Fury’s case, it gains a combo-esque finish involving Showdown of the Skalds, Goldspan Dragon, Unleash Fury, and Kazuul’s Fury. Goldspan Dragon’s triggered ability allows you to cast what amount to mana-neutral copies of Unleash Fury, enabling kills out of nowhere, especially with the threat of Kazuul’s Fury to act as another doubling effect on the damage your opponent is taking.
Showdown is dual-purpose in this, digging you towards the pieces you need in order to set these turns up whilst also putting counters on your Dragon to make kills easier to piece together; those +1/+1 counters stack up really quickly when you’re about to double the power of your Dragon afterwards. With Sejiri Shelter and Usher to Safety to protect your Dragons, it’s really hard for your opponent to actually keep themselves meaningfully safe from this card, especially considering so little removal lines up well against Goldspan Dragon in the first case.
The big appeal to this variant of Adventures is that its late-game is very good at ignoring the state of the battlefield. I believe this makes Naya Fury a pretty big favourite against Naya Adventures for example, which is one of the biggest draws to playing Naya Fury, because your opponent can resolve all the random ground-bodies and The Great Henges they want, but they can still just die to you resolving a Dragon with the right backup.
The big downside to the Naya Fury variant is that if your opponent has a powerful long-game, can assemble some flying blockers, and backs them up with the right pieces of interaction, then your combo is shut down and you start to really lack staying power. This makes Alrund’s Epiphany pretty frustrating to play against, since that already covers two of those three bases, and as a result I’m pretty unhappy to play against Sultai Ramp or more generic Yorion, Sky Nomad decks.
Creatures (26)
- 3 Scavenging Ooze
- 4 Lovestruck Beast
- 4 Giant Killer
- 4 Edgewall Innkeeper
- 4 Bonecrusher Giant
- 1 Tangled Florahedron
- 1 Yasharn, Implacable Earth
- 4 Kazandu Mammoth
- 1 Masked Vandal
Lands (17)
Spells (17)
Naya Adventures’s choice of late-game is The Great Henge. Of the various approaches to Adventures decks this is the most controlling, seeking to gum up the battlefield and have the right answers to any threats that can push over or through the mess on the ground. Eventually it will just overwhelm the opponent with each creature drawing into yet more creatures.
Whereas this strategy lines up poorly against Naya Fury both because of reasons mentioned previously and because Chop Down and assorted other cheap removal is fairly effective at slowing down the deployment of The Great Henge, the advantage here is that Naya Adventures lines up better than Naya Fury does against both aggressive decks and Sultai Ramp.
Now Naya Fury is already good against Mono-White Aggro❄ and Mono-Red Aggro❄, so being a bit better against these decks isn’t a colossal selling point, but the combo-centric cards in Naya Fury are typically quite bad in these matchups in my experience and that deck is largely winning those games off of the power of the Adventures package. The Great Henge, and a slightly better manabase, are pretty huge upgrades here then. Meanwhile, against a deck like Sultai Ramp, The Great Henge gives Naya Adventures the staying power that Naya Fury really lacked in the matchup, allowing Naya Adventures to even beat resolved copies of Emergent Ultimatum on occasion.
To recap, Naya Adventures is worse in pseudo-mirrors than Naya Fury, but better against the wider field.
Creatures (25)
- 1 Scavenging Ooze
- 4 Lovestruck Beast
- 3 Questing Beast
- 4 Edgewall Innkeeper
- 4 Bonecrusher Giant
- 4 Brushfire Elemental
- 4 Kazandu Mammoth
- 1 Arni Brokenbrow
Lands (8)
Spells (27)
Gruul Adventures is siding with the long-game of Embercleave, pairing it with a collection of haste creatures and notably Questing Beast.
I’m going to be really blunt here: I don’t really understand when you would actually want to register this deck. Naya Fury already does the thing you do of having a great plan against ground blockers. Naya Adventures has a much better plan for the long-game and is subsequently much more resilient than you. In exchange you gain access to Embercleave, which, whilst incredibly powerful, happens to line up poorly against all the instant-speed removal people are playing due to the current popularity of aggressive decks.
It’s possible that if Mono-White Aggro❄ and Mono-Red Aggro❄ become dramatically less popular, then Gruul Adventures can take advantage of a subsequent decrease in instant-speed removal, but I’m suspicious of this. Most problematically of all Gruul, struggles against both of the Naya builds due to how punishing Giant Killer is in the matchup; your opponent having a clean maindeck answer to Lovestruck Beast or Questing Beast, and then getting to cast the creature side of this powerful card to tap down equipped attackers, is just an incredibly hard thing to deal with when you have such a problematic time removing their Lovestruck Beasts.
Creatures (25)
- 4 Lovestruck Beast
- 4 Edgewall Innkeeper
- 4 Bonecrusher Giant
- 4 Brazen Borrower
- 4 Kazandu Mammoth
- 4 Goldspan Dragon
- 1 Koma, Cosmos Serpent
Lands (20)
Spells (15)
Both Temur Adventures (Obosh) and the assorted Toski, Bearer of Secrets builds of Adventures (so far I’ve seen Selesnya, Bant and Naya) are new enough to the metagame that I’m hesitant to list why you should or shouldn’t play them until other decks have had some time to adjust.
For now I will just say that Temur Adventures, outside of its awful mana, has impressed me immensely and I would be shocked if it doesn’t become more of a major player in Standard. Meanwhile the Toski builds are a ton of fun and hard for me to stop playing with as a result, but ultimately just feel a bit underpowered compared to everything else these Adventures decks are capable of.
Naya Fury Play Advice
So if you do decide that it’s the appropriate weekend to be on Naya Fury as opposed to other variants, what’s some actionable advice you can follow on how to play it? Well, first off, here’s my updated list:
Creatures (22)
- 4 Lovestruck Beast
- 4 Giant Killer
- 4 Edgewall Innkeeper
- 4 Bonecrusher Giant
- 2 Shepherd of the Flock
- 4 Goldspan Dragon
Lands (16)
Spells (22)
My League Weekend list over-respected Jeskai Cycling; I thought the deck was great and deserved to be brought in decent numbers, but it didn’t show up nearly as much as I thought it should. As a result I’m pretty low on the idea of playing Tormod’s Crypt or Soul-Guide Lantern until people prove they’re actually going to bring that deck, and the copy of Embercleave that makes room for in the sideboard is great in the Cycling matchup anyway whilst having meaningful applicability elsewhere.
So, things you should be aware of when playing this deck:
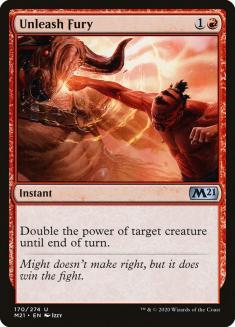
- Between Showdown counters, Unleash Fury, and Kazuul’s Fury there are going to be a bunch of times when you have lethal without realising it. If you have enough of those elements going on and you’ve developed your mana a bit, then start taking a few seconds every turn to count how close you actually are to lethal.
- It’s very easy to get into the mindset that these combo cards are exclusively for use on your Dragons. Remember that sometimes if you attack with Lovestruck Beast and your opponent doesn’t block, then they will just die; a pair of Unleash Furies, or an Unleash Fury plus a Kazuul’s Fury, just outright represents twenty damage there. Your opponent will likely be chump-blocking a bit more often with this in mind, which makes taking slightly more aggressive lines, especially in Game 1 when your opponent knows all the combo pieces will be in your deck, more appealing than they would otherwise be.
- If you’re going to attack with your Goldspan Dragon, then Unleash Fury and Sejiri Shelter will both be functionally zero mana, sacrificing the Treasure the Dragon provided but creating another Treasure in the process, making doubling the Dragon’s power or giving it the necessary protection to push through a blocker fairly trivial in terms of mana investment.
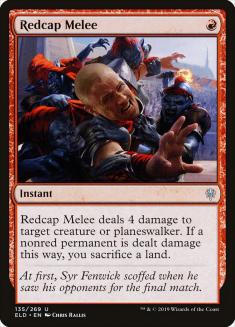
- Kazuul’s Fury, costing three mana, can’t Fling a Dragon via sacrificing a single Treasure, making this line inaccessible on Turn 5, except if you have a copy of Usher to Safety or Redcap Melee in hand, in which case you can attack with your Dragon and then, after damage has resolved, you can sacrifice the Treasure, floating the spare mana you won’t need for these one-mana spells, to target your Dragon. Before Melee or Usher resolve you’ll get an additional Treasure, which, alongside the aforementioned floating mana, gets you to the three mana needed to throw your Dragon at your opponent’s face with Kazuul’s Fury whilst Melee or Usher waits there eternally unresolved.
- Showdown’s second and third modes make it much easier to count to twenty on a combo turn. The cleanest example of this is that Unleash Fury on your Dragon will deploy a +1/+1 counter on it before doubling its power, giving you a 10/5 to hit your opponent with and then Fling at their face. There are much more complicated sequences though that often require you to figure out how to cast as many spells as possible in one turn.
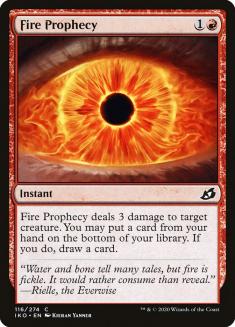
- On Showdown combo turns, a part of getting enough counters to put together lethal can actually come down to targeting your own Dragon with burn spells. Firing Stomps and Fire Prophecies at your Dragon is mana-neutral because of the Treasure generated but will give you an additional +1/+1 counter with each one that resolves (and hopefully enough toughness that these burn spells won’t kill the Dragon as a result).
- The above trick can matter even on non-combo turns. Sometimes you’ll exile a Stomp or a Fire Prophecy to your Showdown but won’t have the time, mana or inclination to fire them off. If this is the case, then firing them at your Dragon, if it seems safe to do so, will let you store the Bonecrusher Giant in exile for later or can give you access to the rummage ability of Fire Prophecy to help filter through your deck.
- Be careful what colour you name with Sejiri Shelter; naming red or white when you don’t really need to can lead to you being unable to put +1/+1 counters onto your creature with Showdown of the Skalds that turn.
- In a lot of decks I’m generally a little bit hesitant to fire off a Turn 4 Showdown since it will be hard to get maximum value from it; you’ll only get the one land play on Turn 5 and your mana is limited enough that it’s hard to cast all the spells you hit in time. I’m a lot more interested in Turn 4 Showdown in this deck because of the combo potential, digging you towards the pieces you’re lacking, but also because getting to stack some counters onto your Turn 5 Dragon is just incredibly powerful getting in for more damage and making your Dragon resistant to cards like Heartless Act and Redcap Melee.
- In general, if you have Sejiri Shelter in hand you don’t need to hold open mana to protect your Dragon due to the Treasure it will make when targeted, but be aware that Yorion decks make for the one big exception here; Binding the Old Gods and Elspeth Conquers Death don’t give you Treasure off your Dragon, making it more important to hold open that protection mana.
- Try not to be too greedy with holding onto Sejiri Shelter and Kazuul’s Fury. If you think there’s a reasonable chance you’re going to need it for mana, then you should probably just play it out as a land early on so that you don’t stumble too much in the later turns.
- In terms of mana requirements you’re looking to assemble single-green, single-white and double-red as soon as possible; this lets you cast all your spells, makes any untapped land capable of casting Goldspan Dragon, and hopefully Showdown digging you through your deck will sort out the rest. Beyond this you’re going to want to prioritise more white mana if you think there’s a good chance you’ll be casting and activating Giant Killers anytime soon, whereas double-green matters mostly for sequences involving Edgewall Innkeeper and Lovestruck Beast.
- Don’t forget you can target your opponent’s creatures with Unleash Fury. This isn’t an exciting way to invest card, but sometimes making the opposing creature large enough to target with Chop Down or turning a 1/1 into a 2/1 so that your opponent’s Lovestruck Beasts can’t attack is just what you need to do.
- Your deck has a lot of counter-play to The Akroan War. You can hold open Usher to Safety or Sejiri Shelter to protect your creature, can cast Showdown of the Skalds on the turn after the War came down if you’re not in too much danger, Giant Killer can become tapped with its activated ability so that it doesn’t need to attack during the second mode of that Saga, and Showdown counters being put on your 1/1s can prevent your Lovestruck Beast from having to attack.
- Remember you can Usher to Safety your Showdown of the Skalds with the third trigger on the stack so that you can redeploy the Showdown but still get the benefit of the +1/+1 counters.
- You can also Usher to Safety lands! Returning a copy of Kazuul’s Fury or Sejiri Shelter to hand can be exactly what you need to set up lethal sometimes. On a less exciting but very occasionally necessary note, you can also return Pathways to your hand to replay them on a different colour.
Finally, let’s get to sideboarding with the deck, which is going to be a mixture of actual sideboarding plans and more general words of advice. So on one side of the spectrum you have the aggressive matchups, where the sideboarding is very easy to lay out…
VS Mono-Red Aggro❄
Out:
In:
VS Mono-White Aggro❄
Out:
In:
The thinking here is simple: if you can keep your opponent’s powerful Equipment in check and line your removal spells up appropriately, your long-game of Showdown, Edgewall Innkeeper, and Adventure creature two-for-ones is just better than anything your opponent can really do. You don’t need the combo pieces here, or really to even be putting that much effort into killing your opponent, so instead just try to survive.
VS Sultai Ramp (Yorion)
Out:
In:
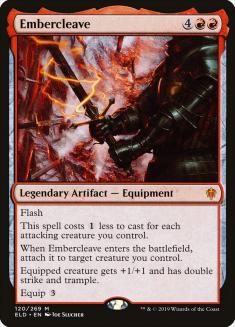
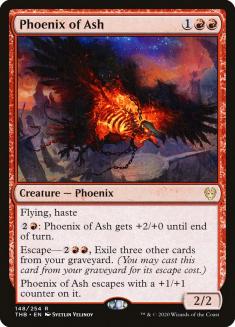
Conversely, against a deck like Sultai Ramp, you hardly want to sideboard at all. Get those Fire Prophecies and a Giant Killer out of your deck to bring in an Embercleave and your two copies of Phoenix of Ash, but for the most part your plan doesn’t really change.
Where things get tricky is sideboarding against the midrange decks. Goldspan Dragon is clearly excellent in these matchups, but Unleash Fury is much harder to assess. Some games you’re just going to murder your opponent with it, and some games it can let you steal wins even though your opponent has a better battlefield than you.
Conversely, in games that turn into grind-fests and games where your Dragons either are getting answered or aren’t showing up, Unleash Fury can sometimes just turn into blank cardboard. In addition, your opponent is going to be sideboarding in a bunch of answers to Goldspan Dragon, cards like Redcap Melee or Run Afoul, that are excellent against the combo but can start to look pretty awkward against you in fair games.
To make this whole equation even more challenging, your opponent will be inclined to play pretty differently if they know Unleash Fury is in your deck from if they know it isn’t. I won a mirror match over the weekend that I might have lost except my opponent assumed Unleash Fury wasn’t in my deck, since he sideboards all his copies out in the mirror, and so he blocked differently from how he would have were he playing around the card. Informational advantage is huge and you don’t want to get too predictable in these midrange mirrors.
All this is to say I’m not sure giving strict advice on exactly how to sideboard in these midrange mirrors is actually particularly helpful. Don’t be afraid to experiment and try out different numbers and setups because the advantage gained by not being too predictable here is likely going to make up for a lot of the disadvantage of not presenting the “Perfect 60” in these sideboarded games.