
Last week was part one of my Modern Burn primer to get everyone
ready for the Season Two Invitational and Grand Prix Charlotte. Now that you’ve gotten your fill on how to go about building the deck, let’s get to the
sideboard.
Sideboarding with Burn is tricky, and finding that delicate balance between keeping your gameplan cohesive and preparing yourself for the incoming hate is
incredibly important, and will be further honed with time and practice.
General Sideboarding and Preemptive Preparation
In order to really get a grasp for what to expect, it’s a good idea to take a strong look at the most played cards that you are likely to run into in games
2 and 3.


These are, by and large, the most common hate cards you will see, and it’s possible to be prepared for all of them in fifteen cards.
Here are some common trends you should be aware of:
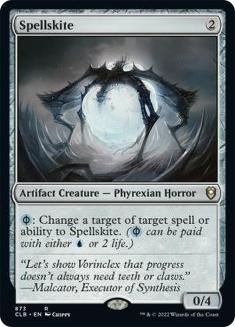
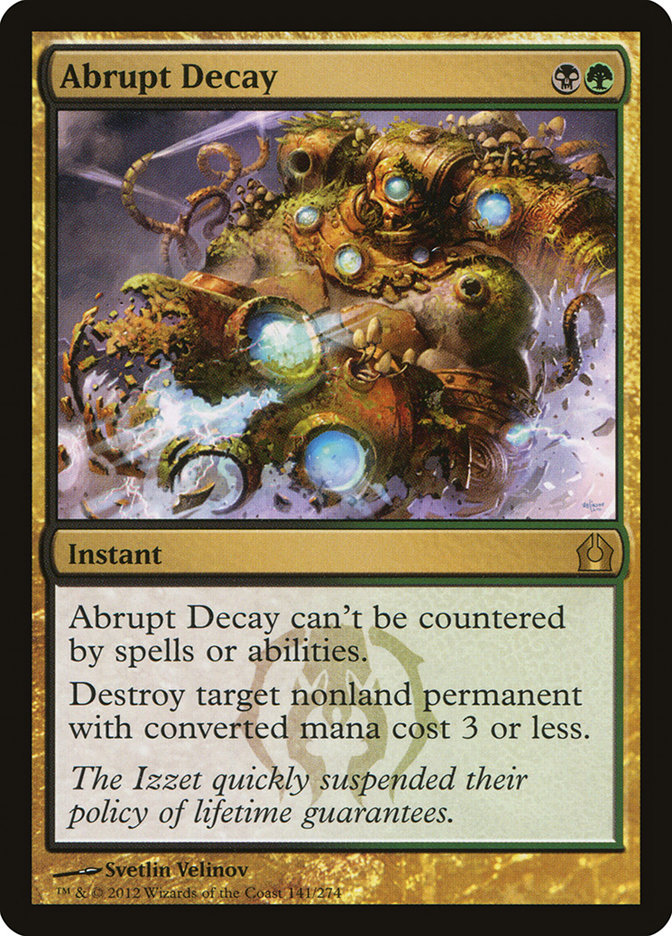
– Non-white, non-green decks will generally always pack hate in the form of artifacts or enchantments, with Spellskite being the most popular. Preemptively
sideboarding in some number of Destructive Revelries is a good way to combat this, but be careful not to overcompensate for this unless you’re absolutely
sure that this is the case.
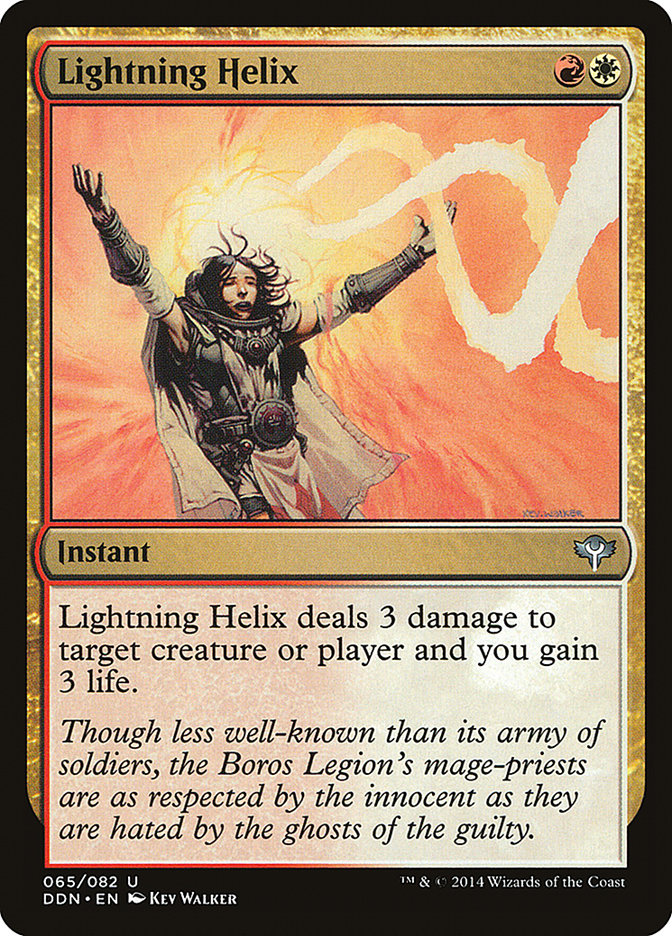
– Your weakest burn spell is Rift Bolt against non-Remand decks, and Skullcrack is poor against blue control decks (even with Dragon’s Claw in the
equation, except for blue decks with white). If you really aren’t sure what to cut or if you really need to make room for something else, these are your
go-to cuts.
– Don’t try to fight everything! There are three ways decks can hate you out: lifegain, discard, and a fast clock. Choose two out of three to beat for a
given tournament, but don’t try and be a hero. Your deck isn’t capable of grinding on all fronts, and you can’t afford to lose focus on your deck’s goal.
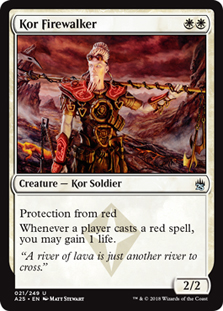
Beating Kor Firewalker
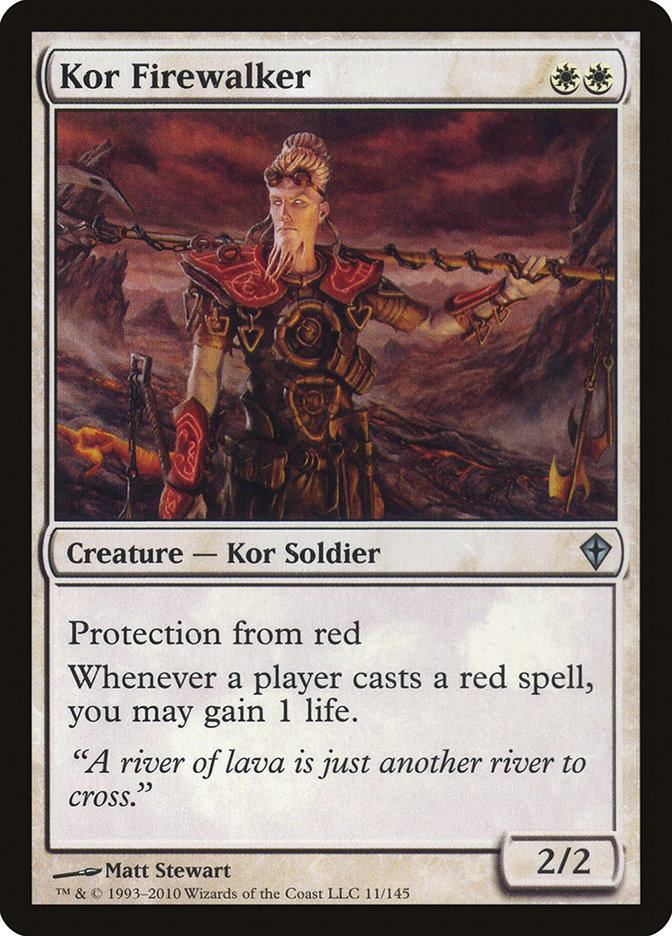
This card deserves its own section because it’s the absolute best single hate card in the format against you. There is no real easy way to do it, as each
method takes something else away from your gameplan, but you can’t just let it sit there.
Or can you?
Here are some of the ways you can combat the Kor menace:
1. Attack n’ Crack. Developing a solid board presence with Skullcrack at the ready is one of the harder ways of getting the job done, but it’s an excellent
way of proceeding with minimal setback. Skullcrack reads “Damage can’t be prevented,” so Kor Firewalker will take whatever damage it took on its block and
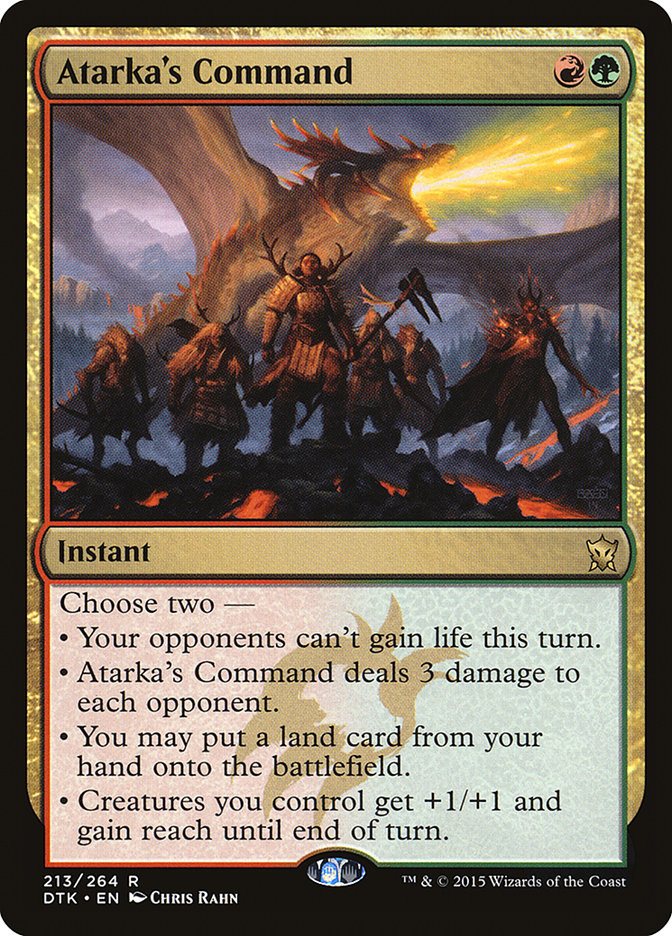
die. Note that Atarka’s Command does not give you this option.
2. Path to Exile. Clean and simple but with a real drawback, one that you have to suck up and deal with. You generally don’t like hastening their mana, as
it can mean fixing their color situation when they’re already dancing around with their fetchlands and shocklands. Do not underestimate this
drawback, as it is very real and will lose you a lot more games than you’ll be aware of. Path also has other applications, such as against Splinter Twin,
so it isn’t completely dead elsewhere, but don’t just side it in because it’s a removal spell against random creatures you can race.
3. Pyrite Spellbomb.
Not as cross-applicable as Path to Exile in matchups where you need help, but you don’t have to deal with the really bad drawback, and if they aren’t on a
Kor Firewalker draw, then it’s a cantrip or two more damage that you can use where you see fit. This is important for sideboarding because you would be
converting a three damage spell to a two damage spell, instead of going from three to zero.
4. Grind it out. Grim Lavamancer can help catch you up a ton when you aren’t readily able to defeat the Firewalker. There are plenty of times where your
opponent will have too much reactive hate and can’t actually kill you. These situations are few and far between, but knowing how to handle these
situations and maximizing your damage is important, even through all the hate.
5. Ignore it. Depending on whether you feel Burn is popular or not, it’s perfectly reasonable to simply not dedicate much hate for the card, if any at all.
Further, not everyone plays white, and those that do aren’t going to have it all the time. Over a fifteen round tournament, if Burn is really popular,
you’ll probably run into it twice, maybe three times on average. There are some tournaments where I’ll just be okay losing to it if I feel I need to shore
up another matchup that I’m expecting more of.
Constructing Your Sideboard
The first thing I tell everyone when building a Burn sideboard is to never get cute. Your tech doesn’t matter nearly as much as you think it will, and
you’re likely better off with an option that gets the job done than an option that “might really” get the job done. I’d rather my bench players always
fulfill their roles, not sometimes. With that, you have to really have an eye on what your deck suffers from the most after the first game in a given
matchup. Yes, that sounds like sideboarding with many a deck, but the cards that are good against you are so good that you can’t afford to waste
valuable space with small upgrades or cross-grades. You need to make an impact, not an impression.
The most commonly played sideboard cards in Burn’s sideboard right now are as follows:
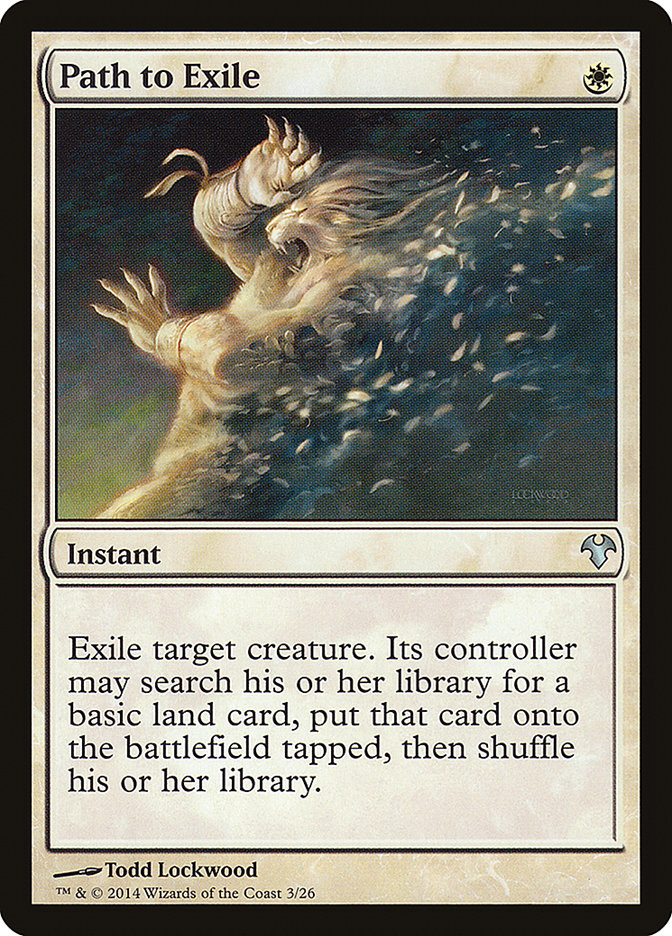
Your best removal against creatures that can just throw you right into game 2. Giving your opponent a land when they’re trying to be careful with their
fetchlands sucks, but it’s better than being dead.
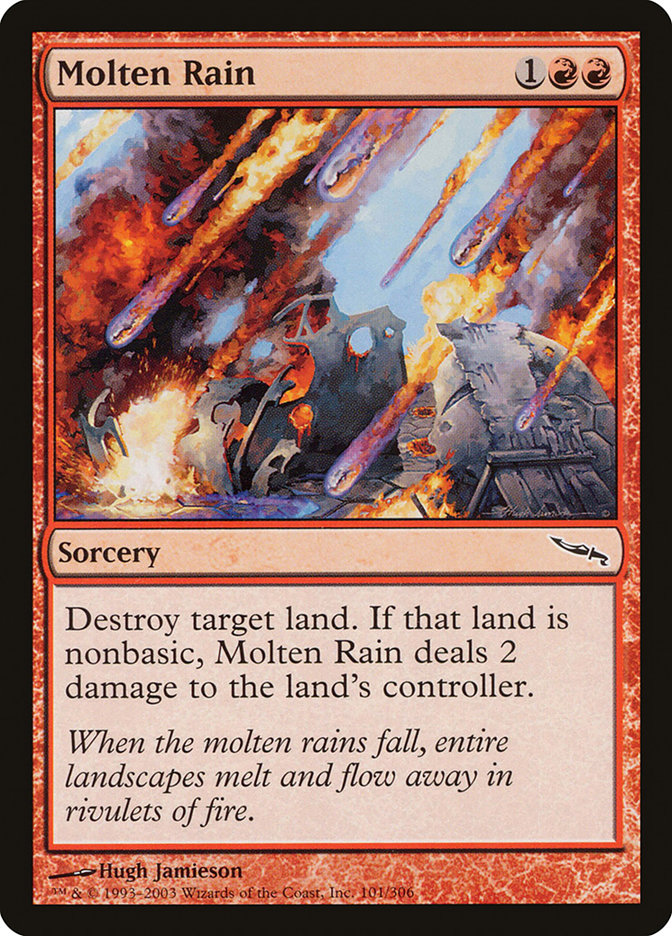
Three-color decks are already trying to tip-toe around with their mana against us, so Molten Rain throws a huge wrench in an already delicate situation.
It’s super expensive, but the effect, plus the two damage to boot, more than makes up for it.
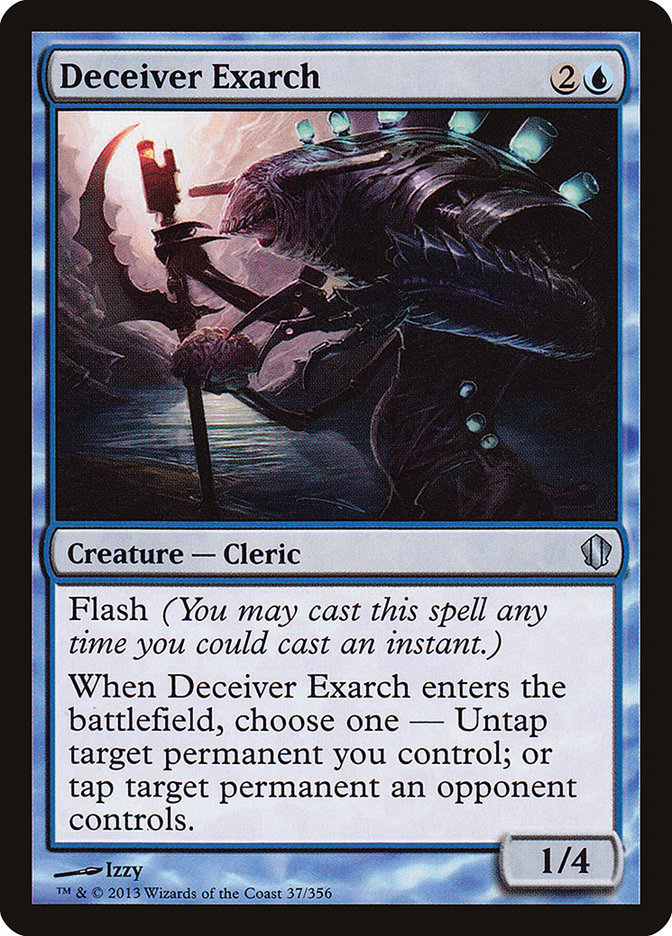
Your go-to Splinter Twin removal spell. Killing a Deceiver Exarch is of the utmost importance, and this is the best way of doing just that. No overlap
against Kor Firewalker hurts it a whole lot, but it’s still a powerful inclusion.
Colorless removal for Kor Firewalker, Etched Champion, and Burrenton Forge-Tender among other hard to kill hate creatures while also a net-loss of one
damage when replacing other burn spells, as opposed to losing three or maybe more damage. Doesn’t kill larger creatures, which is a major drawback, but it
is great at dealing with a specific subset of hate while also having a function when it isn’t doing that, something that Burn sideboards are severely
lacking.
The best slingshot effect in Modern right now. It turns your sideboard matchups against decks trying to kill you with a single large threat into a much
more manageable situation. Affinity, Infect, G/W Hexproof, Amulet Bloom–all of these decks are trying to hit you with one creature for about ten trillion
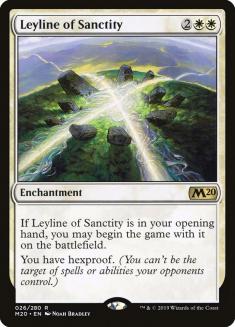
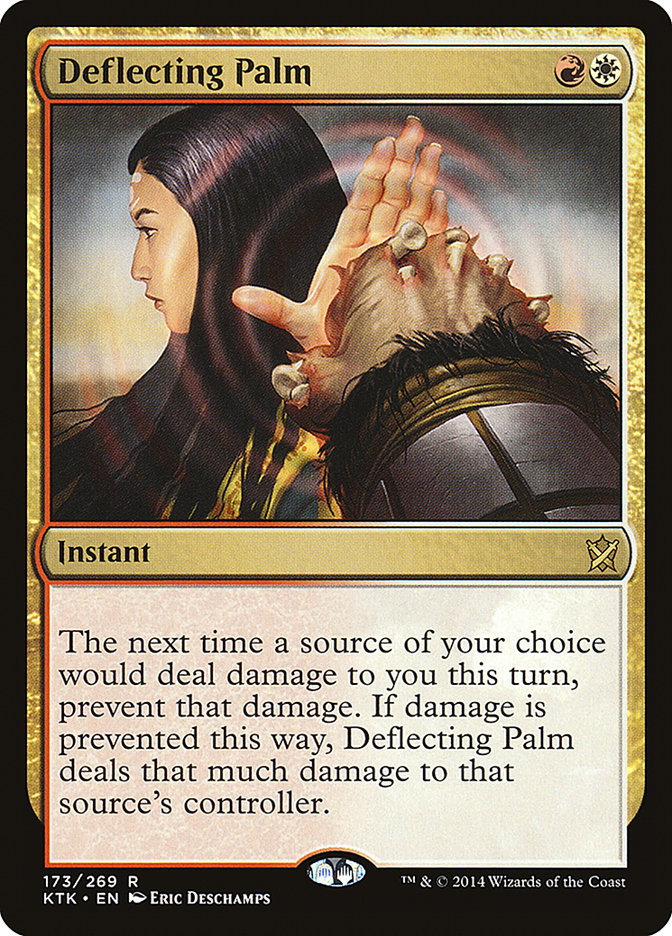
damage, give or take. Palm doesn’t target, so it ignores Spellskite and Leyline of Sanctity. It prevents the damage from a lifelinker, so they aren’t
swinging things in their favor. At worst, you’re bringing it in as a bad Lightning Helix, and if you’re doing that, it’s probably important to have that
effect anyways.
The mirror breaker. It’s not only the single most powerful hate card, but it’s also our best attacker in the mirror as well once things are cleaned up and
stabilized. There will be times where your opponent will have the means to kill it, but that shouldn’t stop you from giving this a very strong
consideration.

Moderately more powerful than Kor Firewalker defensively, but has zero leverage offensively and doesn’t affect the creature draws at all. That said, you
sidestep Path to Exile incredibly well with this option, and that alone is reason enough to give this the nod.
Sometimes you need a fifth or sixth Skullcrack, and you’re already splashing green for Destructive Revelry. This is your next best option.
Matchups
Twin
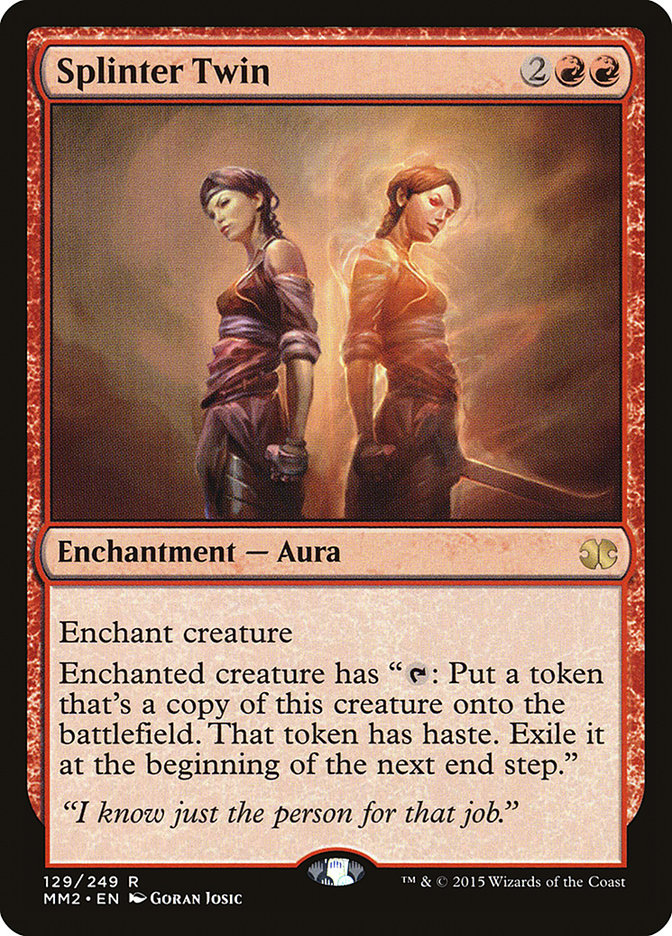
This matchup is not the best, mostly because you can just die to Deceiver Exarch and Splinter Twin. The games where they don’t have exactly that, however,
allow for much more wiggle room and maneuverability. The issue is trying to figure out if you do have said room to work with. There’s no easy way to do
this, but Grim Lavamancer gives you a ton of leverage. A Rift Bolt coming off of suspend between turns 3 and 5 can also be a solid check, as it often
forces out the Remand if they’re still looking or trying to find a better position. If you have a creature heavy draw, you can make a decent guess on what
they have available if they’re using Deceiver Exarch to block. If they’re willing to play a shockland untapped and pass, then red flags would wave pretty
hard for me, and you may have to jump through quite a bit of hoops for it to work out, like playing your fourth land on your play to bluff Bolt plus
Searing Blaze through a trigger. Even so, sometimes they’re just going to have it, and there isn’t much you can do. That’s part of what you sign up for,
and you have to take those licks.
Cards to consider sideboarding out:
Skullcrack, Atarka’s Command, Lightning Helix
Cards to consider sideboarding in:
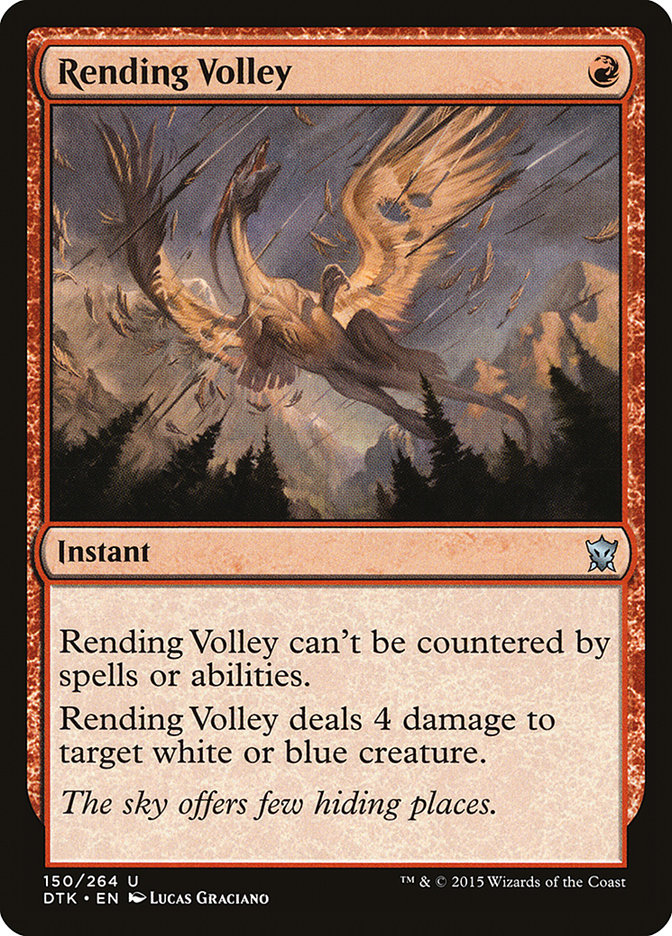
Path to Exile, Rending Volley, Destructive Revelry
A similar game is played in games 2 and 3. The hate they bring in isn’t as crippling, as their primary gameplan is usually the best thing they can do
against you, so it’s on us not to die. Anything that kills Deceiver Exarch is worth it here, obviously, but note that even if they’re bringing in lifegain
or mitigation, almost all of it will be artifacts, thus Skullcrack and Atarka’s Command are often not worth it. Similarly, the life buffer from Lightning
Helix rarely comes into play here, so you’re better off slimming down your twos, especially against a deck that may contain Spell Snare (though it may be
worth considering leaving some number in as bait for your more important Destructive Revelry).
It is of the utmost importance to not expose your green sources. Stomping Ground is your most important land, even if you don’t actually have the Revelry.
Leaving up a fetchland will more often than not keep your opponent from just jamming if you’re sitting on more than two lands, and it will lead to more
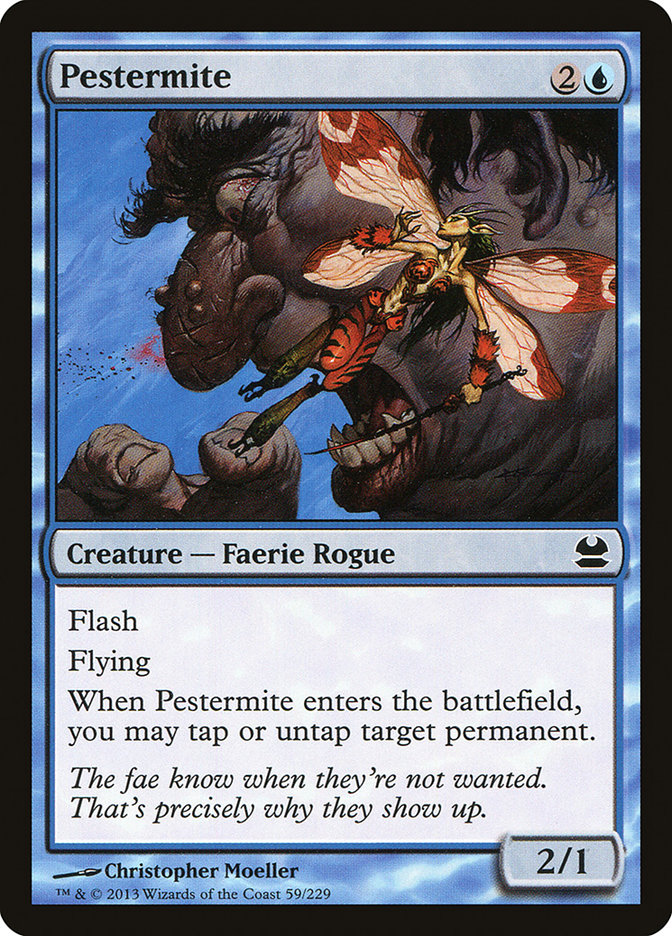
favorable positions than trying to get in every point of burn on that turn. Even if you’re looking to Path to Exile or Rending Volley the Deceiver Exarch
or Pestermite, keep them guessing anyways, as the ambiguity matters. Of course, this is extremely contextual, as sometimes your hand is just insane and it
won’t matter, but definitely pay attention to your mana situation, your opponent’s mana situation, and how you see the game developing, relative to how you
think they see it.
Grixis
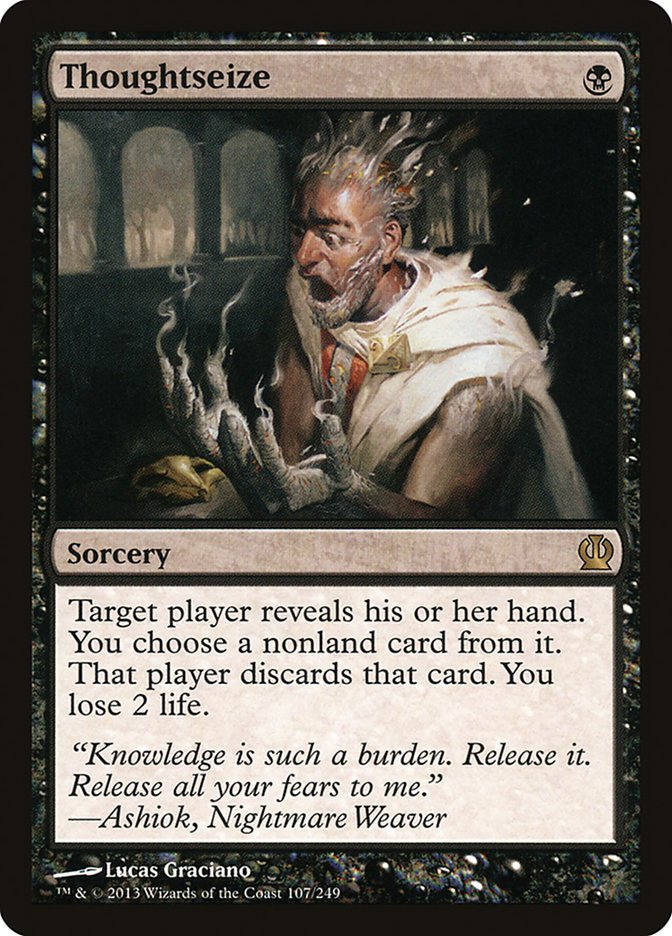

Inquisition of Kozilek is probably the best hate card against you, and they can get you really hard and proceed to run away from there with an early
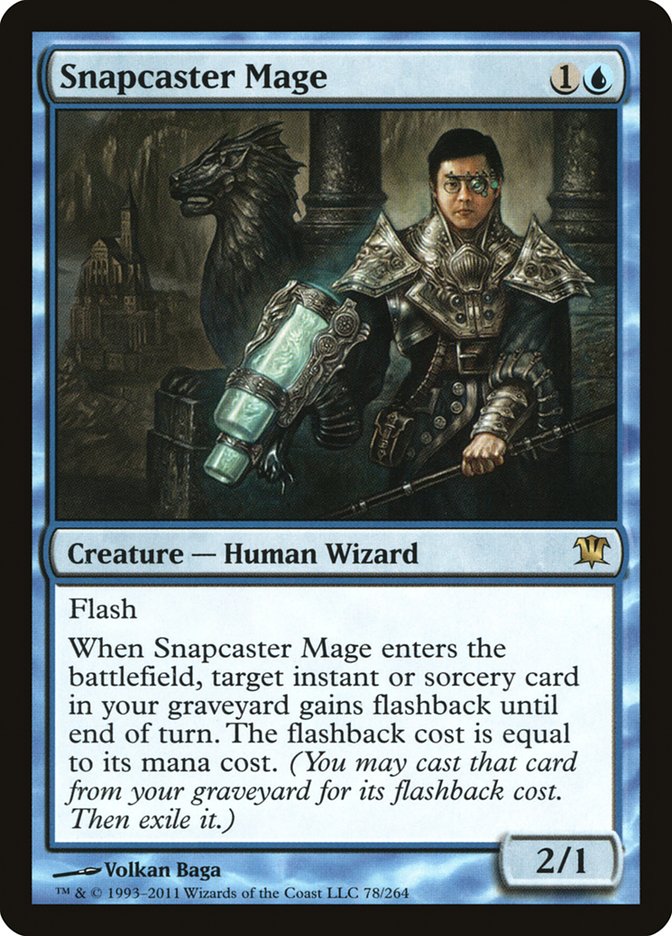
Tasigur, Gurmag Angler, Kolaghan’s Command, or Snapcaster Mage into Inquisition. There isn’t much you can do about that, and it draws more emphasis on not
keeping sketchy hands. Fortunately, Searing Blaze is solid against the Delver variant, Grim Lavamancer is great against all variants, heavy creature draws
can punish the hands without Inquisition and a lot of shocklands, and the control decks lack the speed of Twin and Delver variants.
Cards to consider sideboarding out:
Grixis Delver and Twin:
Skullcrack, Atarka’s Command, Rift Bolt
Grixis Control:
Lightning Helix, Skullcrack
Cards to consider sideboarding in:
Grixis Delver:
Deflecting Palm, Pyrite Spellbomb, Lightning Helix
Grixis Twin:
Path to Exile, Rending Volley, Molten Rain, Destructive Revelry
Grixis Control:
Molten Rain, Pyrite Spellbomb, Kor Firewalker, Smash to Smithereens
I’m a big fan of slingshots in the Delver matchup, cards that undo some of the work that they did while also pushing your advantage, Lightning Helix and
Deflecting Palm accomplish this best and help buy you a bit of time to develop your progress in non-Tasigur situations. It’s because of this thought
process that I’m not a big fan of Path to Exile. Their threats are probably going to help carry them, yes, but you can beat them without it, and giving
them a land is pretty brutal, especially since there’s a real chance that their land situation is going to be light. I only want Path when I’m going to die
on the spot, and while they will sometimes have a nut draw of Tasigur on turn 2 after an Inquisition, I’m fine with just dying to that part of the deck if
it means my game against the other parts of the deck are stronger.
Grixis Twin is handled similarly to U/R Twin, except that Molten Rain shines much better here. You’ll have a strong chance of cutting off a crucial land,
alleviating the chances of getting mid-game Inquisitioned, Splinter Twinned, or even blue spells at all. The more they attempt to dance around with their
mana, the better Molten Rain gets, especially when paired with creature draws.
Molten Rain is even better against Grixis Control, as they have to fumble around with their lands even more. You’re more likely to get a black source than
anything since many builds are of a Blood Moon variety, so the amount of Islands they wield is fairly high. Kor Firewalker and Pyrite Spellbomb are
seemingly out of place and unusual here, but sometimes you want to bring in anything that can potentially deal damage. If you do decide to do this, you
incidentally have a cushion against Anger of the Gods, which isn’t particularly relevant most of the time, but will be great when it comes up. Destructive
Revelry is kind of whatever here. While you can hit Vedalken Shackles, Blood Moon, and Spellskite, I’m not certain you really need it to win. Smash to
Smithereens makes for a much more attractive option since you can cast it through a Blood Moon if they decide to fight you through that route (which in
turn makes your Molten Rains better suited to hit their basic Island).
Jund and Abzan
Prioritizing is everything here, as Jund and Abzan are two of the best decks at exploiting one of Burn’s major holes: defending against a fast clock.
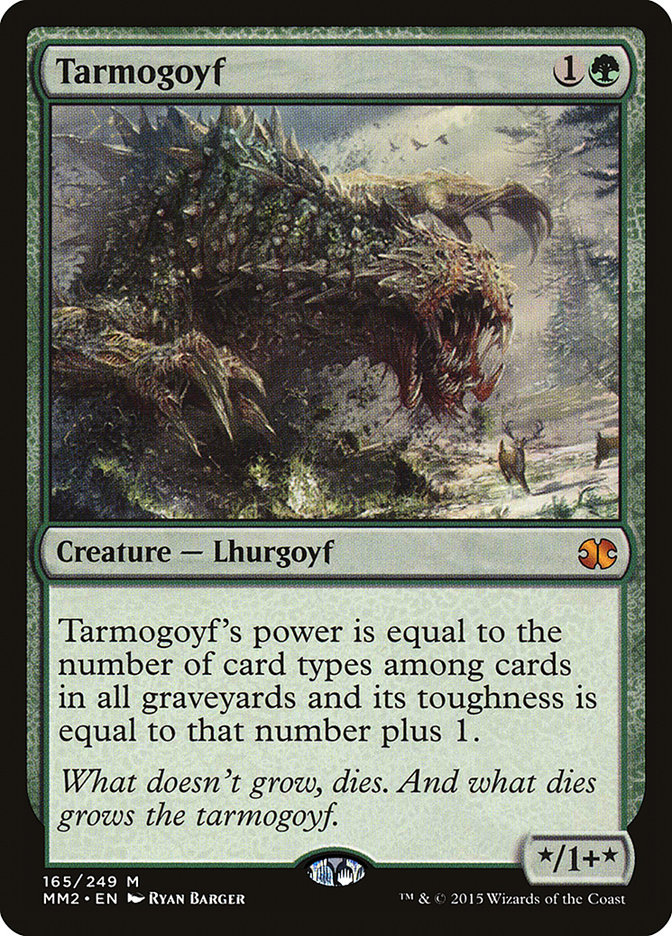
Discard into Tarmogoyf into almost anything can light you up quick, and you’ll get easily punished for not prioritizing your clock and maximizing damage to
them. All of that said, the matchups are closer than advertised, and you’ll often have little resistance because of how slowly they can come out the gate
due to not only the typical three-color deck mana development under Burn pressure, but the added Treetop Villages and Raging Ravines or Stirring Wildwoods.
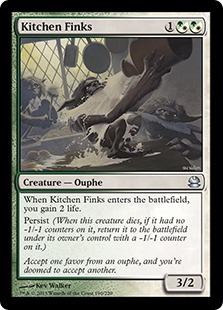
Don’t be surprised if your creature draw is met with a Dark Confidant out of Jund. Bob will likely force your ability to switch gears, otherwise it trades
with an attacker. This may also be an indicator of their deck containing maindeck Kitchen Finks and likely very few, if any, four- or five-drops. That’s
not concrete, however, so keep it in mind, but don’t make it a hard and fast rule. Against Abzan, Siege Rhino is obviously the big problem, so consider
saving your Skullcrack effects for that instead of other lifegain in game 1.
Cards to consider sideboarding out:
Jund and Abzan:
Rift Bolt, Searing Blaze
Cards to consider sideboarding in:
Jund and Abzan:
Deflecting Palm, Molten Rain,
Abzan:
Atarka’s Command, Path to Exile
Feed the Clan is the biggest concern here, but it’s pretty tough to defend against that in addition to not dying to early Goyfs or Tasigurs. As is the
trend with most green midrange decks, any life buffers and slingshots are great here. The games are going to get longer, and you need to be able to keep up
with their turning the corner. Molten Rain is probably going to land on a green source against Jund if you aren’t sure, and a white source if you’re
worried about Kor Firewalker out of Abzan. Like most things, this isn’t the hard rule. There are times where you’ll hit their only green source just to put
them off of a Rhino or Huntmaster of the Fells, or their only red source to leverage a Grim Lavamancer against a Terminate. Remember, position yourself
accordingly, and don’t worry about guessing wrong with your resources. Sometimes you cut off the green source, only to get Firewalkered. Again, those are
licks you’ll take. Lastly, while I usually don’t advocate adding Path to Exile, if Kor Firewalker is that much of an issue, then do what you have to do.
Burn
The mirror can go in two very distinct directions: on-board or non-interactive. When either player is on the on-board plan, it’s up to the opponent to keep
that from happening. You now have two routes you can take if you’re defending against this: blocking and racing.
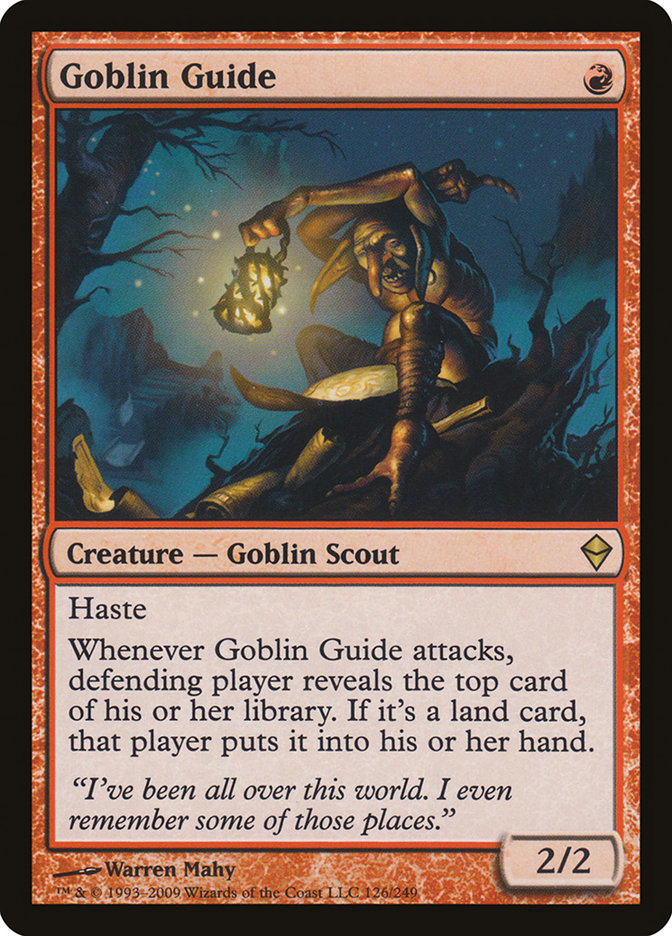
Blocking is as easy as it sounds. Match their creatures with your creatures, but block theirs if they line up. Goblin Guide on 2/2s, Swiftspear with an
instant on almost anything, etc. Searing Blaze blows this plan up, but if they have it anyway, you’re just going to take the same amount of damage, except
you’ll have dealt two points, which would be good if you were ahead. But you aren’t in this spot. This is the disciplined decision-making that separates
the Burn players, and it’s extremely important to know just how much you can do to the board with your board.
Racing involves doing things similar to the situation alluded to previously. If you’re both jamming creatures in each other’s faces, the game becomes more
and more about Lightning Helix versus Skullcrack. As life totals dwindle, the need to regain becomes most important. Thus, the need to stop that from
happening becomes more important. If they have it and you don’t have a second Helix at any point, you’re way behind. It’s because of this that Lightning
Helix is the most important card in the matchup in game 1, even though a lot could be going on. If you can find a spot to get a Helix in under a
Skullcrack, do it, even if it means it isn’t the most damaging thing you can do.
When things get non-interactive, it’s a lot less about finding spots and more about cutting your opponent off of room to find theirs via the sheer speed of
your draw. Swiftspear into triple Lava Spike is going to make things ultra hard before your opponent can even get off the ground. Not killing your
opponent’s Eidolon of the Great Revel and just firing off threes, for example, is a way of pressing them into unfavorable positions. It’s all dependent on
what your hand looks like and how it lines up with what how you think your opponent’s hand is going to develop.
Cards to consider sideboarding out:
Lava Spike, Eidolon of the Great Revel
Cards to consider sideboarding in:
Kor Firewalker, Dragon’s Claw, Path to Exile, Lightning Helix, Atarka’s Command, Deflecting Palm, Pyrite Spellbomb
In games 2 and 3, the plan shifts. Defending against Kor Firewalker (or powering through it), and slowing the game down are the primaries. If your board
presence develops well and they try to brickwall you with a Kor Firewalker, if given the option, Skullcracking through the Firewalker may be better than
using the Path to Exile, even when Lightning Helix and Deflecting Palm are factors. It may wind up much more difficult to fight through the second
Firewalker with Skullcrack than it will the first, and the Path gets better the later you cast it as well, as it’s less likely that your opponent will be
strapped for lands, thus making the land they search for less relevant. If you have a soul read on your opponent, or if you notice the lack of white in
your opponent’s deck, usually in favor of green, then there’s a strong chance that their hate card is Dragon’s Claw. I’d still be a little skeptical of
bringing in Destructive Revelry because Dragon’s Claw doesn’t keep your creatures from attacking, so it’s much easier to fight through. There will also be
games where you have the Revelry and they don’t have the Dragon’s Claw, which puts you on an effective mulligan. You’re better off ensuring that all of
your spells do something at almost every point in the game.
Affinity


This deck’s fast starts are very hard to keep up within game 1, but your Searing Blazes carry a lot of the workload when looking to stabilize and/or get
ahead. Vault Skirge by itself is kind of whatever, though you should keep track of just how much life you can let them gain before firing off that
Skullcrack. Arcbound Ravager really messes things up, as they can easily get their Skirge out of Bolt range, but if you can contain it (not pushing too
hard on your spells, pressing whatever advantage you gain) then you can more easily get a game 1 that’s really close for both players.
Cards to consider sideboarding out:
Eidolon of the Great Revel, Lightning Helix, Lava Spike
Cards to consider sideboarding in:
Destructive Revelry, Deflecting Palm, Molten Rain
Destructive Revelry and Smash to Smithereens are givens, but we are the control deck here, and it’s on us to make sure we can properly set the tone of the
game. Spellskite and Spell Pierce are the big ones to watch out for, as they can allow them to punch a Cranial Plating through. Deflecting Palm ignores
Spellskite, but the instant speed on Cranial Plating can sidestep it, so adjust accordingly.
Infect
Interacting with them is tough sometimes, and you aren’t usually going to win the race. If you can hit their one-drop on turn 1, do it. You can recoup that
card later. Maindeck Spellskite is one of the main reasons why, but also cards like Vines of Vastwood and pump spells. If you aren’t able to interact with
them, then doing it at the end of combat is worth it, potentially putting them off balance while not putting yourself dead to pump spells. Put the decision
on them: They either develop their board, or their mana. The longer the game goes, the less this will have any effect, so proceed if you know that you’re
able to capitalize off of it.
Cards to consider sideboarding out:
Cards to consider sideboarding in:
Deflecting Palm, Path to Exile, Molten Rain, Destructive Revelry
Deflecting Palm is the all-star, but Spell Pierce is the defense. You’re the control deck, and you have to set the pace. Molten Rain alleviates the strain
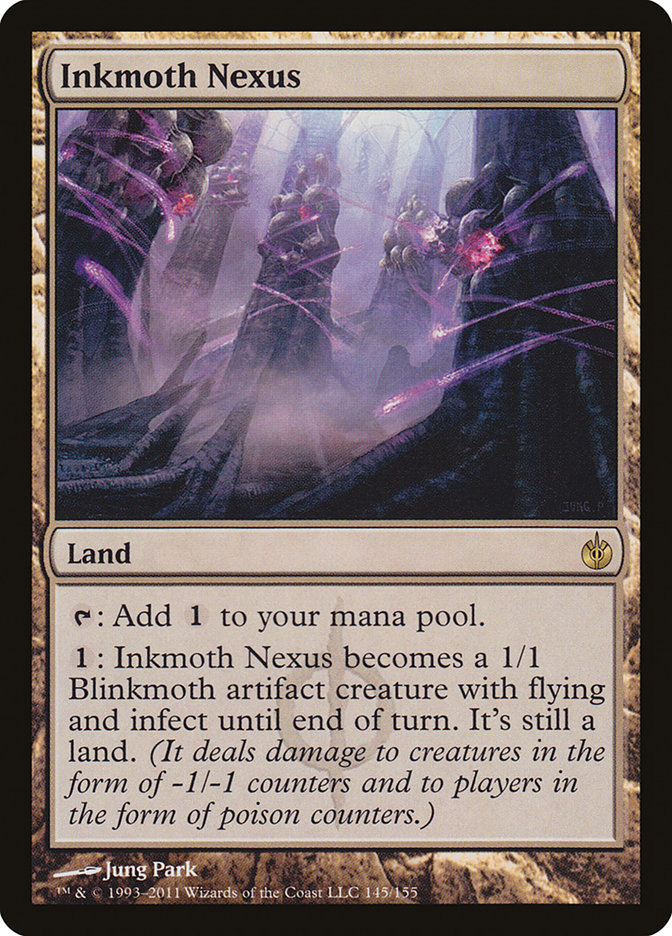
of having to deal with Inkmoth Nexus through pump spells, as does Destructive Revelry, though Spellskite will probably eat it first. If you really need the
crutch, then Path to Exile is a good fallback plan. Watch for dilution.
Amulet Bloom
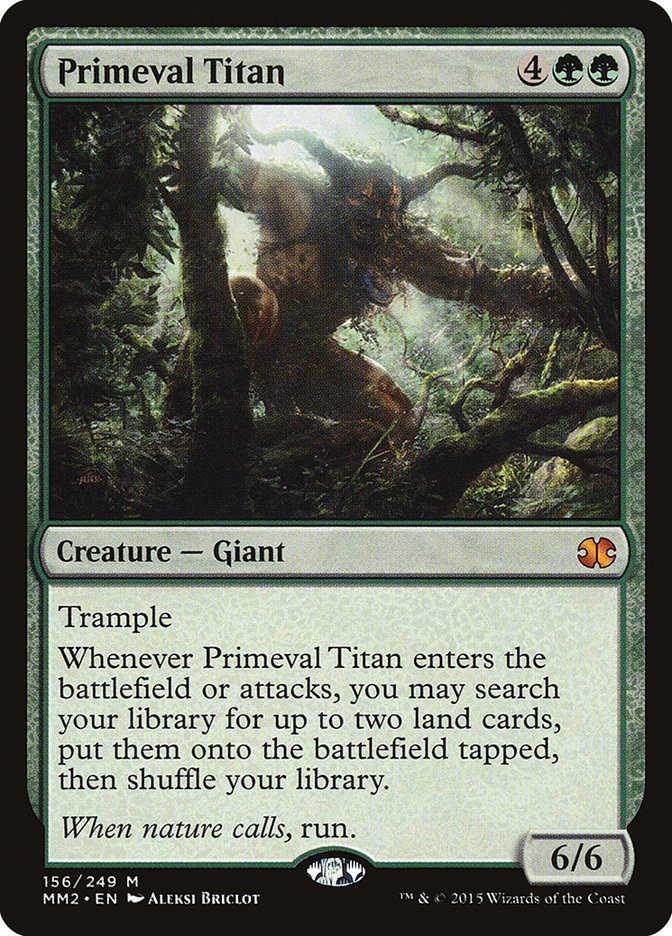
You are racing as hard as possible. Radiant Fountain is the big one here, so make sure you don’t overcommit, as they can easily gain four to six life in a
turn. Don’t be afraid of killing a Primeval Titan if you have to; it’s better than being dead. Hive Mind is probably going to get you regardless, which is
why it’s all the more important to come out the gates fast and furious.
Cards to consider sideboarding out:
Grim Lavamancer, Searing Blaze, Lightning Helix
Cards to consider sideboarding in:
Destructive Revelry, Molten Rain, Deflecting Palm, Atarka’s Command
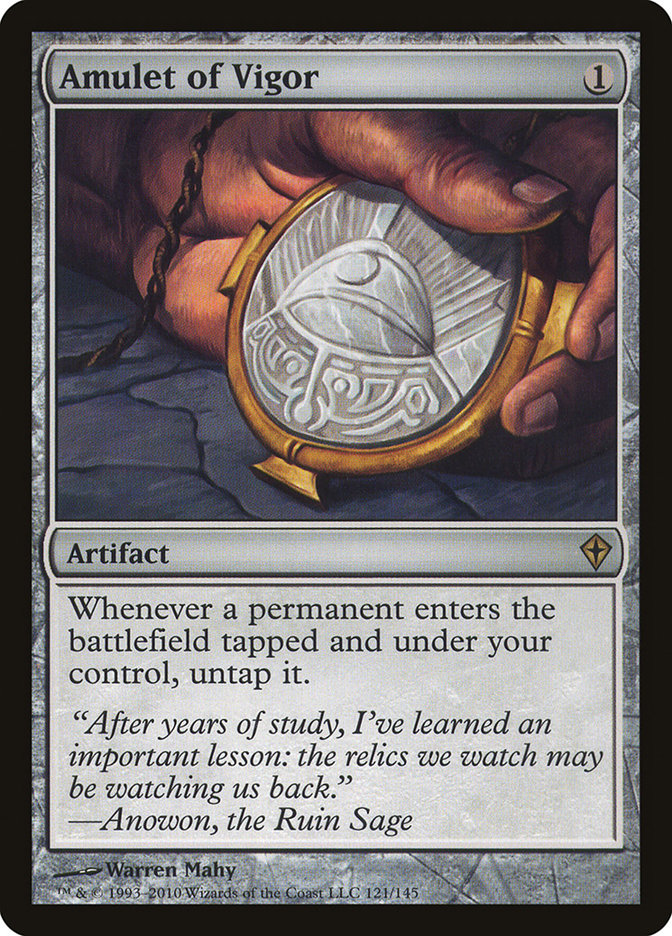
Amulet of Vigor was already a big one, but Leyline of Sanctity is also going to come in, so don’t skimp on Revelries. Molten Rain can really put a big
damper on their development, as you might be able to knock out a bounceland, which is huge. Deflecting Palm will smack any Primeval Titan plan silly, and
Atarka’s Command is important for the impending Thragtusk, Radiant Fountain, or Dragonlord Dromoka that you may run into. I’m okay with over-sideboarding a
little bit here since your cards are so impactful and so are theirs.
G/R Tron
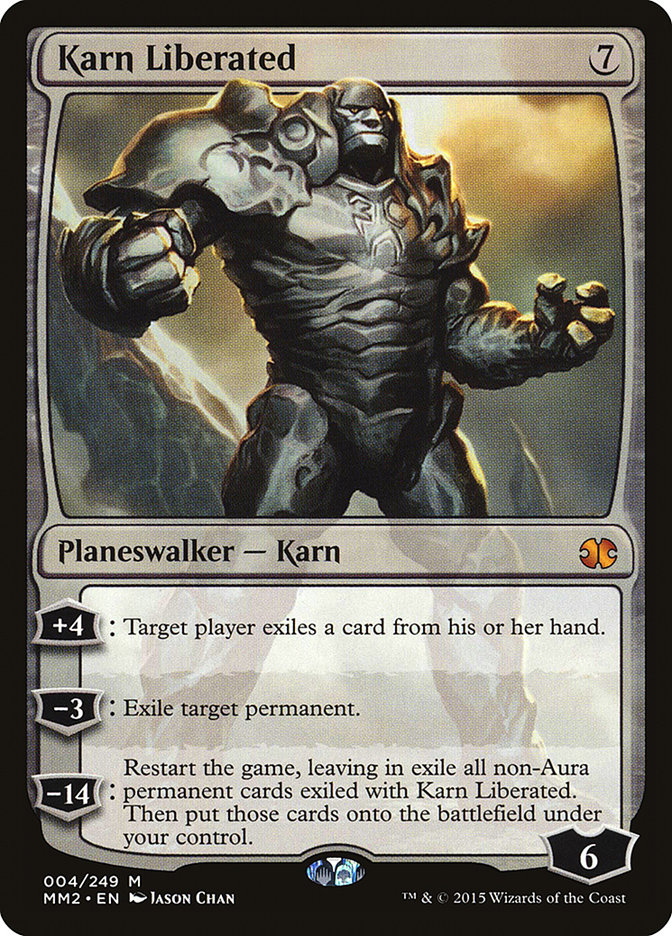
Wurmcoil Engine is their best threat against you, with Ugin being second best. Karn Liberated is good too, but you can hold lands in your hand to mitigate
the impact it has against you. I’m okay with losing to Ugin since it’s usually a one of, and even then, it’s an eight mana seven life buffer with suspend
two. On Wurmcoil Engine: You can obviously Skullcrack it, and you can also block and kill your own creature before damage. There are a lot of ways to stop
the lifegain, so you’ll have an easier time than most other decks at ignoring what they’re doing when they’re operating on all cylinders.
Cards to consider sideboarding out:
Searing Blaze, Lightning Helix, Rift Bolt, Goblin Guide,
Cards to consider sideboarding in:
Deflecting Palm, Atarka’s Command, Destructive Revelry, Molten Rain
Same rules apply as in game 1, except that Spellskite is part of the mix now. Goblin Guide is still insane, but giving them any increased chance of
attaining Tron is not really something we want to do, so shaving a couple may work out if you’re bringing in Molten Rain. Palm hits Wurmcoil Engine, which
is huge since often times that’s all they have against you. Feed the Clan might be possible out of their sideboard, but I wouldn’t worry too much about it
in game 2. Race hard and be ready to handle their heavies.
Sideboarding Against the Rest of the Field
Deduce and apply. Gauge what their deck is trying to do in game 2 and figure out what part of your deck doesn’t line up well against their plan. If Merfolk
is trying to swarm you hard, then Destructive Revelry on their Aether Vial might not be a good plan. Instead, try warding off their offense with Rending
Volley and Deflecting Palm while also surmounting your gameplan with Grim Lavamancer holding the fort. If you’re getting pummeled by Living End, then maybe
sideboard very little against it. Don’t overcompensate in most cases. If you run into a horrible matchup that you probably aren’t prepared for, then
whatever. There will also be times where your opponent just isn’t ready to get lit up. Give and take.
Tips and Tricks
– Pick a second color, splash the third, but do not jam all three (or more) colors. Yes, having Boros Charm and Atarka’s Command is great, but you will
often lose the life that Atarka’s Command is keeping your opponent from gaining. Remember, the biggest problem with Burn is not the lifegain hate, it’s the
fast clocks, and taking more damage than you need to will hurt in the long run more than the benefit of having all of these shiny spells, especially in the
mirror.
– Skullcrack versus Atarka’s Command: I don’t think it matters too much. I also don’t think they need to compete with each other, as they’re both
equally powerful, but it’s easier to see the upside of Atarka’s Command than it is to see the intricacies of either. Skullcrack lets you fight through a
Kor Firewalker; Atarka’s Command doesn’t. Skullcrack doesn’t need a second color, thus being less painful in the mirror while also helping against
Deflecting Palm. Atarka’s Command scales insanely well with your creature draws while also being way harder to play against. Skullcrack is always three
damage, no matter your board presence. Atarka’s Command bypasses Leyline of Sanctity since it doesn’t target. Skullcrack needs to hit yourself if you need
to prevent any lifegain or shields. Atarka’s Command can’t be redirected back to you, but Skullcrack can. If you really want Atarka’s Command, I’d run it
with Skullcrack in your 75. The benefits of both are incredibly important, and neither is strictly better than the other.
–
Your life total matters. Contrary to popular belief, you are not as fast as many think you are. Therefore, your life total matters much more than
advertised, especially in sideboarded games. Don’t get unwieldy with your resources. Keep track of what lands you’re working with. Don’t just crack all of
your fetches just because. Sometimes you should leave one or two back so you don’t expose a colored source to a Deceiver Exarch or so you can represent
Searing Blaze at all times. If you’re getting beat down by a 4/4 at thirteen life, going down to twelve loses you a turn. The deck thinning, while
relevant, isn’t always the best thing you can do. Maximize everything you can, including the things that don’t look like they matter.
Closing Thoughts
Despite being a hyper-linear deck, Burn has a lot of room for innovation and growth. You will lose a lot of games in embarrassing fashion, but you’ll also
be on the giving end of those embarrassing games. Many of the best decks in the format simply cannot beat a lot of our decent draws, and our best draws are
very hard to defend against. I fully expect to see Burn have a solid showing at the Season Two Invitational, and hopefully, I’ll be the one doing it.