
Magic is complicated and Legacy particularly so – not only do you have to deal with a lot of weird interactions coming up when you deal with a format that allows the vast majority of the cards ever printed for Magic, the high power level of the format means that even tiny details and extremely minor-looking play decisions can have a huge impact on who’s getting the W and who the L.
What I’d like to do today is present you with three scenarios that contain such easily-overlooked decisions. Decisions that we often don’t even realize we’re making when we aren’t used to paying attention to them. I’ll then give you a little bit of time to figure out what you think the correct play is and follow it with an explanation of what I think the correct line is as well as why and where the tiny decision that turned out to be important took place.
Sound good? Alright, let’s get going then!
Delving Deeper
We’re playing game one with Temur Delver against an unknown opponent.
Creatures (12)
Lands (18)
Spells (30)

Our opponent simply played Bayou and passed on turn one and we decided keeping up Stifle is more important here than playing a turn-one Nimble Mongoose. It is now our opponent’s second turn and they’ve just played and cracked a Bloodstained Mire:
Game One, Opponent’s first main phase, their land drop has been used.
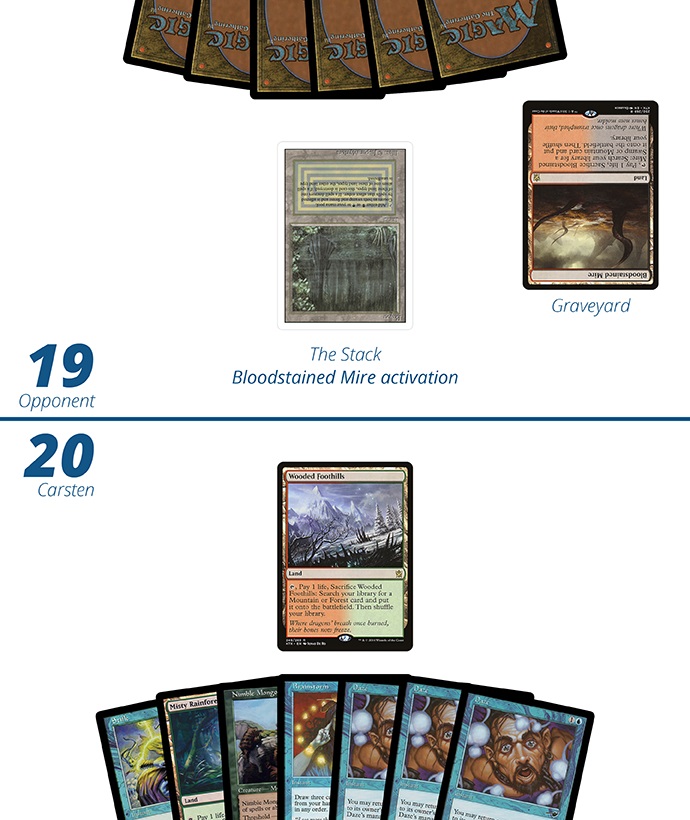
So what’s the play?
.
.
.
.
.
.
.
.
.
.
.
.
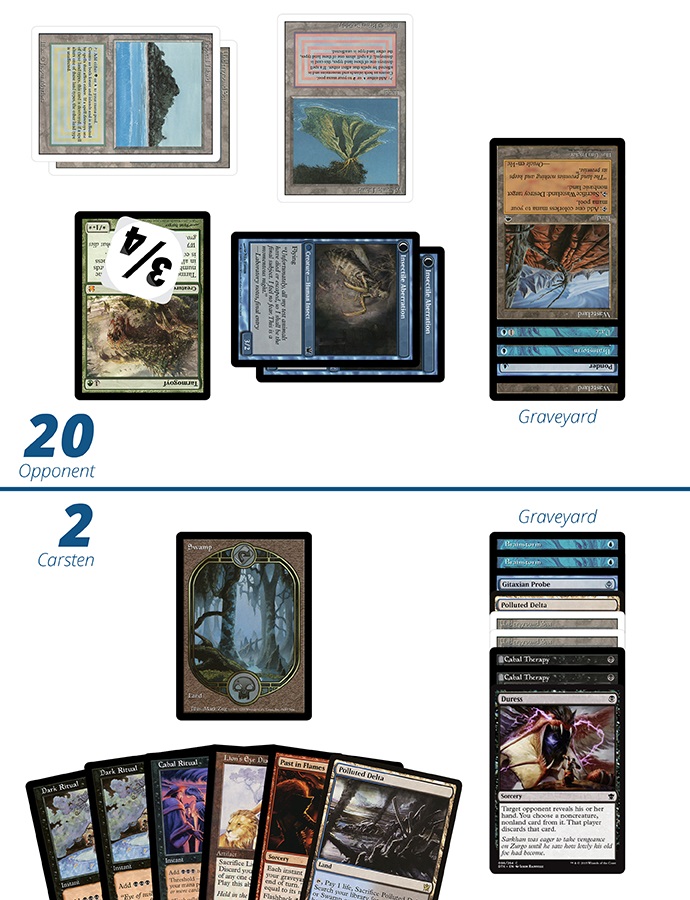
To those who just said “we Stifle the Fetch, duh!” – well done! Now let’s pay some attention to the part that isn’t totally obvious – which land do we go for with our Wooded Foothills?
.
.
.
.
.
.
.
.
To actually give a decent answer to this question, we need to figure out what our plan is moving forward. Given that our hand has no red cards but does have a green card, our first instinct probably is to just go get the Tropical Island. I believe that to be wrong, making Volcanic Island the correct call. Here’s why:
At this point, it looks very much like we’re playing against Jund (what with Bloodstained Mire in their deck and their first land being Bayou), so one of our best plans against them is to manascrew them and win before they can draw out of it. Given that we have a bunch of Dazes in hand, this plan conveniently also seems to be at least in our reach. So doesn’t that mean we should get Tropical Island to cast Mongoose next turn and start the clock?
The problem with that line of thought is that it means we’ll have a Nimble Mongoose with a single card in our graveyard with a fetchland up. If we crack that fetchland, however – say we need to cast both Dazes – we won’t have any way to shuffle after our Brainstorm, and that shuffle is of major importance here.
At the same time, we need to shovel cards into our graveyard as fast as possible to make Nimble Mongoose into an actual threat. With the hand we have, that means casting Brainstorm and hopefully finding additional cantrips or other easy-to-cast spells. Not cracking the fetchland on our turn also means we “waste” one mana we theoretically have access to this turn, something that is rarely in Temur Delver’s interest and particularly unappealing given that we’re trying to get Mungo thresholded ASAP.
At the same time, the third Daze is reasonably likely to not find a target, so we have at least one card we kind of don’t want to draw again and in all likelihood will draw another stinker with our Brainstorm. As such, we want to try and make a “perfect Brainstorm” as Cedric likes to call them, one directly followed by a fetchland activation.
We also don’t have anything we need to keep mana up for, so my presumed line – barring our new cards changing things – for the next couple of turns is this: Fetch Volcanic Island here, Stifle their Mire. On our turn, we cast Brainstorm using Volcanic Island, play Misty Rainforest, sacrifice it for Tropical Island and cast Nimble Mongoose, planning to Daze our opponent’s next play. To make this play while guaranteeing access to all our colors, however, we need to fetch for the land that is supposed to cast Brainstorm next turn first – which is why getting the Volcanic Island matters even though we don’t have any red cards yet.
One thing that could be argued against this line is that it falls apart if we need to Daze this turn. If we return the Volcanic Island, we either have to skip playing Nimble Mongoose next turn or crack the fetchland without casting our Brainstorm beforehand. Now, to force us to Daze something here, our opponent would need to cast either Deathrite Shaman or Thoughtseize this turn. The value of playing around this possibility pales in comparison to ensuring our own game flows in the smoothest way possible, though, simply because they would have needed to topdeck either card this turn – otherwise they would have cast either on turn one instead of passing like they did.
Storming Stronger
This one is actually inspired by something I learned in playtesting – and yes, I did get it wrong, which is what inspired this article in the first place.
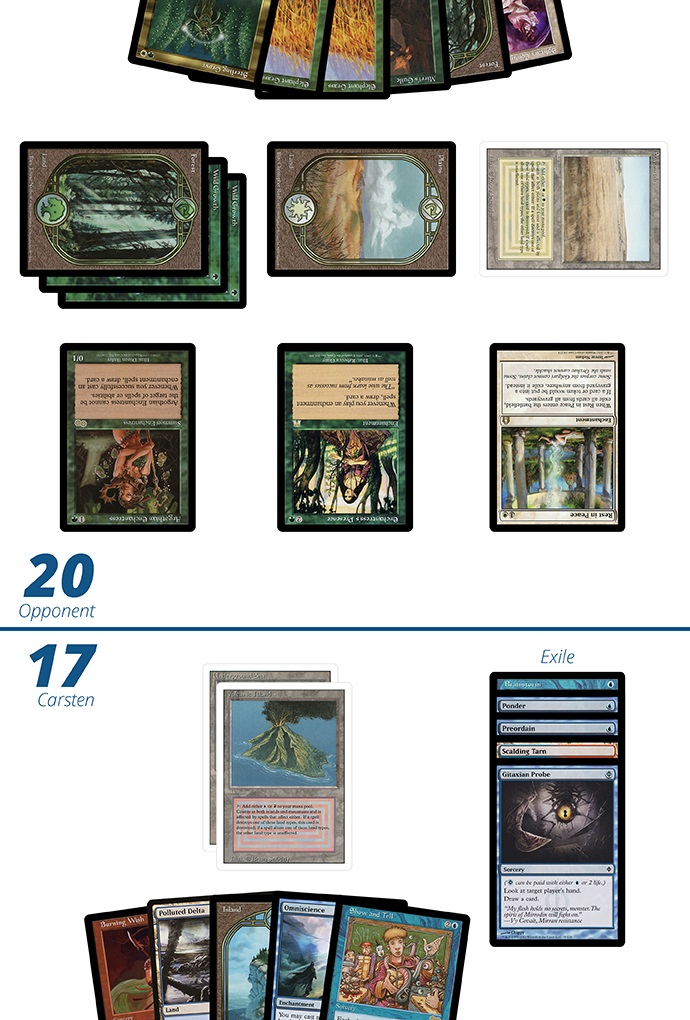
We’re on Storm, testing out Dark Petition (this actually is what I’m testing the card in for those interested):
Lands (15)
Spells (45)
We’re playing against what appears to be BURG Delver and have managed to strip our opponent of any form of disruption (or cards in hand, for that matter). In the meantime, our life total has been rapidly reduced by two flipped Delver of Secrets. Having drawn Polluted Delta, we’re back in our main phase now and it’s do or die this turn:
Game One, our first main phase, land drop available.
What is the correct line to take?
.
.
.
.
.
.
.
.
.
Clearly we have to try to win here, and to do so we have to hope our cantrips can find a tutor or our Tendrils, given that we have everything to Past in Flames up a ton of mana and a lethal Storm count available to us either in hand or in the graveyard. The real question here is: how do we sequence our cantrips to maximize our chance of winning?
.
.
.
.
.
.
.
.
.
.
First the easy part: We cast Dark Ritual, Dark Ritual, Cabal Ritual, Lion’s Eye Diamond and Polluted Delta, cracking the latter for Volcanic Island. We then cast Past in Flames and sacrifice Lion’s Eye Diamond for three blue to pay for our cantrips. We flash back our rituals, leaving us with a Storm count of eight already with UUU BBBBBBBBBBBB (three blue, twelve black floating).
Now for the hard part. If you’ve played any amount of Storm, you’re very much used to casting your Gitaxian Probes from the graveyard before casting the other cantrips because that means you see the most cards that way.
In this particular case, however, blindly following this automatism costs you a chunk of win percentage. By casting Gitaxian Probe first, followed by double Brainstorm, we see the top five cards of our library. However the thing to realize here is that any order of casting these cantrips other than casting Gitaxian Probe last will do that exact same thing – with one very important difference: if we cast Gitaxian Probe first, we will have to keep at least two cards in hand at any point after casting the first Brainstorm. That means if we hit three uncastables/lands and an Infernal Tutor, we can’t actually reach Hellbent to make the tutor a win condition! Basically we can hit the nut spell and still lose (when this came up, the top of my library was land, Infernal Tutor, land, land by the way).
On the other hand, if we cast our first Brainstorm and it’s two uncastables and an Infernal Tutor, our opponent is just dead: keep the Tutor, find Tendrils. If we miss, we can still cast Gitaxian Probe followed by the second Brainstorm and see the same cards we would have seen by casting Gitaxian Probe first. Basically, by sequencing our cantrips differently from what we’re used to, we get an additional shot at drawing an easy win that can’t be messed up while sacrificing nothing at all to do so.
Telling Truer
We’re playing OmniTell with Burning Wish and no maindeck Emrakul, the Aeons Torn (my version I keep calling Demon Rum). It is game one.
Creatures (4)
Lands (19)
Spells (37)
- 4 Brainstorm
- 3 Show and Tell
- 4 Force of Will
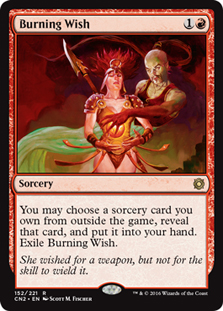
- 4 Burning Wish
- 4 Cabal Therapy
- 4 Ponder
- 2 Preordain
- 4 Gitaxian Probe
- 4 Omniscience
- 4 Dig Through Time
Sideboard
We’ve done what our deck is supposed to do and cantripped until we have Show and Tell, Burning Wish and Omniscience in hand. We’ve found the Show and Tell just this turn by casting a Gitaxian Probe and as it turns out our opponent – who is playing good old Enchantress – has something in hand to make our Grapeshot look a bit awkward given that we need to cast Show and Tell: Solitary Confinement.
Game One, our first main phase, land drop available.
So what’s our line?
.
.
.
.
.
.
.
.
.
.
.
.
.
Assuming our opponent is clever enough to drop Solitary Confinement when we Show and Tell, we clearly need an additional Burning Wish at some point. That way we can Show and Tell, start Petal-ing, then find Void Snare and bounce the Solitary Confinement before casting Grapeshot. And yes, there’s a zero-variance way to do this.
The important first thing to solve this one is to know what exactly our combo – Omniscience plus Burning Wish for Petals of Insight – is actually capable of doing. If all you tag it as in your mind is “make infinite Storm, find another Burning Wish” you won’t be able to solve this one. If you’re aware of the trick I’m talking about, go right ahead and make it work. Otherwise try thinking a little further about how the combo actually plays out and you might find the line we’re looking for.
.
.
.
.
.
.
.
.
.
.
The trick you need to be aware of that I just talked about is simply this: as long as the number of cards in your deck is not divisible by three, casting Petals of Insight again and again in fact changes the order of the cards in your library. You end up slowly moving cards through your deck, pushing a card or two into a different three card block, thereby creating new three card blocks to look at with Petals of Insight every time you move through your complete library. Through this process it is actually possible to create any particular three-card block you want to draw with Petals of Insight at the end of the process.
To illustrate, assume this five-card library:
Let’s assume we want to draw the three cantrips for some reason. We resolve Petals, see Island, Ponder, Preordain and put them on the bottom in any order we want:
We cast Petals again, seeing Burning Wish, Gitaxian Probe and Island. Given that we know where Preordain and Ponder are, all we need to do is position Gitaxian Probe in such a way that it’s next to them:
Now when we cast Petals, we see the three cantrips we want and we’re good to go. As you can see, we essentially get to create new three-card blocks by combining the bottom two cards of one block with the top card of the next one we push to the bottom. If we’re only one card over a number that’s divisible by three, our new piles are one card from the first block plus two from the second one instead.
With a larger library, we can use the same process to move cards around in the deck and slowly but surely assemble whatever combination of cards we want. This can take quite a number of Petals of Insight castings in any realistically-sized library, but seeing as we can cast as many Petals as we want, that isn’t really much of a problem.
The problem that remains above is that we have played and drawn exactly 12 cards at this point (did you count before declaring you could win with the above trick?) leaving us with a 48-card library and thus no ability to actually rearrange things whatsoever. If we Petals from here, we will always just get the same order (with minor variations given that we can reorder each three-card block inside itself) repeated again and again.
Luckily for us, we have an easy way in hand to change the number of cards in our library: Polluted Delta. As long as we’re aware of the fact that the number of cards in our library matters, all we need to do is figure out the number of cards we have left first, realize we need to add or remove one and play the fetchland instead of the Island to cast Show and Tell. Voila, we’re ready to set up a double Burning Wish pile eventually after casting Show and Tell.
If we didn’t pay attention? Well, we might still win but suddenly there’s a chance we miss. We can win with any block that includes either both Burning Wishes naturally, which is unlikely to just randomly find, or just a combination of card-drawing spells (Dig Through Time in particular) and a Burning Wish. It’s beyond my ability to figure out the odds for that to work, but clearly it is possible to miss either the Burning Wish plus card draw block or to miss the extra Wish with the card drawing. It gets even harder to figure out odds when we also have to pay attention to how close the Digs are to the Wishes, and that math is super hard to crunch but at least when you’re playing through you can feasibly keep track of your deck as you iterate through it the first time with Petals. But not paying attention to small details spews a decent bit of win percentage here, doesn’t it?
I’s Dotted And T’s Crossed
So, how many of these did you get right? More importantly, in how many of these scenarios did you actually realize what it was about and figured out the little details before reading the solution (or the half-way hint)? I’m fine discussing these lines and I wouldn’t stake my life on there not being a better one available, but these specific scenarios are the fine print. The important thing I’ve wanted to point towards today is that even the tiniest decisions have a right answer and a wrong one and it is only by learning to pay attention to all the little things we do while playing the game in addition to the big picture that we even give ourselves the chance to make them correctly. Remember, the easiest way to get a decision wrong is to not even realize you’re making one. Keep those eyes open!