
“Dredge.”
Just the word makes many Magic players shudder.
Since its inception and through its various forms in various formats, Dredge has always been something of an enigma. Mechanically, the deck is odd because it plays a game that doesn’t feel like Magic. You rarely actually draw a card after turn 2, you don’t even cast half your spells and the other half you cast from your graveyard, and card advantage is basically irrelevant beyond your cards being cards. These oddities tend to leave a sour taste in many players’ mouths, making Dredge both underplayed and under-respected in Modern. It feels weird, so many players just stay away from it.
Don’t make this mistake.
Dredge is one of the most powerful decks in Modern, even without Golgari Grave-Troll. It is capable of producing extremely broken battlefield states as early as turn 2, as well as going longer into the game and grinding people out. For a purely linear deck it also features a solid amount of interaction, with access to a number of large castings of Conflagrate each game fueled by Life from the Loam.
Today I will be divulging everything I know about Modern Dredge. I’ve played the deck in number of major events recently, and despite some rough draws and bad matchups at #SCGBALT, I am firmly convinced of its power. Before we start, however, a quick note about my Team MGG teammate Ben Friedman’s Dredge list.
Creatures (19)
Lands (20)
Spells (21)

Ben and I have worked together on the deck twice now and we have fairly differing views on how the deck should be built and played.

Ben has his list set up to play a longer, more interactive game at the expense of explosiveness, and he makes his mulligan and gameplay choices based on this philosophy as well. It is evident after watching him play the deck that we play the deck very differently, as I am much more apt to mulligan aggressively and look for powerful openings while he is happier to sit back and play a more reactive game. It’s extremely interesting to me that two experienced players of a highly linear deck can have such differing opinions on it, but that is a topic for another article.
Having considered Ben’s way and adapting some of his philosophy into the deck, I am still firmly content with my more “normal” version, and that is the list we will be discussing today.
Creatures (23)
Lands (20)
Spells (17)
As far as Modern decks go, Dredge is essentially a highly linear aggressive deck – much like Affinity or Hexproof. It uses very high levels of synergy between many bizarre Magic cards to put a lot of power onto the battlefield very quickly, and then uses those cards to attack the opponent to death over a few turns. Because its threats are so resilient, any deck attempting to play anything that resembles fair Magic with it will often be overpowered and overrun.
Like other highly linear decks, Dredge also tends to live and die by how Games 2 and 3 go. Sideboard cards define how your matches with Dredge turn out, and most of your sideboard revolves around fighting other decks’ sideboard cards rather than the decks themselves. You’re usually a pretty big favorite to win Game 1 against most of the format; the challenge is beating the hate post-sideboard.
Before we get to the actual cards in the deck, let’s establish some of the ground rules for what you are signing up for when you play Dredge.
1. You are looking for opening hands that are more specific than for most Magic decks.
While most decks are looking for a good mix of lands and spells in their opening hands, you are looking for a hand that contains a dredge card, an enabler, and at least two lands, one of which produces green. The upside to needing more specific combinations of cards is that the quantity of cards in your hand don’t matter that much and the scry rule is fantastic. As long as your engine is going and you have at least two lands with one green source, Life from the Loam will pay you back all the cards you will need.
Tip: How aggressively you can mulligan is often matchup-dependent. Are they going to goldfish you on turn 4? Are they going to have a lot of discard or counterspells? Plan accordingly!
2. You are rarely going to draw a card past turn 2.
Once you’ve got your engine online, you are rarely going to be drawing a new card into your hand. You will be spending all of your draw steps dredging, and as such your hand is going to be full of Stinkweed Imps and Golgari Thugs. As such, your gameplan is usually on display on the battlefield and face up in your graveyard. This is mostly relevant in post-sideboard games, where if you start dredging you will not be able to find most of your sideboard cards, but can also be relevant in Game 1 when you need to draw a mana source and/or don’t have green mana yet.
Tip: Having two lands on the battlefield, one of which taps for green, is essential for making the deck work. Don’t be afraid to take natural draws if you need to find a land. Don’t dredge-lock yourself!
3. The cards in your hand are often essentially blank pieces of cardboard.
Because of how you use your graveyard as essentially your hand, how often you will be “drawing” irrelevant cards, and how often you are using Life from the Loam to get back bulk amounts of lands, many times the excess cards in your hand are nothing more than a number for flashing back Conflagrate.
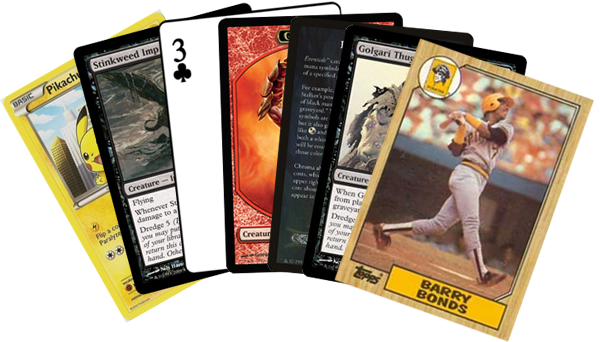
It doesn’t really matter if your hand is a Pikachu, a Stinkweed Imp, a three of clubs, a Goblin token, a rules insert, a Golgari Thug, and a Barry Bonds rookie card, you’re still going to be able to deal seven damage by discarding them all to flash back a Conflagrate. The quantity of cards you have is important, however, which makes casting Life from the Loam as often as possible very important.
Tip: You can often use Life from the Loam as a discard outlet if you can get your hand size to eight or larger. This can help you clear your hand of excess copies of Prized Amalgam and whatever else you’d prefer in the graveyard.
4. You don’t interact with the stack or noncreature permanents very well, but you do interact very well with your opponent’s creatures.
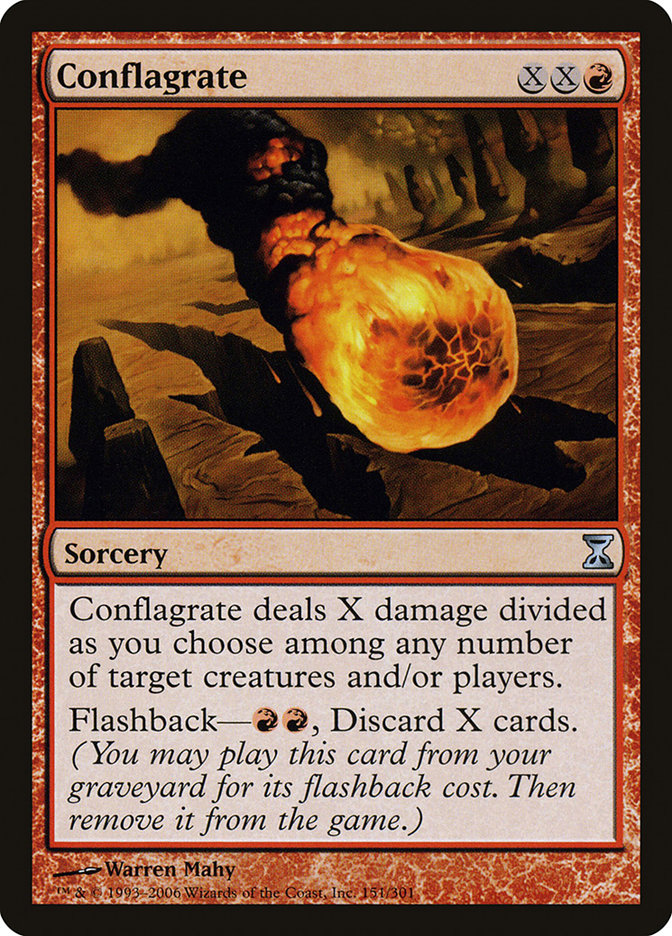
Conflagrate is a powerful Magic card, and being able to Fireball all of your opponent’s creatures on turn 3 or 4 is a very powerful effect. As such, Dredge excels against decks full of small creatures. Because Conflagrate has such a low cost and just happens naturally as you are playing your deck, you have access to it on turn 3 or 4 almost every game.
If it’s not wrecking your opponent’s battlefield, it’s often just a Fireball to the face for around seven damage, which can end the game in a hurry in conjunction with your creatures.
Tip: Keep casting Life from the Loam! Even if you haven’t put a Conflagrate into your graveyard yet, you will find one sooner rather than later; you want to be able to fire it off for the maximum amount as soon as possible.
5. Things aren’t always going to go to plan, and sometimes you’ll need to just cast your spells.
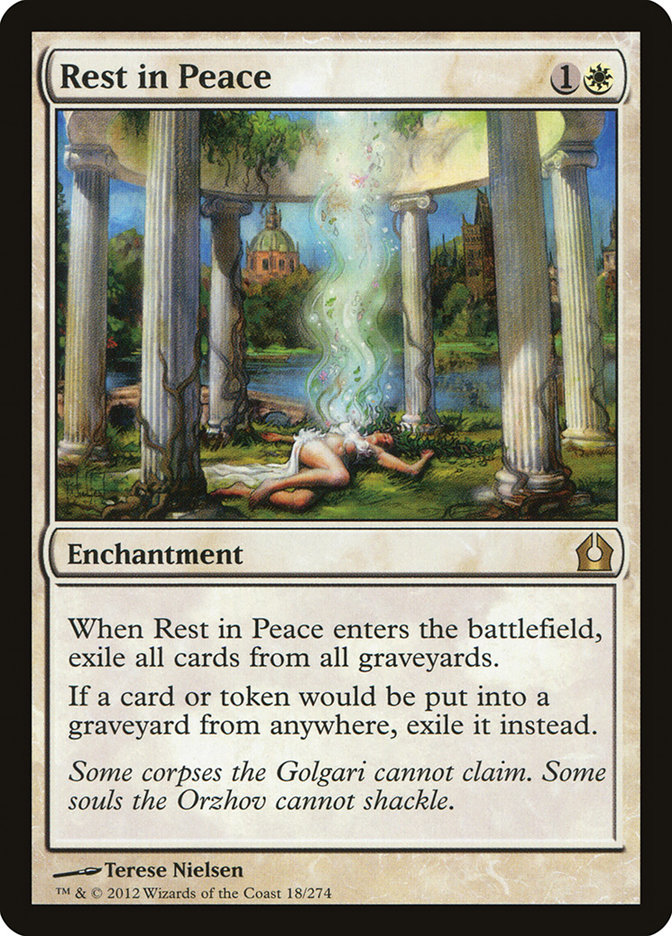
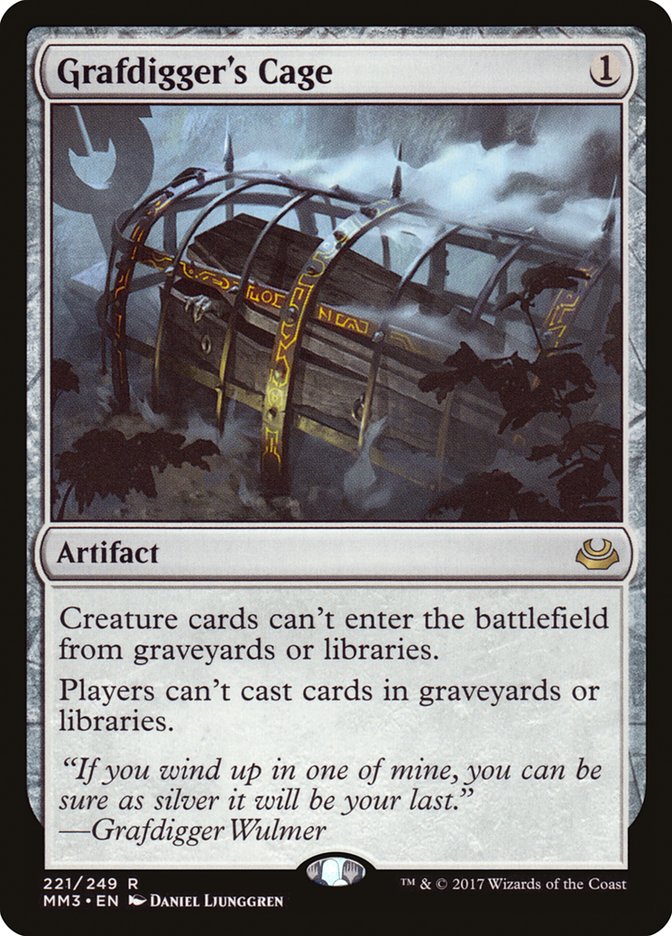
It’s not glamorous, but you aren’t always going to be putting ten power worth of creatures onto the battlefield on turn 2 every game. Some games your hand is not going to be perfect, your opponent is going to do a good job of disrupting you, or, most commonly, you are going to be held in check by a powerful sideboard card like Rest in Peace or Grafdigger’s Cage. When things are going wrong, you need to understand that your cards still have text!
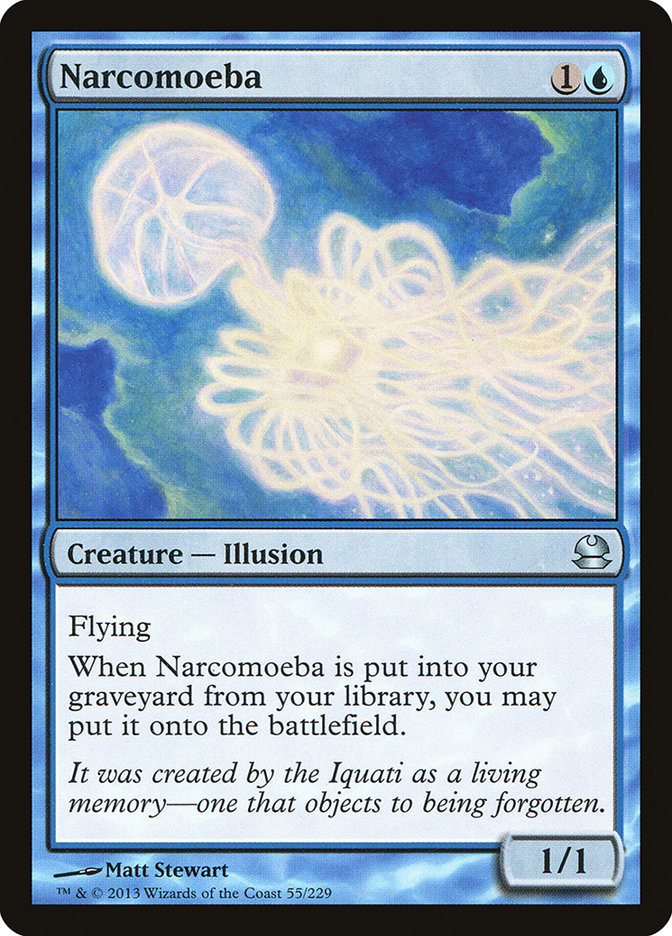
Stinkweed Imp and Golgari Thug are both great blockers, with the death-trigger ability on Golgari Thug very relevant. Putting a Narcomoeba on top of your deck while putting a dredge card in the graveyard is a solid play, and you will cast Golgari Thug more than you think. There’s also a Steam Vents in the deck to allow you to cast Prized Amalgam and Narcomoeba when things are really awry, and you win a nonzero amount of games through hate by just beating down.
Tip: The more hate your opponent has, the fewer actual cards they have to further their own plan. Trained Armodon beats get there more often than you’d imagine in post-sideboard games.
The Deck
The easiest way to view the Dredge deck is to break it up into four main parts: the engine, the dredge cards, the payoffs, and the lands. You are going to need your opening hand to usually be made up of a mixture of these parts, but some are more important than others.
The Engine
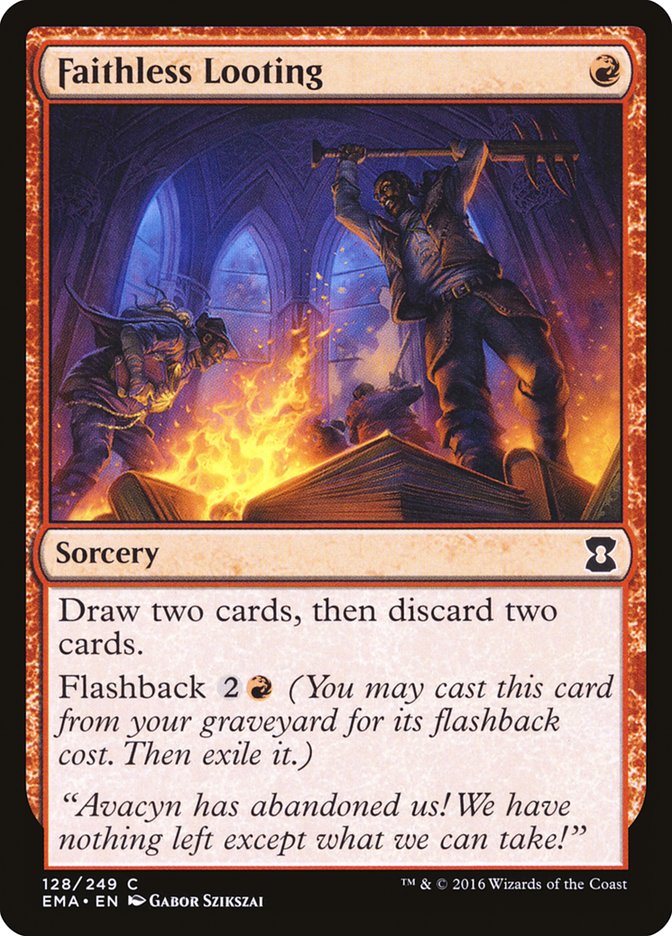
The red spells that draw and discard cards form the fundamental engine of the deck, as they allow you to get your important cards in the graveyard and speed up the dredging process. You typically need to dredge a number of times per turn to really get things rolling— just using your draw step each turn will not be enough.
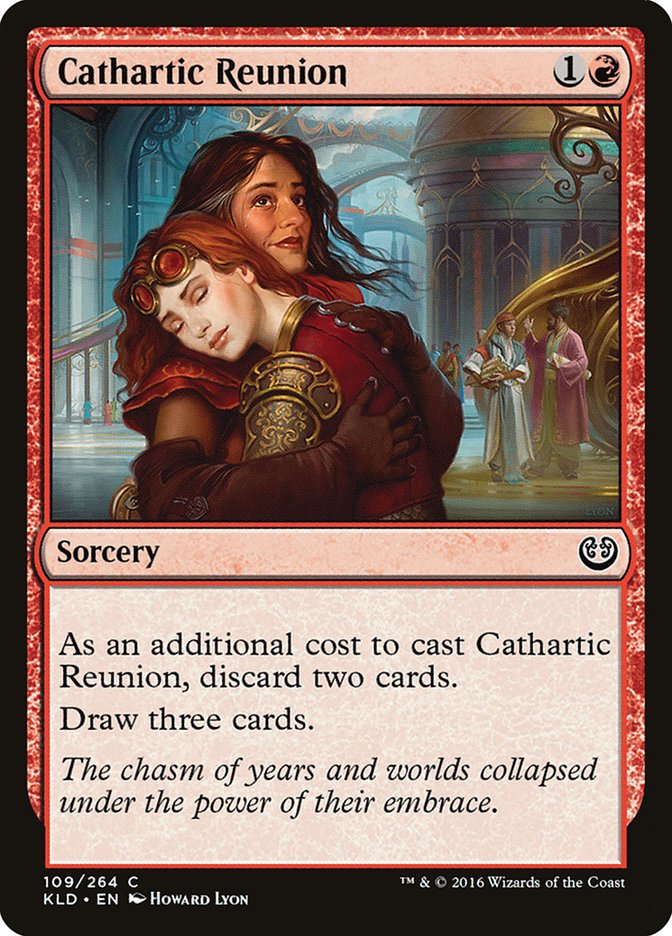
Cathartic Reunion is the best of the trio, because it does everything that you need to do in one neat package. It discards the cards for you, and then starts dredging immediately for a big three draws. Cathartic Reunion is one of the major reasons I am willing to mulligan so aggressively with Dredge. A four-card hand of Copperline Gorge, Blood Crypt, Cathartic Reunion, and Stinkweed Imp is likely favored to win against a large portion of the format in Game 1. Don’t be afraid to mulligan!
Faithless Looting is just as important, but serves a number of different purposes. While it can be used to get cards into your graveyard so you can begin the dredging process, it is often dangerous to do so if you have no other way to draw cards and don’t have your third land yet for a turn 3 Flashback. Whenever possible, you’d prefer to use Faithless Looting as a tool to dredge with rather than a method for getting cards in the graveyard. If Faithless Looting is your only red card in hand, it is often correct to hold it to cast on turn 3 after a Collective Brutality or hard-cast Life from the Loam rather than just casting it on turn 1. This is especially true if you don’t already have three total lands to flash it back on turn 3.
Tip: The cards you discard to Faithless Looting hit the graveyard when the spell resolves, which is before you resolve triggers on Narcomoeba. This means any Prized Amalgams you discard to it will come back from copies of Narcomoeba that are dredged with Faithless Looting.
Insolent Neonate is essentially a mini-Cathartic Reunion, as it also allows you to dredge immediately without needed to put a dredge card in the graveyard first. It has a much lower impact than Cathartic Reunion or Faithless Looting, but it is a necessary piece in getting your engine rolling in the first place. Being a creature also gives it several advantages over being a spell. Getting in for a block before activating lets Insolent Neonate play like a Sakura Tribe-Elder, and it can also get in a little chip-shot damage. Most importantly, in post-sideboard games, it can sit on the battlefield, get some attacks in while you wait to answer their hate card, and then immediately get the dredge ball rolling again.
Tip: When activating Insolent Neonate on your opponent’s turn, timing is critical. Because Prized Amalgam triggers at the beginning of the end step, if you dredge one over with a Narcomoeba on your opponent’s end step, it will not come back until the beginning of your next end step at the end of your turn. As such, most dredges with Insolent Neonate should be done at the end of your opponent’s second main phase.
These red engine cards are fundamental to the operation of the deck, and it is difficult to keep a hand without one of them.
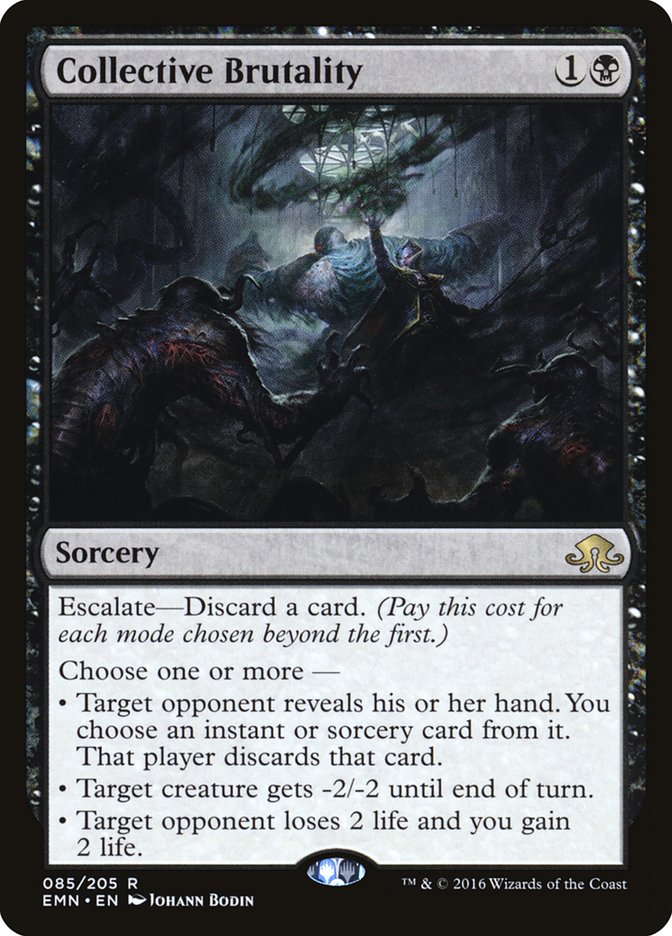
One of the few truly interactive cards in the deck, Collective Brutality is a good card to slow your opponent down and get the ball rolling with cards into your graveyard. While it doesn’t draw extra cards and therefore can’t make you dredge any faster, slowing your opponent down does give you more time to dredge into cards like Faithless Looting and keep dredging that way.
Collective Brutality is not an essential part of the deck’s engine, but one that slots very well into the Modern metagame. Casting it against Counters Company is a dream come true!
The Dredgers


The cards that make Dredge work are naturally the cards with the dredge ability.
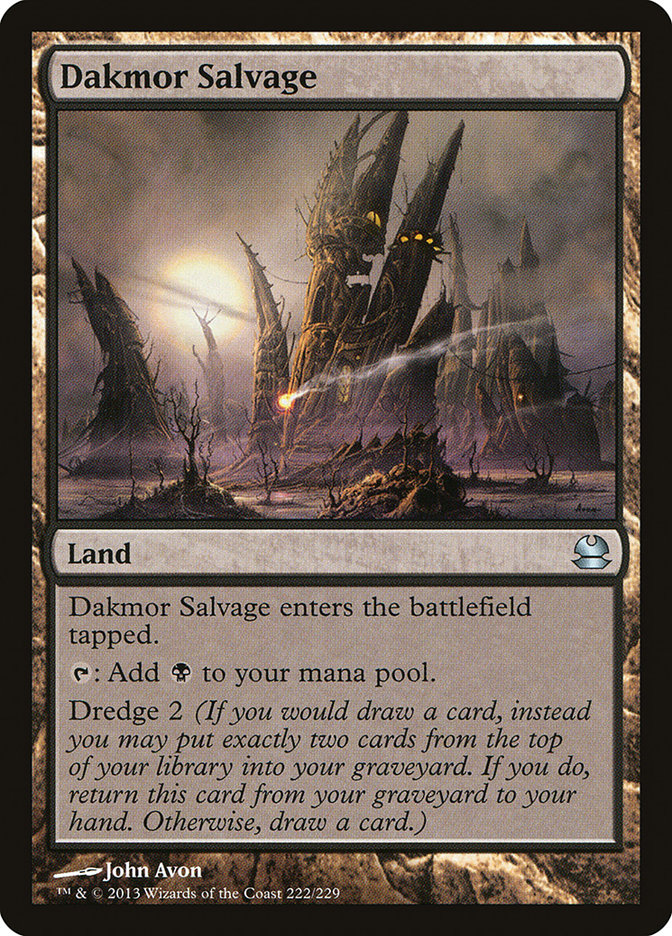
Golgari Grave-Troll was the best of the bunch because it had the largest dredge number ever printed on a Magic card, but with that banned, Stinkweed Imp becomes the top dredge card. Golgari Thug follows suit, with Life from the Loam and Dakmor Salvage bringing up the rear but also serving different purposes.
When choosing what to dredge, you must decide if you want raw numbers or need a particular card. Most often you just want raw numbers, in which case you can pick the card with the highest dredge number and dredge that one. This is often the case when you are resolving an effect like Cathartic Reunion or Faithless Looting that draws multiple cards, as you want to go raw numbers first and can then decide on the last draw if you want Life from the Loam or a blocker.
Tip: Every card draw is an individual action and you can choose to dredge or not dredge on each one. This is most important when you are trying to find a land with a Faithless Looting or Cathartic Reunion, as you can naturally draw until you find it and then dredge with the remaining draws.
Both Stinkweed Imp and Golgari Thug are great blockers and it’s not uncommon to cast them. If you are able to interfere with your opponent’s plans by blocking and also dredging more cards, that is a great win for you.
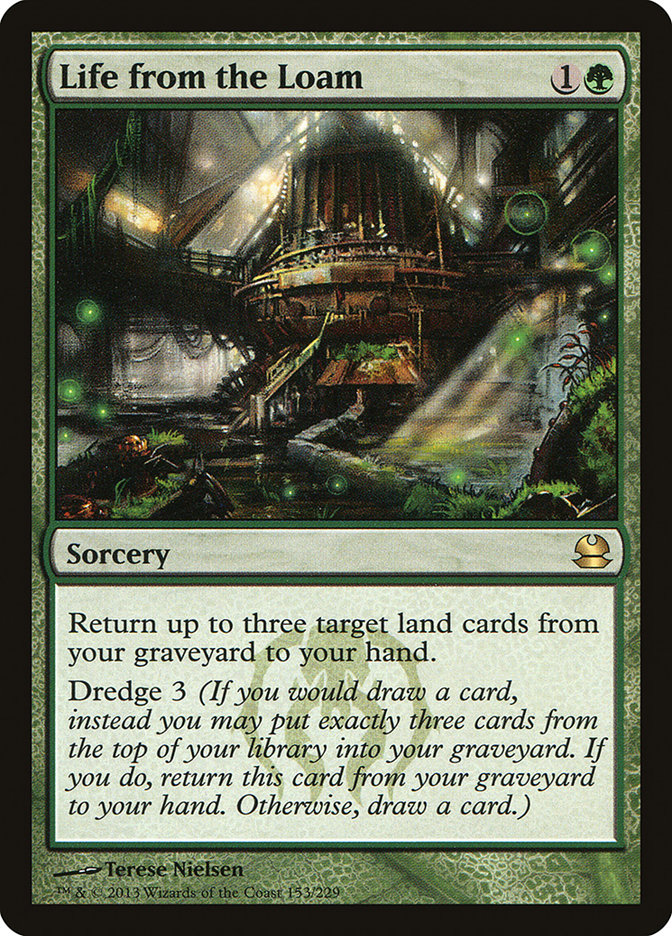
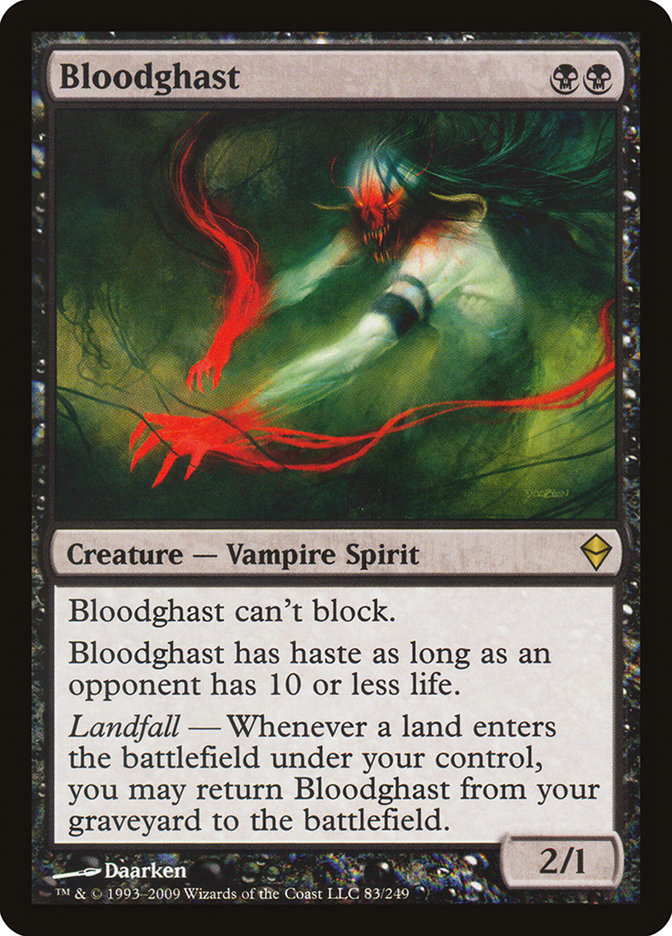
Life from the Loam is perhaps the most important card in the deck, as it allows you to make up card disadvantage, hit your land drops, make up for mulligans, and fuel Conflagrate. It also is your primary tool for recurring Bloodghast. Don’t forget, when you are dredging, you are no longer drawing cards! This means that land drops are not a given, and Life from the Loam is your method for ensuring land drops and returning Bloodghast.
Although it only has twenty lands, Dredge is surprisingly a deck that wants to make its land drops almost every turn. Each land drop makes it easier to cast more Life from the Loams, to cast your creatures to block, and most importantly to flash back Faithless Looting to continue your dredge engine. Dakmor Salvage also ends up serving this purpose and can occasionally be better if you are dredging big but don’t have the mana for Life from the Loam in the same turn.
The Payoffs
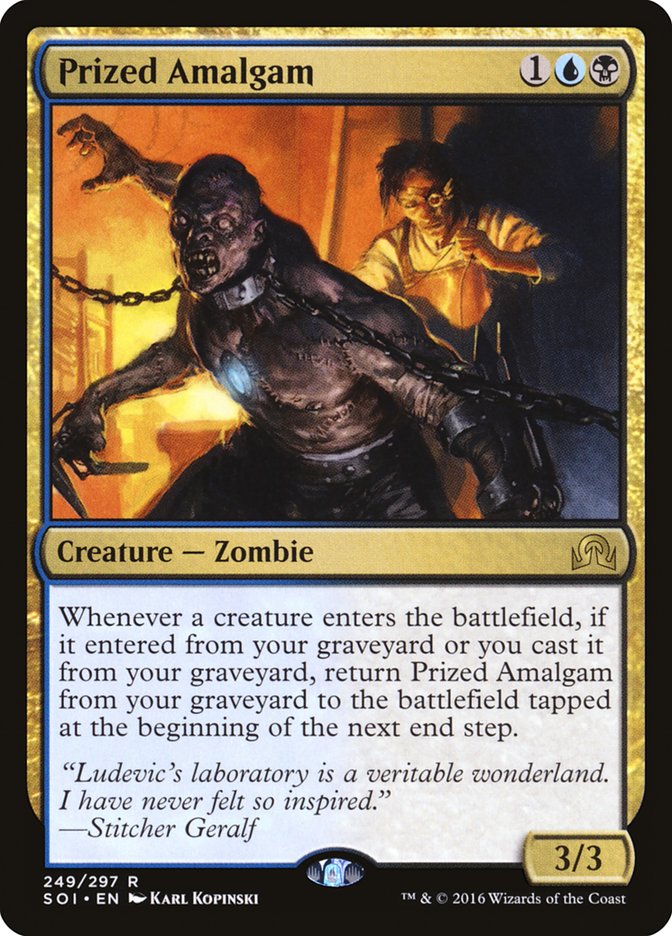
Why are we so hellbent in getting so many cards in our graveyard? Prized Amalgam, that’s why.
Prized Amalgam is our primary path to victory, and Bloodghast and Narcomoeba exist almost purely to get Prized Amalgam onto the battlefield with a solid level of consistency. Prized Amalgam is large enough to attack through many early creatures, and it provides a very fast clock. It’s not uncommon to put two copies of Prized Amalgam on the battlefield on turn 2 alongside a few copies of Narcomoeba, and eight power on turn 2 is a start that most aggressive decks dream about.
Typically we are just looking to slam as many copies of these cards onto the battlefield as soon as we can, but it’s important to understand how their triggers work so you can play around things like Anger of the Gods, Detention Sphere, and other hate cards.
Prized Amalgam is not a “may” effect. When something comes back from the graveyard, it will come back on your end step whether you want it to or not.
Bloodghast is a “may” effect and this is often very relevant. Sometimes on early turns a Bloodghast is all you have in your graveyard, and if you have a big dredge planned for the following turn, it’s sometimes better to just leave it in the graveyard so it can return Prized Amalgams later. This is also relevant if you have enough power on the battlefield and want to play around something like Anger of the Gods and leave extra copies of Bloodghast and Prized Amalgam in the graveyard for later.
Tip: You can use a fetchland to trigger your copies of Bloodghast on your opponent’s turn, either in their end step or at the end of their second main phase, to raise an army at instant speed.
Narcomoeba is also a may effect, and while it is unlikely you would want to decline using it, there are corner-case scenarios where you may want to play around Anger of the Gods and leave your Prized Amalgams in the graveyard.
Our last big payoff is Conflagrate, and its tandem with Life from the Loam forms one of the most powerful reasons to play the deck. At its worst, Conflagrate is a Lava Axe that helps you finish the game more quickly and get cards back into your graveyard. At its best, Conflagrate is a one-sided Wrath of God that will decimate any semblance of a battlefield position your opponents may have built up. It is fairly common for your opponent to have a sizable battlefield presence with large blockers, and you just attack with all your disposable creatures and then use Conflagrate to finish the blockers off after damage. One land drop brings all of your creatures back anyway, and if they don’t block, they will often die to the Conflagrate.
Make no mistake: Conflagrate is the reason that Dredge is as good as it is.
The Lands
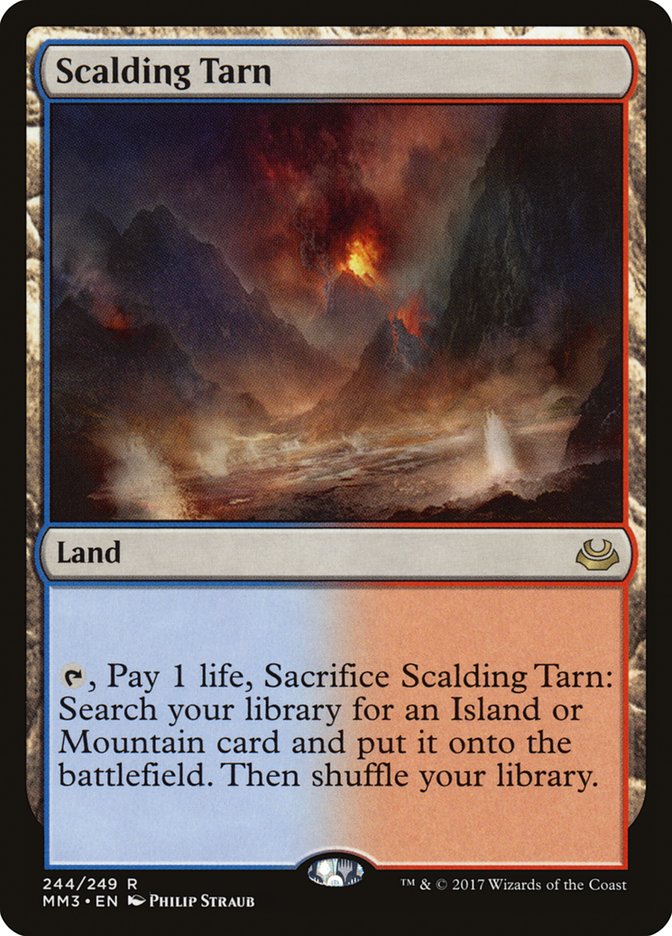

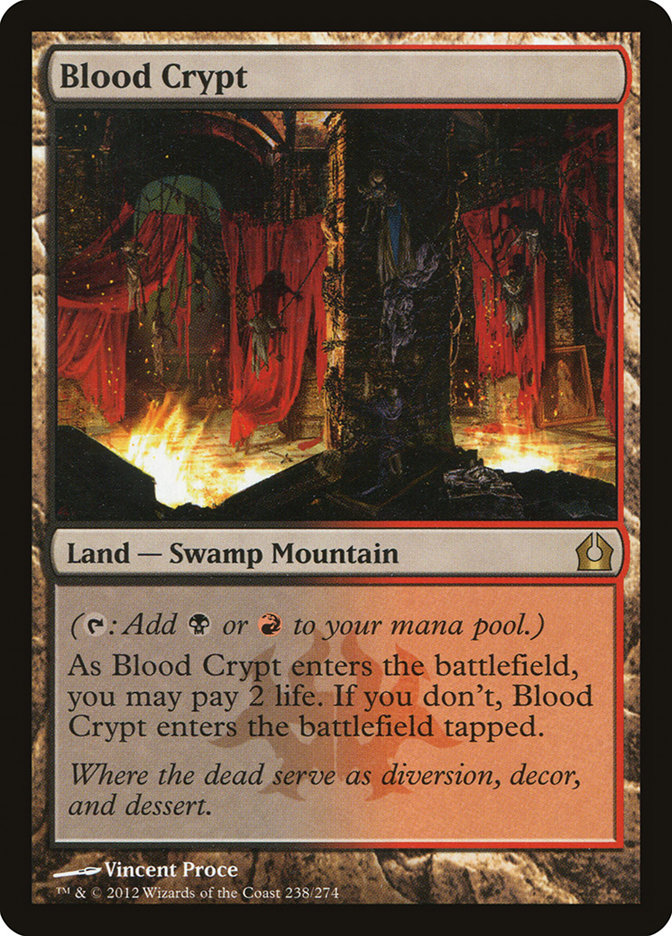
The manabase is fairly simple, with fetchlands and their corresponding shocklands. There is also a Steam Vents to facilitate casting Narcomoeba and Prized Amalgam when necessary, which is very helpful against hate.
Copperline Gorge is the best land in the deck, as having green mana in your opening hand is essential. As long as you have green you can always Life from the Loam back lands of other colors, so make sure you have green before fetching your black.
There are no Gemstone Mines, as they play poorly with your desire to make land drops and cast Life from the Loam every turn. Steam Vents gives you a more consistent source of blue mana when necessary, and being able to tap your lands over and over allows you maximum usage of the Flashback on your copies of Faithless Looting.
Tip: I’ve said it before and I’ll say it again: you must start the game with at least two lands in your hand, one of which is green! Playing without Life from the Loam is putting yourself at a severe handicap. You can occasially keep one-land hands on the draw with a Faithless Looting, but don’t be afraid to naturally draw until you find your second land.
Next Week
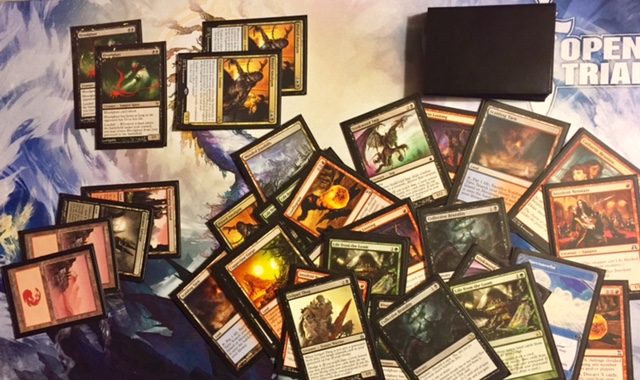
As we are over 3,000 words deep on the subject, we are going to finish up our guide next week. We’ve
gone over the deck as a whole, and next week we will explore the most important aspect of playing Dredge – sideboarding and playing sideboarded games against hate. We will also go over a number of starting hands as well as common lines of play the deck takes over the first few turns of the game. Last, we will talk about how to actually physically play the deck in paper so your games don’t end up looking like this:
Dredge is messy and complicated, but the payoff is worth it for #SCGCHAR and beyond if you want to play one of the best decks in the format. Did I mention it also has a very good matchup against almost all the Death’s Shadow decks?