
This Standard format might be on its way out, but B/U Midrange is on its way up. First Corey Burkhart took seventh place at Grand Prix Orlando with the deck. Then it took second at Grand Prix Los Angeles in the hands of Ben Friedman. That same weekend, Autumn Burchett won English Nationals with it. A week later, Emma Handy won the #SCGBALT Standard Classic. The deck went from being thought unplayable in the wake of Core Set 2019 to making the elimination rounds of every event in a month. What more do you need to be convinced that the deck is the real deal?
Hopefully nothing, because I’m not even going to try. My mission today is to speed run you through your first 40 or 50 matches with the deck, to take you from never having played the deck before to having a good understanding of how to sequence and what to prioritize in all the major matchups, and to explain how to sideboard and why so you can adjust when faced with the unexpected.
The tail end of this Standard format is pretty important to a lot of us with Grand Prix Richmond and the second weekend of Regional Pro Tour Qualifiers this coming weekend, and I don’t want to hear “I didn’t have time to learn it” as your excuse for not picking up B/U Midrange.
Here’s the list:
Creatures (14)
Planeswalkers (1)
Lands (26)
Spells (19)

It says “Emma Handy, first place at the #SCGBALT Standard Classic” up there, but since I just handed Emma the 75 cards Autumn and I had worked on together, it could just as easily say “Autumn Burchett, first place at English Nationals.” You can quibble over a couple of the card choices if you want, but at this point the pedigree of the list has me thoroughly convinced and I intend to run it back exactly for my Regional Pro Tour Qualifier this weekend.
If you’re interested in said quibbling, check out Autumn’s article last week about their experience winning English Nationals with B/U Midrange. There’s a discussion of card choices included therein, which you should absolutely read and think about before starting to make any changes to the list.
Teferi Control
We’ll start with the control end of the spectrum. U/W Control and Esper Control have enough differences that at points we will have to talk about them individually, but for the most part we can talk about them as a cohesive unit.
Creatures (2)
Planeswalkers (4)
Lands (26)
Spells (28)
Creatures (4)
Planeswalkers (3)
Lands (27)
Spells (26)
Here’s the thing: they win the super-late-game. B/U Midrange earns that Midrange moniker by passing on the bulk of Teferi Control’s late-game power. We don’t get Glimmer of Genius; we don’t get Azcanta, the Sunken Ruin; we get fewer Torrential Gearhulks; and, most importantly, we don’t get Teferi, Hero of Dominaria. If the game goes late enough, we won’t be winning.
But before we talk more about these very powerful weapons in our opponent’s arsenal, we need to have a firm understanding of what B/U Midrange gains in exchange for not playing with those cards.

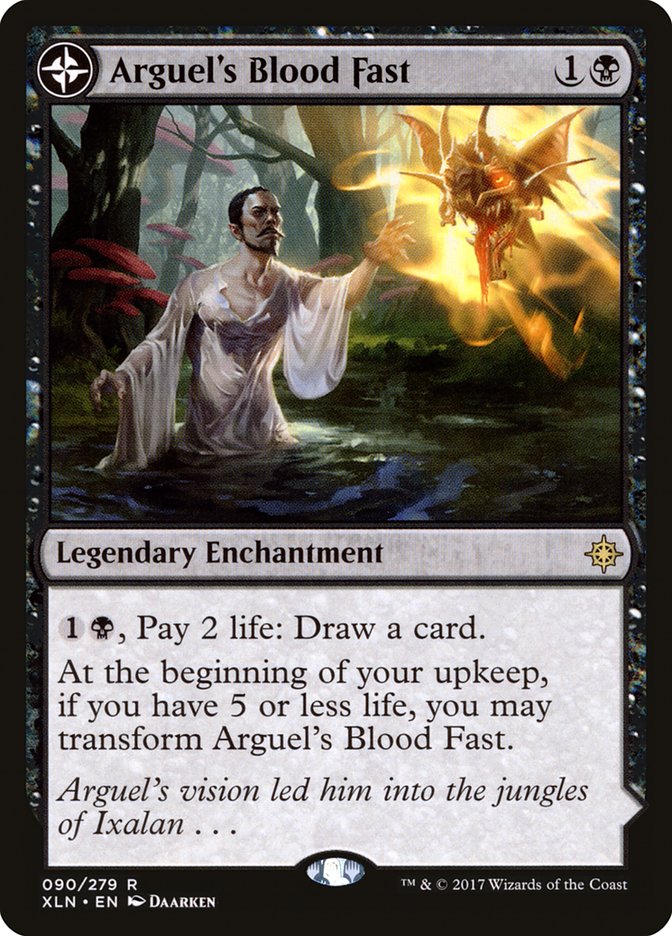

These three cards don’t represent literally all the cards B/U Midrange plays and Teferi Control does not, but they are the three that are the most important to our gameplan. Casting a Turn 2 Arguel’s Blood Fast is your easiest path to victory. When you have one on the battlefield, your main objective is to ensure you hit your land drop every turn. If you have your land drop guaranteed, I like drawing one extra card a turn and using the rest of my mana to present a threat. In this way you slowly run them out of resources while continuing to improve your position in the game.
Eternalizing Champion of Wits is your most powerful source of card advantage outside of Arguel’s Blood Fast and getting copies of Champion of Wits into the graveyard is a super-interesting subgame in these matchups. You generally should wait to cast Champion of Wits until you have another copy in hand to discard, as it can be tough to get a Champion of Wits into the graveyard from the battlefield. Esper Control is more than happy to spend a Vraska’s Contempt on Champion of Wits and virtually every removal spell in U/W Control will exile your Champion. You can always use Cast Down on your own Champion in a pinch, but you don’t really want to waste a Field of Ruin to enable revolt to do the same with a Fatal Push. Safest just to discard additional copies to the first one’s trigger.
A consequence of the power of the eternalize ability on Champion of Wits is that you don’t have to fear the late-game, just the super-late-game. You want to hit seven mana and start eternalizing, and that’s decidedly a late-game thing to do. Because this is part of your plan, you should value making your land drops very highly. It’s the only way you’ll keep up. You still need to find a way to end the game shortly after, but the infusion of resources of Champion of Wits often makes that academic. Keep in mind that eternalize can be stopped with Disallow, and the Champion will still be exiled.
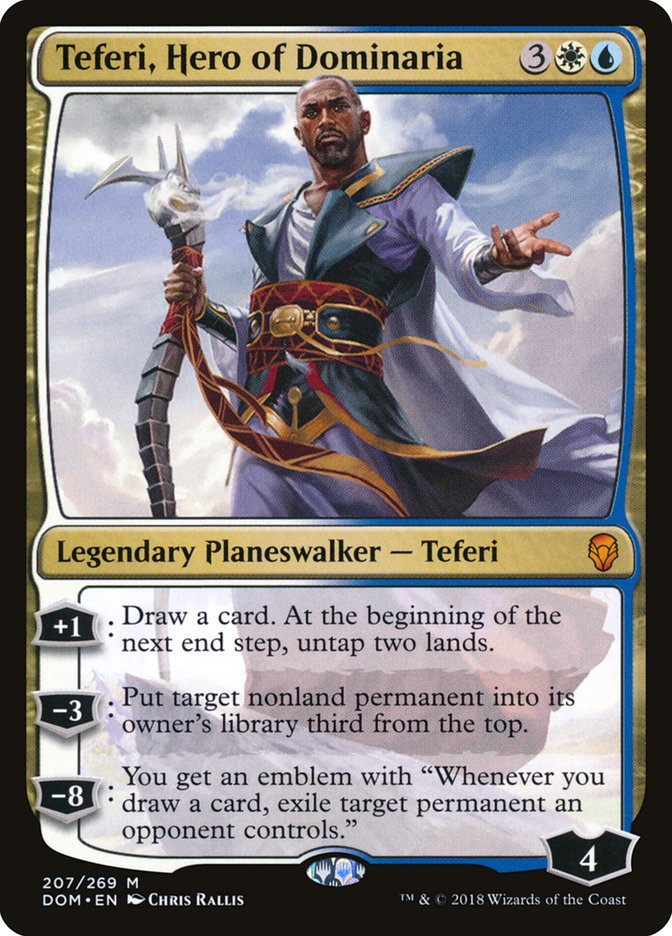
Teferi, Hero of Dominaria is the best card in the matchup. Not their best card in the matchup, the best card, period. He’s better than all your cards as well as all of theirs, and you need to respect that fact. This means constantly thinking about when they can land Teferi and what you can do about it. Specifically, the following:
- In pre-sideboard games, you will inevitably be down a card on any Teferi exchange. This is bad, but there’s not much you can do about it. After sideboard, the plan is to use Duress / Sorcerous Spyglass / countermagic, so make sure to plan the game out to make that happen. Vraska’s Contempt is not where you want to be. Pre-sideboard, your two Doomfalls and one Supreme Will can handle Teferi in that same elegant way, so use them for that purpose whenever the opportunity arises.
- Be very careful about how you plan out your turns in the mid-game. When your Teferi Control opponent has access to five or six mana, having mana up for Vraska’s Contempt on their turn is often the difference between being able to Contempt Teferi and getting your Contempt countered. Getting your Contempt countered is a nightmare.
- Developing your battlefield early is a great way to minimize the threat of Teferi. Having pressure on the battlefield reduces the effectiveness of Teferi and generally forces your control opponent to deal with your battlefield before deploying Teferi. This buys you much-needed time to find a plan that trumps Teferi.
Search for Azcanta is virtually unbeatable card for you if it gets going. The good news with this one is that we have a virtually unstoppable answer to Azcanta, the Sunken Ruin: Field of Ruin. Sure, it’s possible for them to use a Disallow to stop it, but it’s generally trivial to find a window in which you have free rein. Their Disallows are pretty taxed in the matchup anyway, so you rarely see this happen.
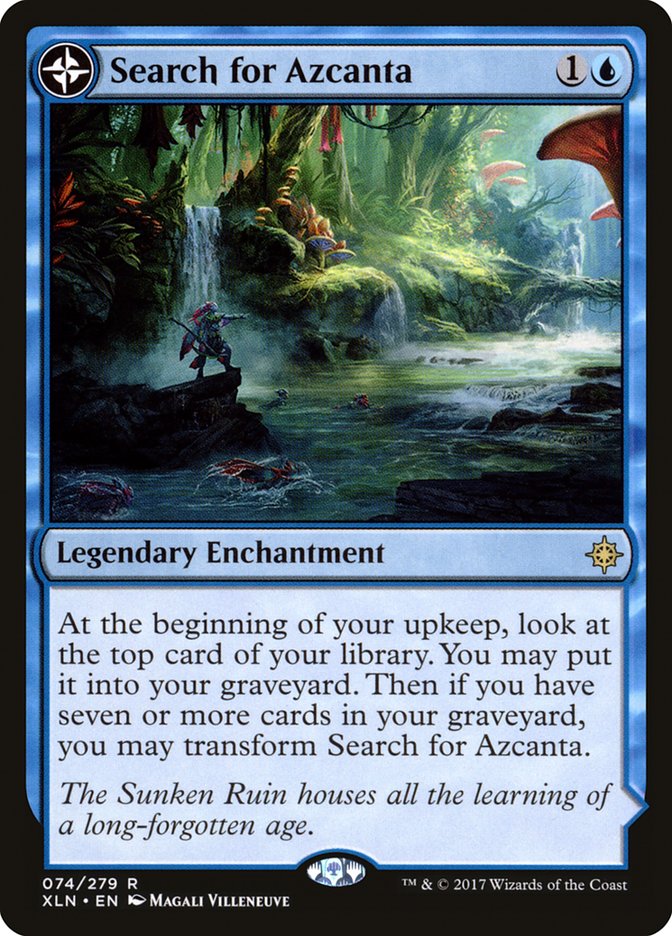
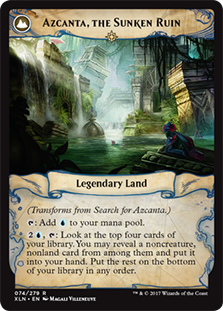
What this means for you is that you need to value Field of Ruin highly. You almost never want to discard it to Champion of Wits and you need to hold it in your hand as long as possible. They play Field of Ruin too, after all, and letting their Field blow up yours before Search for Azcanta transforms is a disaster. Always play Field as your last land drop, and in some circumstances skipping a land drop to keep it your hand is the right play.
As for Glimmer of Genius, there’s not much to be done besides shrug and let them have their extra cards. After sideboarding you’ll find yourself countering it maybe 30% of the time, when they look pinched on resources and it’s particularly mana efficient for you to do so, but most of the time you’re better off ignoring the Glimmer and fighting the cards that matter. The worst part is that the classic “Glimmer trick” of playing your important spells into their Turn 4 Glimmer mana is now exceptionally risky, as that means your shields are down for them to untap and Teferi you.
Here are the baseline sideboarding plans for the control matchups. You might notice that they are very similar to the ones Autumn Burchett included in their article last week; I’m reprinting them here mostly so you don’t have to go back and reference another article, although Autumn and I do disagree on a couple of small points.
VS U/W Control
Out:

In:
VS Esper Control
Out:
In:
We want more-or-less the same cards in both matchups, but the cards we take out differ a bit. Mostly the difference can be attributed to either the additional Torrential Gearhulks that Esper Control plays or the different sideboard swerves that the decks employ. Esper looks to sometimes sideboard in Glint-Sleeve Siphoner to abuse your lack of removal in post-sideboard games, while U/W Control does the same with Baral, Chief of Compliance or History of Benalia, depending on the build.
Either way, access to countermagic and discard changes this matchup a lot. Protecting The Scarab God with a Negate can make it actually stick and Teferi is a lot less threatening when you have the ability to stop him with a Jace’s Defeat. Your Torrential Gearhulks also get much better after sideboarding when they gain the ability to reliably Flashback countermagic.
One last thing to talk about before we move on: The Chromium Problem.
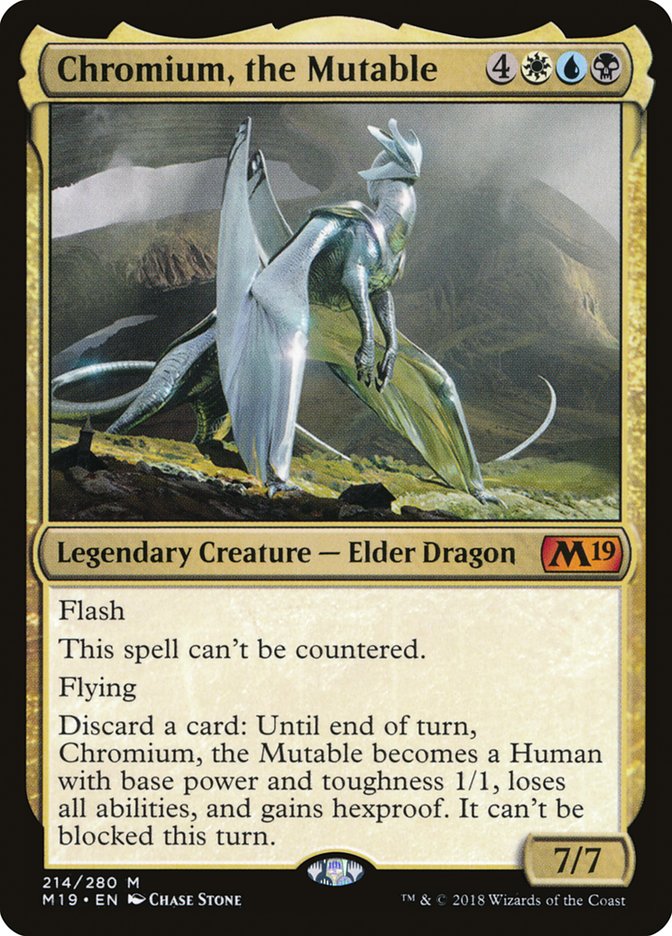
On balance, I think Esper Control is quite a good matchup for B/U Midrange. Chromium, the Mutable out of the Esper Control sideboard shifts that dramatically. It’s very difficult for B/U Midrange to beat Chromium. If it weren’t for Chromium, I’d be advocating for builds without any copies of Doomfall in the 75, as I think the card costs half a mana more than the effect is worth in most game states right now. But in the Chromium world we live in, such is the price we pay.
Keep in mind that you can use Sorcerous Spyglass to name Chromium, the Mutable in a pinch to make it vulnerable to removal. Not naming Teferi, Hero of Dominaria is a steep cost, but you do what you have to do.
Bant Nexus
Moving right along, let’s consider the Bant Nexus deck:
Planeswalkers (5)
Lands (26)
Spells (29)
There’s been a lot of discussion about this deck since it broke out at Pro Tour 25th Anniversary. One of the big things we’ve come to realize since then is that the way to fight this deck is to attack the enablers.
These are the cards that let the Bant Nexus deck reliably take the rest of the turns, and these are the cards that you need to prioritize dealing with. Unlike the matchup against Teferi Control, you don’t have to put a huge emphasis on answering Teferi cleanly. It doesn’t matter if they go up a card in the exchange because their deck is a pile of useless cards if they don’t have one of these troublesome permanents on the battlefield. As such, your Vraska’s Contempts are among your best cards.
Answering their cards that actually let them win the game is your first priority, but you must do so behind some kind of clock. The reason this matchup is so good for B/U Midrange is Glint-Sleeve Siphoner. Beating their Teferis one at a time while giving them infinite time to find another is not a winning proposition. Champion of Wits will do in a pinch, but getting a four-power clock onto the battlefield in the early turns followed by answering as many Teferis and Searches as they find is the easiest way to win the matchup.
Here’s how we sideboard.
Out:
In:
The cards we want in out of the sideboard are easily apparent. It’s less obvious what we want to take out. The sideboard plan above is excellent against most Bant Nexus players, whom you can expect to bring in some kind of cheap creature like Baral, Chief of Compliance to leverage you cutting your removal spells. Baral is very effective against us and keeping Fatal Push in to hedge against that possibility is a smart move.
It’s almost free to do so, as we have a lot of rather ineffective cards in the matchup. It might be surprising to see The Scarab God and Liliana, Death’s Majesty not make the cut after sideboarding, but the truth is that we can never afford to tap out for these expensive five-drops. Keeping countermagic and/or Vraska’s Contempt up is too important and resolving these spells doesn’t even matter very much. They are too slow to be the clock we need and it’s far better to rely on Glint-Sleeve Siphoner and Champion of Wits for ending the game. Torrential Gearhulk gets a pass here because it doubles as a piece of relevant interaction.
That being said, if your opponent is on the Carnage Tyrant plan, it’s correct to leave a couple of copies of The Scarab God in. The easiest way to beat Carnage Tyrant is just to double-block with a couple of 4/4s revived with The Scarab God. Carnage Tyrant is beatable even without The Scarab God, as you can line up a double-block with Torrential Gearhulk and anything or some eternalized Champion of Wits tokens can enter the fray, so you aren’t out of luck if your opponent casts a Carnage Tyrant you weren’t expecting. Just adapt for the next game.
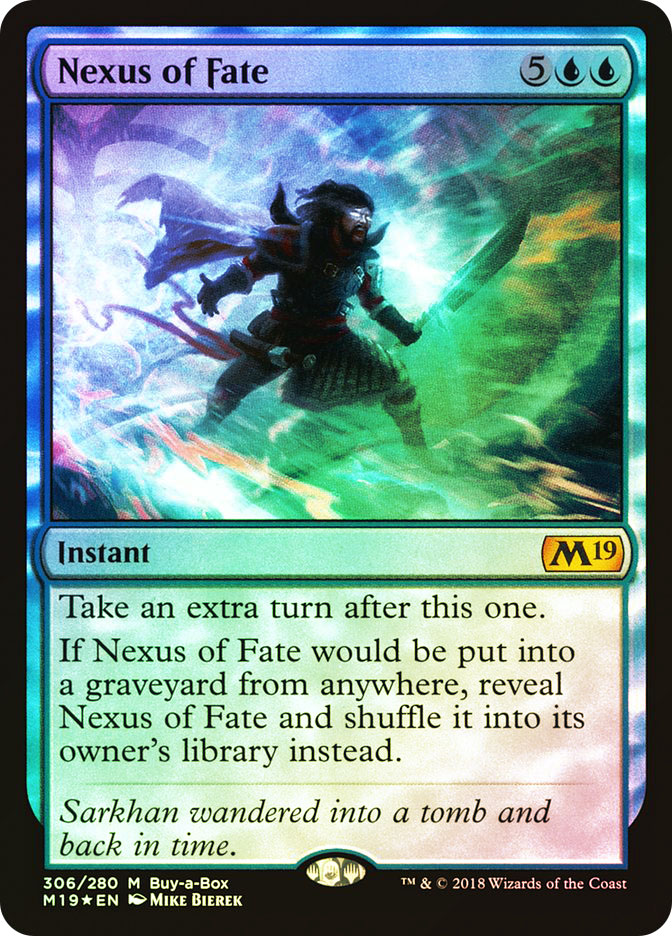
You rarely want to counter this and you rarely want to take it with Duress. If they don’t have an Azcanta, the Sunken Ruin or a planeswalker on the battlefield, Nexus of Fate does not matter. I get that it’s scary when they cast a Nexus of Fate in your end step and are looking to take two turns in a row, but if you have countermagic up, just save it for the Teferi. On the other hand, if they have a planeswalker or Azcanta out, absolutely counter the Nexus of Fate. You’re not in a good spot regardless, but it will buy you some time to maybe find an answer to whatever it is they have on the battlefield and hopefully get back to parity.
The Mirror
I’ll just cut right to the chase:
Arguel’s Blood Fast is the most important card in the mirror. It’s very hard to lose a game where you have it and your opponent does not, and it’s very hard to steal a game where your opponent has Arguel’s Blood Fast and you do not. The Spell Pierce in the sideboard is there almost entirely to give an additional piece of interaction that stops Turn 2 Arguel’s Blood Fast, if that says anything about how important the card is.
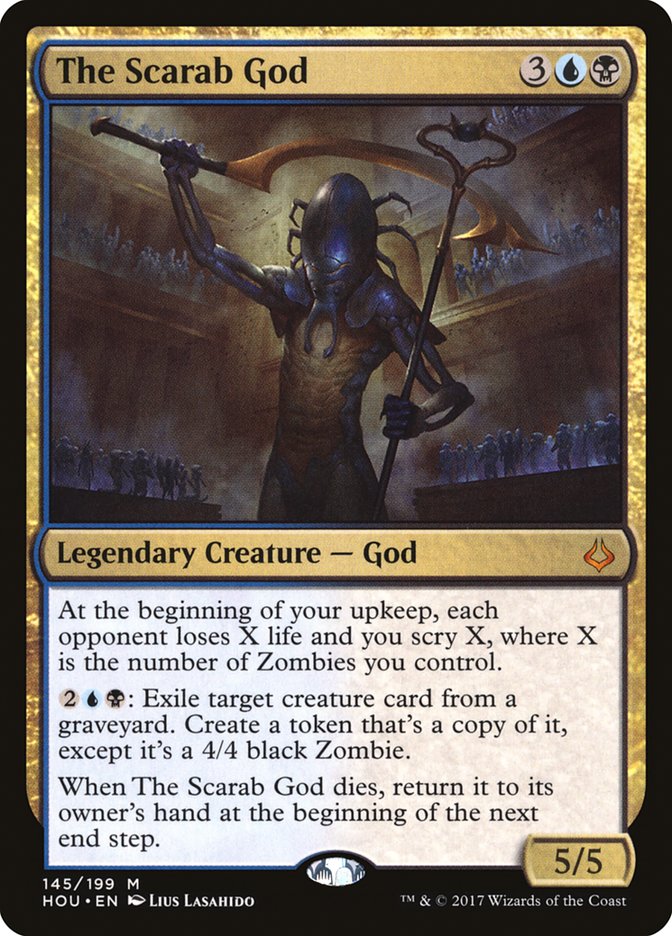
After Arguel’s Blood Fast, The Scarab God is the card that matters the most in the mirror. It’s also the card that decides the most games…and the card that is the easiest to throw a game away with by playing incorrectly.
You should almost never tap out for The Scarab God on Turn 5 into open mana. If they have Vraska’s Contempt, you lose the game virtually on the spot. If they don’t have Contempt, you might win the game on the spot, but they have it a whole lot more often than they don’t. Still, because of that free win potential, there are some circumstances that make running The Scarab God out on five correct, mostly the need to convert extra copies of The Scarab God in your hand into real resources. You’ll still be playing out of position for the next while after making that exchange, though, so be careful.
Hitting nine mana and playing out The Scarab God with an activation open is a very real thing that decides a lot of games in the mirror. Because of this, in the super-late-game, Essence Scatter is a much more valuable piece of interaction than Vraska’s Contempt because it can trade one-for-one with The Scarab God no manner how much mana your opponent has. Another consequence of this play pattern is that hitting your land drop turn after turn is invaluable in this matchup.
One last note on The Scarab God: Liliana, Death’s Majesty can set up uncounterable The Scarab Gods with all your mana open if she survives a turn. Discarding The Scarab God to Champion of Wits is the easiest way to set this up, short of running a copy of The Scarab God into an Essence Scatter and hoping that they don’t have Vraska’s Contempt instead.
Champion of Wits is the most reliable source of early pressure in the matchup. Glint-Sleeve Siphoner is obviously great but is a priority removal target in a matchup with more removal than it knows what to do with. Champion of Wits, on the other hand, is a creature with power and toughness that the opponent actively wants to never remove, unless it’s with Vraska’s Contempt.
Pulling ahead with the eternalize half of a Champion of Wits is one of the easiest ways to guarantee victory in the matchup, so having a Champion of Wits in the graveyard is often better than having it on the battlefield. For this reason, you generally want to discard any other Champions you have in hand to the first’s trigger, but because every attack is worth a card versus an Arguel’s Blood Fast, you don’t want to wait to find a second Champion before you cast the first.
Here’s the sideboard plan.
Out:
In:
Despite looking a lot like a control mirror, the creatures are what really matter in this matchup. I watch a lot of players come out of sideboarding in the mirror with a 60 chock-full of Negates and Duresses, and they typically lose handily. You need some of that effect to fight Arguel’s Blood Fast, but overdoing it will spell disaster. Note that on the draw you want Spell Pierce in your deck for that reason.
Glint-Sleeve Siphoner gets much better after sideboarding, as the early removal spells are some of the worst cards in the matchup. In Game 1, Siphoner rarely lives; after sideboarding, a Turn 2 Siphoner might live to see an upkeep. Because of this, I like having an extra Fatal Push or two in my deck on the draw over some of the three-mana interactive spells like Supreme Will or Never.
Mono-Green Aggro
We’re through with the midrange decks and on to the aggro side of the matchup spectrum. We’re also on to one of the worst B/U Midrange matchups, so that’s fun.
Creatures (28)
- 4 Llanowar Elves
- 4 Verdurous Gearhulk
- 4 Servant of the Conduit
- 3 Greenbelt Rampager
- 3 Rhonas the Indomitable
- 4 Steel Leaf Champion
- 4 Vine Mare
- 2 Thorn Lieutenant
Lands (22)
Spells (10)
Your gameplan in this matchup is relatively simple: you want to kill a lot of their creatures and then take over the game with The Scarab God. This is your plan against most creature decks, and it’s a good one. Here are the problems:
- Your removal doesn’t line up very well. Fatal Push is great at what it does, but what it does is not reliably kill Steel Leaf Champion. This matchup is one of the big reasons you see two copies of Cast Down in the 75.
- Your early creatures either can’t block or can’t block effectively. Against the red decks, your creatures have a hidden ability of at least being a little relevant. Casting them can force your opponent to cast a Goblin Chainwhirler they didn’t want to or let you get a trade out of them. Mono-Green just doesn’t care at all about your Glint-Sleeve Siphoners or your Champion of Wits.
- When Mono-Green pulls ahead, it’s very difficult for the lifegain from Temple of Aclazotz to matter at all.
- Blossoming Defense is a beating, but not all builds play it. Vine Mare is also a beating, and unfortunately nearly all builds have access to it in the 75.
We don’t have a huge amount in the sideboard to shore up this matchup:
Out:
In:
Ultimately, you need The Scarab God to get online to have any hope of overpowering what the Mono-Green deck is doing. Finding it and getting going is very important, but it will be far too slow if you aren’t also dealing with their creatures. Both halves of the equation are important and getting both in place is a difficult tightrope to walk.
Essence Scatter is by and large your best piece of interaction, and the only one you should consider saving for better targets. Fatal Push anything you can when you can; who knows when you’ll get revolt again or when they will draw another Heart of Kiran. Vraska’s Contempt manages most things, but keeping the battlefield contained is important enough that whatever’s on the battlefield right now is likely the most important threat. Essence Scatter, on the other hand, is the only thing you have that can reliably deal with a Vine Mare, and that’s very important.
After sideboard, you also must deal with some scary planeswalkers: Vivien Reid and Nissa, Vital Force. How heavy Mono-Green leans on these planeswalkers varies from build to build, but if you see or suspect a higher than normal amount of planeswalkers from your opponent, you should probably sideboard in Negate. Planeswalkers are also a reason to be a tad more conservative with your Vraska’s Contempts in post-sideboard games.
Fortunately, Mono-Green Aggro seems to have all but disappeared from the winner’s circle these days, likely due to the rise in popularity of Bant Nexus. The matchup is rough, but relatively uncommon, and it shouldn’t scare you off B/U Midrange. It’s also very winnable if you play well and things break your way.
But What About The Red Decks?
Over 3500 words and I’ve yet to say a single word about Goblin Chainwhirler or Bomat Courier. Mountains are easily the most important matchup to know for any deck in Standard right now, and I could easily write another 3500 words about just the Red Aggro matchups. Truth be told, they are intricate enough to deserve their own article.
Fortunately, they’re getting one. On the way to her #SCGBALT Standard Classic victory, Emma Handy played against various forms of the red deck a whopping seven times out of ten total rounds. Since she did in fact win that tournament, it’s safe to say she knows a thing or two about how to go about winning that matchup, and she’ll be telling you all about it later this week.
To tide you over until then, here are some quick notes:
- Your life total isn’t everything, but it’s nearly everything. You can afford to fall to around eight or nine to help make your removal spells line up correctly, but much lower than that is asking for trouble.
- You can’t let Bomat Courier run free, so kill it sooner rather than later and save some points of damage.
- If you ever get to trade a Glint-Sleeve Siphoner for a real card, snap it off. These opportunities don’t come often. Sometimes they will attack their Bomat Courier into your weak-hand-prompted Turn 2 Glint-Sleeve Siphoner, though, and you should block every time.
- Their most singularly important cards are the ones that overload your Vraska’s Contempts: Hazoret the Fervent; Chandra, Torch of Defiance; Rekindling Phoenix, and Glorybringer.
- You win most games by answering a few creatures and then slamming a copy of The Scarab God, but Torrential Gearhulk flashing back Vraska’s Contempt generally will win the game just as easily.