

I am a little old for that picture to evoke my childhood. Mighty Morphin’ Power Rangers came out in 1993, while I was in middle school and already mostly
over watching “kids shows.” I had my stint of tuning in to Conan the Adventurer as soon as I got home every day, and I could sing the theme songs to Gummy
Bears, Duck Tales, Chip and Dale’s Rescue Rangers, and more (and still can, in fact), but by the time Mighty Morphin Power Rangers was on the air, I’d
moved on to more adult programming. You know, like Saved by the Bell.
Or Magic. I am old enough to remember when morph was around for the first time. In fact, Onslaught Block was the period during which I had a great deal of
success in Limited. Most of my best finishes in my career have been with sixty card decks. Of my thirteen Grand Prix Top 8s, nine of them are in
Constructed. But of my three wins, one of them came in Limited, and that was Grand Prix Boston in 2003. The format? Onslaught/Legions Booster Draft. A
major factor in my success in the format was my ability to play effectively with and against morph creatures.
Magic is always a game of imperfect information, because you never know exactly what your opponent has in their hand. You can only extrapolate what they
could possibly have based on the actions they have taken during the game. Each of your opponent’s actions has meaning. Have they been leaving 1W up every
turn? Did they attack their 2/2 into your 3/3? They could be bluffing, or they could have Feat of Resistance in their hand. Learning the possible tricks
you might face is essential to giving yourself the best chance to succeed in a Limited format.
Morphs take this dynamic and extend it to apply to cards in play as well. Your opponent’s tricks are no longer limited by what they have in their hand.
Every face down creature on the battlefield could potentially have a nasty surprise waiting for you.
Much like with typical combat tricks, the most important tool at your disposal when facing morphs is knowledge. At a bare minimum, you should be familiar
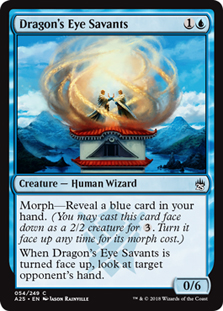
with all of the common morph creatures in the format. Let’s take a look.
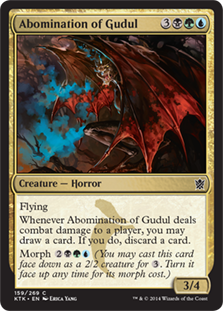
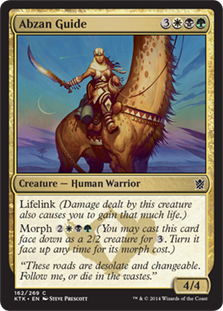
![]()
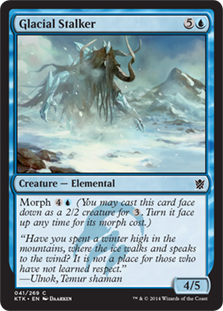
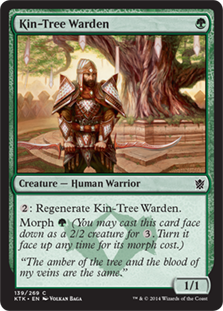
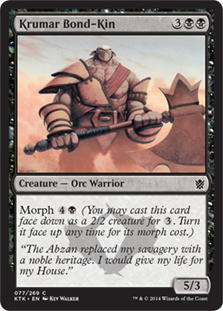
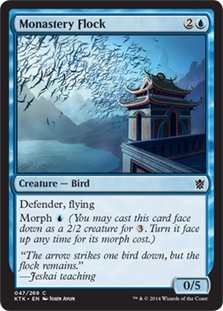
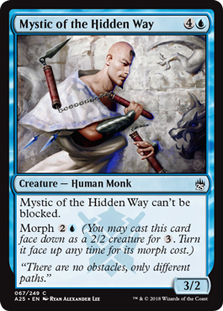

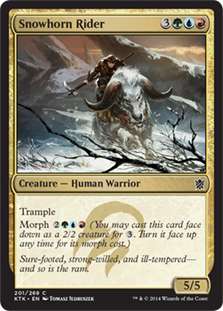
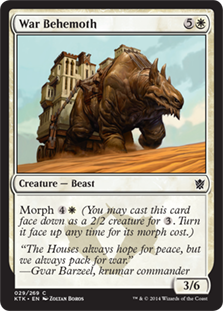
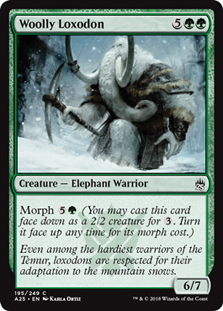

Study these cards. Your knowledge of them is going to play a huge part in your ability to succeed in Khans Limited.
No, really. Study them. Right now. There will be a quiz shortly.
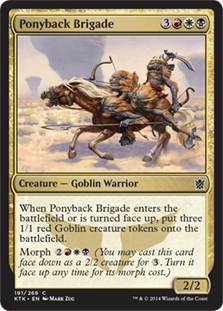
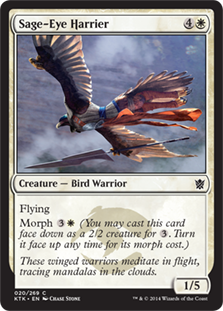
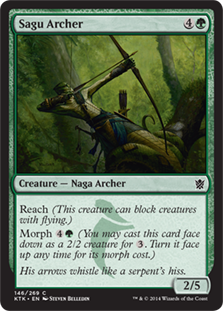
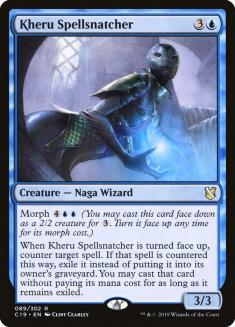
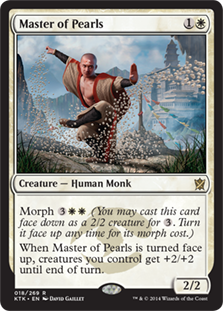
Less crucial, but still important – the uncommon morphs:
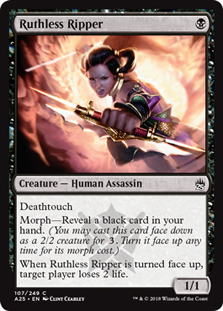
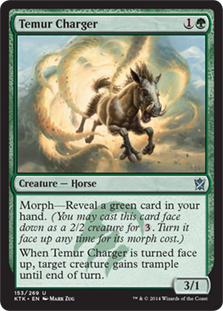
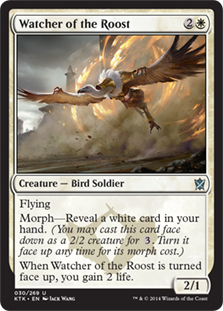
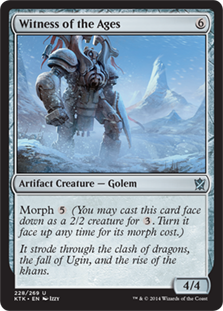
These make things a bit more complicated. All of the common morphs have mana costs, while many of the uncommons have alternate costs you can pay to flip
them face up. There’s an important thing to note about all of the alternate cost morph creatures though. None of them will win a fight against another
morph-sized creature, and none of their “when turned face up” triggers will alter the outcome of a combat. Sure, Watcher of the Roost may keep your
opponent alive when you thought they were going to die, and Temur Charger might mean you’re taking a lot more damage than you expected on defense, but all
of them will at best force a trade with an opposing 2/2. The most dangerous of them from a combat perspective is likely Ruthless Ripper, which can force a
trade against a large creature for no extra mana investment, but that’s a far cry from flipping into a 3/3 or 4/4 and just eating something that you
attacked into it.
That’s the biggest difference between the modern world of morphs and the original Onslaught era. Back then, if you got into a morph vs morph battle in the
early turns of the game, you could find yourself facing a 3/4 First Striking Daru Lancer as early as the fourth turn, or even a Zombie Cutthroat at a zero
mana investment from your opponent. Not only that, but there were morphs in the same color that punished you for whatever different action you might take.
If you blocked, your opponent could have a Battering Craghorn and kill your creature with first strike. If you let it through, it could be a Skirk Commando
that could take out your creature anyway.
If that weren’t already bad enough, it was also back in the days when damage still used the stack. What that means is that if two morphs got into combat,
players could choose to flip them over before or after damage “stacked,” at which point the damage that would be dealt to each of the creatures would be
locked in. That made the seemingly innocuous Gravel Slinger – a 1/3 morph that flipped for 1W that could tap to deal one damage to an attacking or blocking
creature – something of a powerhouse, because you could attack with it and induce a block, stack damage, and then pay two to flip it face up so it survived
with its three toughness while your opponent’s creature died.
Suffice it to say those were messy times. With so many ways for things to go wrong, there were many attacks and blocks players wished they could take back.
Thankfully, we live in calmer times, and there are neither Skirk Commandos nor Zombie Cutthroats nor damage on the stack to worry about.
We do have to worry about some fancy rare morphs, though. Keep in mind that these won’t come up nearly as often as the other morphs we looked at earlier,
but they are valuable to know regardless. You don’t want to be the person who gets blown out because you didn’t know what was in the set!
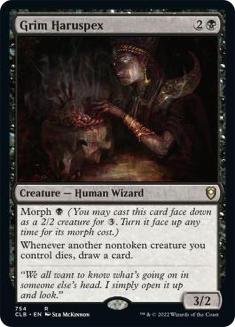
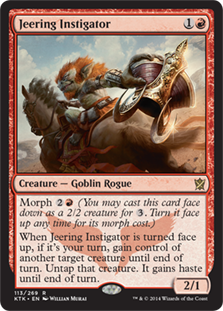
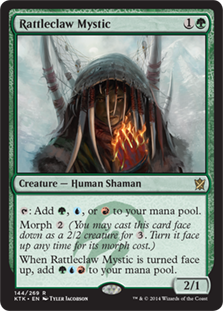
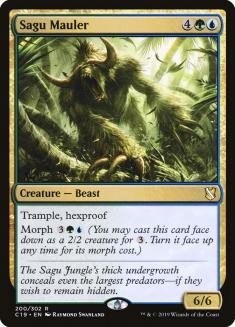
There are some pretty big effects here, but thankfully that’s the operative term – big. There’s nothing that can wreck you in combat early in the game,
though there are a lot of things that can really turn the tide once things go late. Grim Haruspex can certainly make what you thought were even trades go
ugly, and Jeering Instigator can make you dead out of nowhere, but at least you don’t have to worry about your creature dying for free when you decide to
block on the fourth turn!
Speaking of which – pop quiz, hot shot. Here’s the board situation. What morphs can your opponent have that could cause trouble for you block? What about
if you let it through?
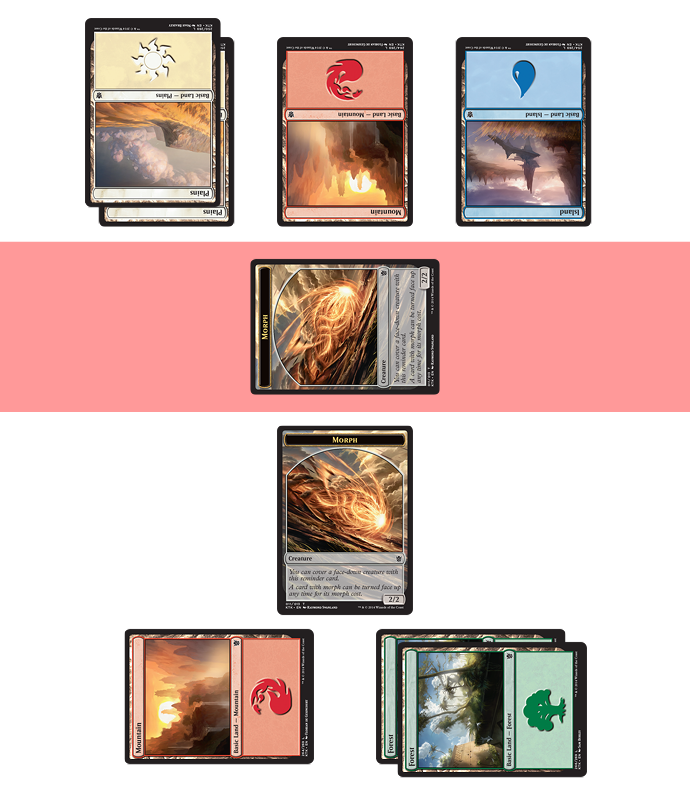
The answer is nothing, save maybe a few points of extra damage if they invest their entire turn into flipping their creature. That’s actually a unifying
theme through all of the morphs in the set. There are no morphs that can kill another 2/2 creature and live with a flip cost of less than five mana. If
your opponent plays a morph on turn 3, and you play a morph of your own, and then they attack, there is not a single creature that can punish you for
blocking – or not blocking, for that matter. In that scenario, if your opponent wants to get you, they’re going to have to play some kind of trick from
their hand, or else you’re trading at worst.
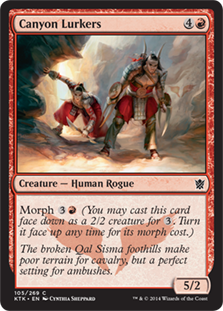
How about here?
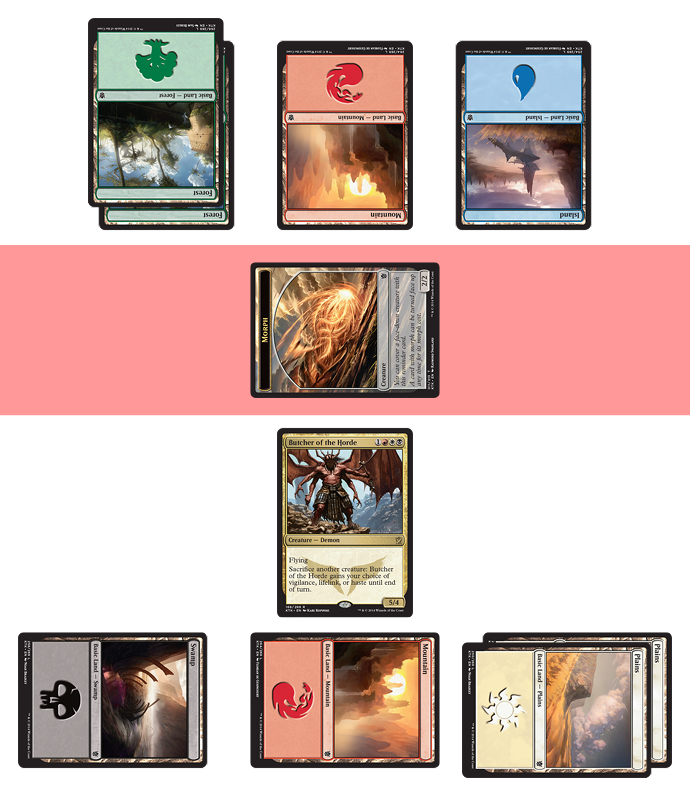
If our opponent is attacking a morph into our 5/4, something is probably up. With the mana our opponent has available, there is only one morph that we
really don’t want to block, and that is Canyon Lurkers, which flips into a 5/2 for 3R, which would cost our opponent their entire turn in order to trade.
This is far from a clear cut scenario though. In this case, we have to consider what motivations our opponent might have for attacking. After all, we don’t
just have a random 5/4 creature in play – we have Butcher of the Horde, which is a creature that can very easily win the game by itself if given the
opportunity. Our opponent very well may be attacking in the hopes of sneaking a few points of damage through because they think we’ll value our Butcher
highly enough that we won’t be willing to risk it by blocking here. If they have a relatively weak hand, it may be their only way to win the game.
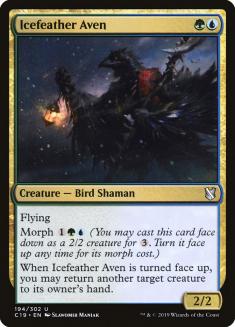
The opponent could also have Icefeather Aven, which makes the attack something of a semi-bluff. If we block, they can use the Aven to bounce the Butcher
and they won’t lose their creature. If we let it through, they get in two points of damage and get to use their mana on something else that turn thanks to
our adversity to putting our Butcher of the Horde at risk.
In any case, whether we choose to block or not, it’s important to take note of which morph it was that our opponent attacked with into our Butcher once it
is eventually revealed, because that gives us a lot of information about the kind of plays our opponent is willing to make.
How about this one?
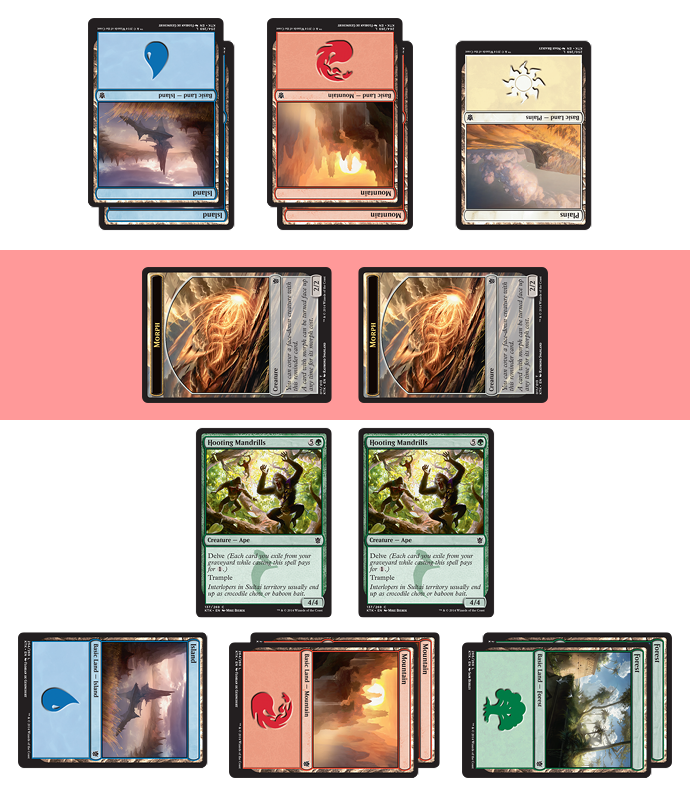
What can go wrong here?
The answer, it turns out, is a lot. This is actually similar to a decision that I put a lot of my opponents to in the Prerelease, and it almost always
turned out in my favor. The general instinct here for a lot of players is to block both, thinking that the worst case scenario here is that they eat one of
their opponent’s morphs and get eaten by the other one, since their opponent doesn’t have enough mana to flip two big creatures. That feels like a good
trade, on the surface, because your opponent probably has to spend most if not all of their mana in order to unmorph something big enough to take down your
4/4s.
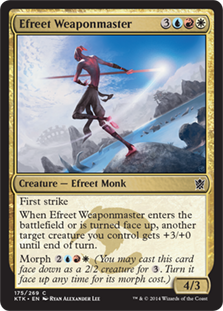
Here’s the problem with that plan.
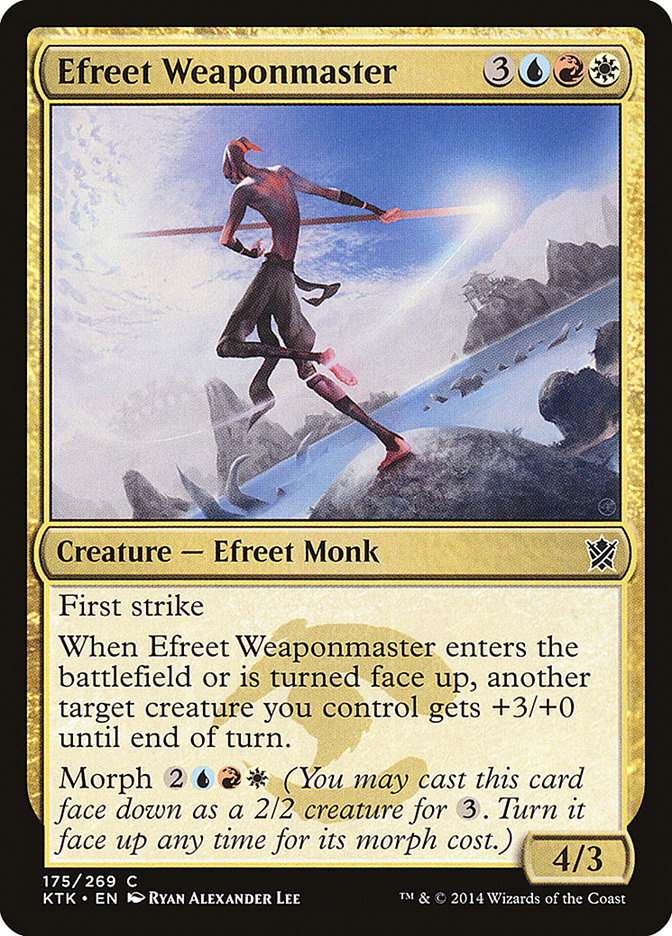
If you block and either of your opponent’s creatures are an Efreet Weaponmaster, you lose both of your creatures and they only lose one! Now
that’s a blowout.
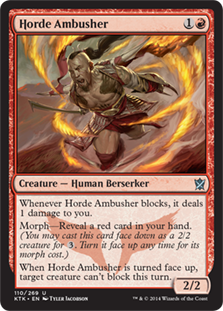
Efreet Weaponmaster is probably the most important of the common morph creatures to keep in mind, because unlike the others it can impact combats in which
it is not itself participating. Add to that a four power first striking body and you can end up with a lot of regretful sighs when it’s flipped face up.
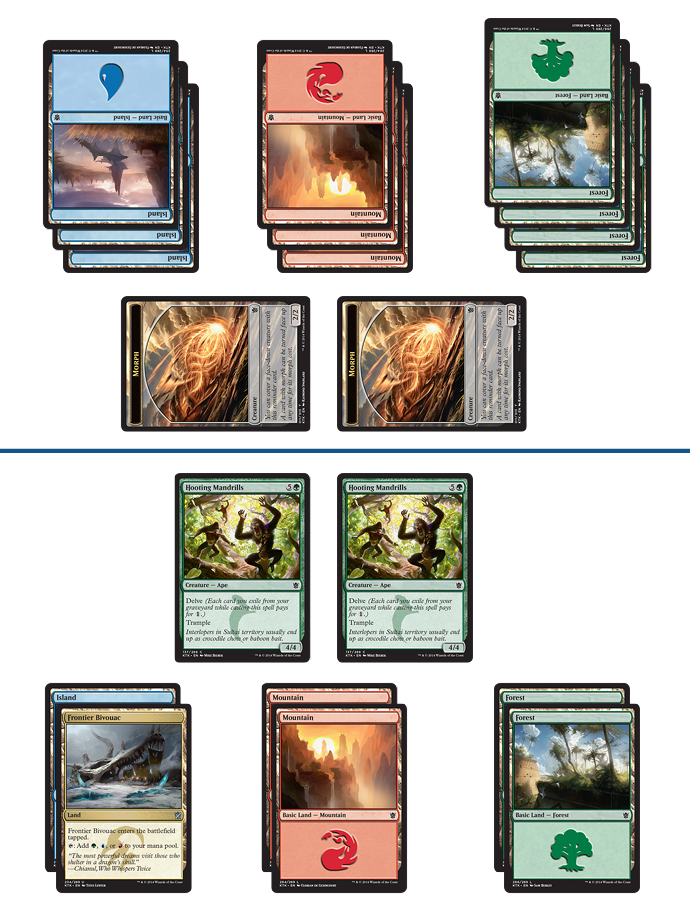
First of all, I’m not really sure why we’re playing with so many Hooting Mandrills, except for the fact that they’re the first simple 4/4 creature I found
while looking through the Khans file and now I think it’s kind of funny.
Secondly, what’s going on here? Aren’t we talking about morphs in combat? Our opponent’s morphs are tapped – why does it matter what they are if they’re
tapped?
Well, as we just explored with Efreet Weaponmaster, some morphs in this set can have an impact even when they’re not involved in combat – and some can get
into combat when you least expect it!
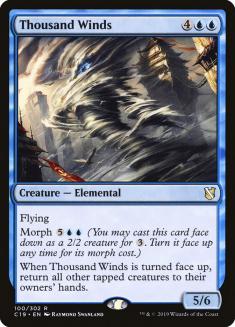
If we attack all out with both of our creatures, what’s the worst that can happen?
Terrible, terrible things.
The biggest blowout is probably Thousand Winds, which would allow our opponent to bounce both of our creatures to our hand if we sent them both. That’s
pretty much a disaster, since Hooting Mandrills certainly aren’t easy to cast!
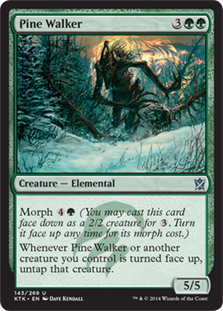
Even outside of the rare, we could run into Pine Walker. Pine Walker has the easy-to-overlook ability that it untaps itself and other creatures that flip
face up, so you could easily be sending your 4/4s into a Pine Walker and Glacial Stalker and end up with absolutely nothing at the end of it. At the
pleasant end of the spectrum, we could just be looking at Icefeather Aven to buy our opponent some time.
In any case, it’s important to recognize that morphs in Khans can do a lot more than attack and block – they have a lot of abilities that can be relevant
even when it doesn’t seem like they’re going to be involved in combat.
So what’s the take-away? First things first – learn your morphs, especially the commons. You should know what your opponent’s face down creatures could be
at any stage of the game and what they can possibly flip up with their available mana.
Pay attention to the order in which your opponent plays their morphs and the decisions they make regarding attacking and blocking with them, and look for
patterns in the way they play. Do they play their creatures with the highest morph costs early because they expect them to trade, or do they play their
cheapest morphs first because they want to try to flip them up quickly? Did they attack a few times with a morph and then stop attacking right before they
got to a certain mana threshold? There’s a good chance that creature morphs for that much mana, so they were trying to save it for an opportunity to flip.
Pay attention to your own tendencies too. Try to avoid being predictable, especially against strong opponents. See yourself consistently falling into some
of the patterns I mentioned above? Try to mix things up. And take opportunities to bluff, especially when your opponent is risking a lot to call you, like
the Butcher of the Horde example above.
Morphs are incredibly complex, and most of the difficulty in playing with and against them lies in trying to keep track of all of your opponent’s actions
and figuring out what they could mean.
How’d you do on the quizzes here? Unless you knew the answers to every one, you’ve got some studying to do before you, too, can be a Mighty Morphin Power
Ranger.