As of the time of writing this article, the Mythic Invitational Top 8 is underway. Unfortunately I’m not in it – I went 9-5, which was good for Top 32 – but Matt Nass is and he’s playing an almost identical build of Mono-Black God-Pharaoh’s Gift (only a couple of sideboard differences). I think the deck happens to be quite strong, and well-positioned for the expected Mythic Invitational metagame. Here is the decklist:
Creatures (30)
- 2 Massacre Wurm
- 4 Cryptbreaker
- 4 Ravenous Chupacabra
- 4 Stitcher's Supplier
- 4 Priest of Forgotten Gods
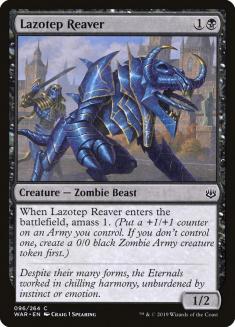
- 4 Lazotep Reaver
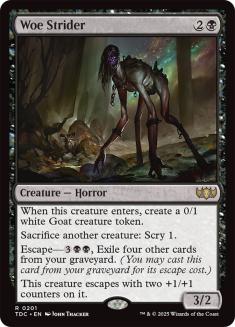
- 4 Woe Strider
- 4 Fiend Artisan
Lands (24)
Spells (6)

Mono-Black God-Pharaoh’s Gift is, much like Historic Goblins, an aggro-combo deck with very distinct plans. For Goblins, these plans are A) Muxus, B) beating down with Goblins. For Mono-Black God-Pharaoh’s Gift, the main plan is God-Pharaoh’s Gift, but Plan B can change a lot depending on what’s going on in the game – we’ll talk through the possibilities farther ahead. Just like with Goblins, the most important thing in each game is figuring out what kind of game you’re playing, as this will impact your sideboarding, mulliganing and in-game decisions. There’s no quicker route to defeat than trying to combo off in a game you should be trying to win fairly or vice versa.
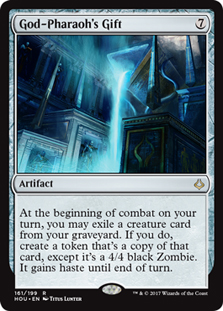
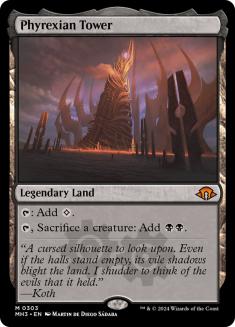
The main plan of the deck is quite straightforward – you get a God-Pharaoh’s Gift on the battlefield and win the game from there. This can be done by getting six creatures in the graveyard and activating Gate to the Afterlife, or just by hard-casting God-Pharaoh’s Gift. Between Phyrexian Tower and Priest of the Forgotten Gods, getting to seven mana is not actually that hard, which means God-Pharaoh’s Gift is not even a bad card to draw in a lot of situations, which is part of the reason I don’t particularly mind playing two in my maindeck.
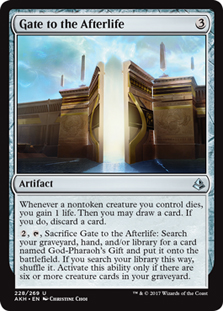
It might seem like six creatures in the graveyard is a lot, and in some games it can be, but it’s usually not very hard to accomplish this unless the opponent is disrupting you in some way. Stitcher’s Supplier by itself will usually put like four creatures in the graveyard if you have a way of sacrificing it, and the deck has sixteen sacrifice outlets – Phyrexian Tower, Woe Strider, Fiend Artisan, and Priest of the Forgotten Gods – as well as the original sacrifice outlet of blocking. Gate to the Afterlife and Cryptbreaker offer you ways of putting creatures in your graveyard directly from hand as well.
I mentioned a deck’s Plan B earlier. With Goblins, if you are not combo-killing them with Muxus, Goblin Grandee, then you’re beating down with Goblins. This can take some different forms (for example, sometimes Krenko, Mob Boss is involved, sometimes it isn’t), but it’s usually just a beatdown plan that can include different cards depending on what you draw. The Plan B of Mono-Black God-Pharaoh’s Gift is significantly more complex, as it can take many forms depending on what you’re playing against and what the game looks like in a particular moment.
One of the secondary gameplans is “Zombies,” which is led by Cryptbreaker. It’s not uncommon for you to be able to activate Cryptbreaker to draw extra cards starting on Turn 2 – Lazotep Reaver alone enables this, as well as a combination of Cryptbreakers and Stitcher’s Suppliers.
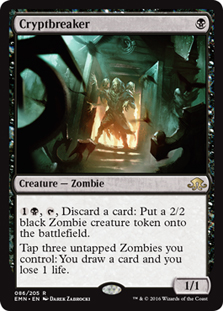
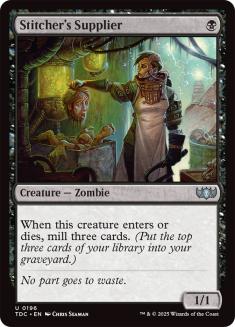
This is a good start against literally any deck, but it should be your default Plan B against decks that don’t have a lot of spot removal, such as Azorius Control or Bant Control, as Cryptbreaker and two Zombies are enough to force a Wrath of God every time (plus these are the decks you have the most dead cards against, so there’s usually something convenient to discard). Against these slower decks, Cryptbreaker alone is often enough to get the engine going – they can’t easily kill it, so you just make some Zombies with its other ability until you have three of them. You should often do this to the detriment of doing something else – for example, getting a Zombie token on Turn 2 might just be more valuable than casting something like a Fiend Artisan. If you have Cryptbreaker and Stitcher’s Supplier but no third Zombie, then usually you spend Turn 2 making a token and cast the Supplier on Turn 3.
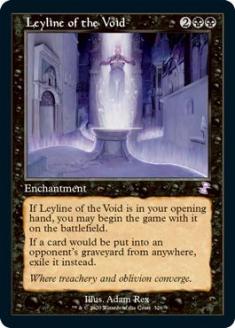
This is also your deck’s best Plan B against people with Leyline of the Void that are not playing an aggressive deck, though you do need to transition to a beatdown plan sooner rather than later against them, as without access to your graveyard their late-game will trump yours regardless of how many extra cards you draw.
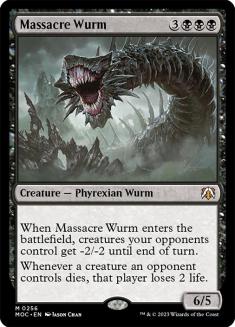
Another possible Plan B is Massacre Wurm. Against aggressive decks such as Goblins, Rakdos Arcanist and some versions of Jund, just getting a Massacre Wurm on the battlefield is enough to win the game. The deck can get Wurm on the battlefield on Turn 4 or Turn 5 relatively easily, and this should be your goal, even more so than getting a God-Pharaoh’s Gift going (unless of course that is bringing back Massacre Wurm, in which case you get the best of both worlds). After sideboarding against some of these decks, you actually turn into a deck where Massacre Wurm becomes Plan A – you bring in a lot of control elements and then just have that as your big finisher.
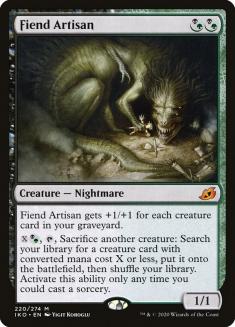
A third Plan B is “Fiend Artisan.” Fiend Artisan fills many roles in this deck – it’s a tutor for certain bullets, a sacrifice outlet, a large creature to reanimate with God-Pharaoh’s Gift – but sometimes the game can be all about Fiend Artisan, and it’s important to recognize those times. They usually happen against people that don’t have access to black removal.
For example, at the Mythic Invitational I was playing a match against a deck whose only removal was red-based. My opening hand was this:
I led with Switcher’s Supplier. On Turn 2, I cast another Stitcher’s Supplier, played Phyrexian Tower, and sacrificed a Stitcher’s Supplier to cast Fiend Artisan. At this point, the Fiend Artisan was already well past burn range. Then, on Turn 3, I sacrificed the second Stitcher’s Supplier for the Fiend Artisan to get a second Fiend Artisan. At this point, my battlefield was two 10/10-ish creatures, against a deck whose only removal was based on toughness, so the game was effectively over. Against these decks, you should always keep in mind the “Fiend Artisan” chain – often the best thing you can do with your turn is just tutoring another Fiend Artisan.
Then, we have the fourth Plan B – beating down with tokens. This is actually the worst of your plans, as your creatures are quite anemic-hitting outside of Fiend Artisan, so you don’t usually opt into it, but sometimes you have to against Leyline of the Void. You’re not trying to win the game with Woe Strider, but know that you can do it.
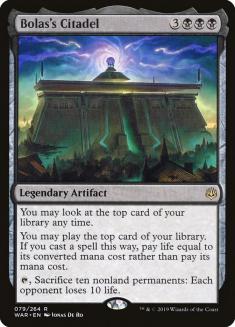
Finally, there’s the Bolas’s Citadel Plan B. This only happens after sideboarding (obviously), but it can come up against the slower decks. You don’t win the game every time you untap with it like the dedicated Citadel decks (far from it), but it does happen, and you do have Woe Strider and Gate to the Afterlife as ways to keep the chain going. I had a game at the invitational where I cast Citadel into an empty battlefield, untapped, and killed them from seventeen life.
Other than all the possible gameplans, this deck also has a lot of small details that can make it quite hard to play. Here are some tips:
- God-Pharaoh’s Gift has a lot of particularities. It doesn’t target (so they can’t wait for you to select something and then exile it with Scavenging Ooze, for example) and it completely ignores Grafdigger’s Cage.
- The token from God-Pharaoh’s Gift keeps the same converted mana cost of the original card (it is not zero) – this is relevant for Extinction Event and Eliminate.
- The token from God-Pharaoh’s Gift is also a Zombie, which means you can use it for Cryptbreaker.
- Most of the time, you want to play your utility lands first (certainly Castle Locthwain, sometimes Phyrexian Tower too). This deck has discard outlets in Cryptbreaker and Gate to the Afterlife, so you often end up discarding excess lands, and it sucks to have to discard Castle Locthwain because you played Swamp on Turns 1, 2 and 3. At the same time, you don’t want to expose Phyrexian Tower early, as it might change the way they play (for example they might not play around a Turn 5 Massacre Wurm if it’s not visible), so you have to balance that.
- Lazotep Reaver doesn’t make a token – it has amass. This means that the second one you cast is only going to pump the first Zombie rather than making another one. Because of this, a common sequence is to use your Zombie token (on Cryptbreaker for example), and then sacrifice it to Woe Strider or Phyrexian Tower so that you get a new, untapped Zombie token.
- Fiend Artisan is green! This can be relevant because there are people playing Aether Gust maindeck right now.
- Gate to the Afterlife can search for God-Pharaoh’s Gift in your hand or graveyard as well. If you have one in your graveyard, you have to consider whether God-Pharaoh’s Gift is a card you want to draw, as well as whether you might need the card in the graveyard for Woe Strider. You almost never want to select it from your hand if you can help it, but it could come up if you need to empty your hand for Castle Locthwain.
- If you have Cryptbreaker and you’re going to make your third untapped Zombie, it usually pays off to do that while they are tapped out. For example, imagine a battlefield of Cryptbreaker and two Zombie tokens where you have excess cards you want to turn into more Zombies. If you wait and do it at the end of the turn, which is common, then they could respond to the activation by killing the Cryptbreaker (or a token) and you don’t get to activate it, so it’s often better to just do it on your turn.
- This is exclusive to Magic Arena, but if you play this deck you have to be careful with Phyrexian Tower, as there’s currently a bug that doesn’t give you priority with it. For example, if you have Gate to the Afterlife, five creatures in the graveyard, and a Phyrexian Tower, Arena will just end your turn – you won’t have a chance to sacrifice your creature to turn on Gate. Similarly, if they cast something like Extinction Event and you want to sacrifice your creature, you won’t be able to. The only way to play around this is to play under Full Control.
Individual Card Choices
- No uncastables
This is a choice I feel very strongly about – no uncastable cards. I simply don’t think you need them – many of your games will be decided by getting a God-Pharaoh’s Gift on the battlefield or not getting a God-Pharaoh’s Gift on the battlefield, and not because you don’t have the best reanimation target. Granted, there are some games in which you have Gift for multiple turns out and still lose – it happens – but these games are few and far between and are not worth putting an uncastable card in your deck, even if you do have several looting effects.
- The second God-Pharaoh’s Gift
Since Gate to the Afterlife searches your graveyard, you could theoretically get by with only one God-Pharaoh’s Gift – in fact, we go down to one in a lot of matchups after sideboarding. If that’s the case, why are we playing two? Three reasons:
- As I mentioned before, between Priest of Forgotten Gods and Phyrexian Tower acceleration, it’s not actually a bad draw a lot of the time.
- In some matchups you might cast one God-Pharaoh’s Gift and not win, so you will want access to the second – for example, in the mirror.
- Some people can exile it. For example, you could mill it with Stitcher’s Supplier and then get it exiled by Scavenging Ooze, or get it Thoughtseized + Oozed, or simply get it hit by Cast Out.
If you want to play only one then I think that’s a reasonable decision, but I like playing two.
- Four Ravenous Chupacabras
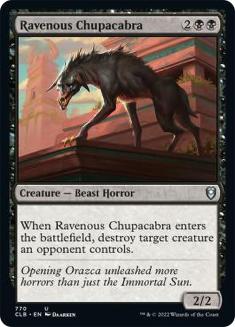
Everything else in our list is pretty standard or intuitive, but four Ravenous Chupacabras is unusual. I think they’re quite strong as a card that’s part of basically all your plans – it’s excellent with your Plan A (it’s the most common God-Pharaoh’s Gift target alongside Fiend Artisan) but it’s also good with basically all your other plans. It shines versus decks like Gruul or Goblins or Jund, but even against Sultai it’s a good card to have access to as it deals with Uro, Titan of Nature’s Wrath; Scavenging Ooze; and Hydroid Krasis. I was very happy with four copies.
Matchups and Sideboarding
VS Goblins
Goblins is a very swingy matchup – usually the games are blowouts on either side. Sometimes they cast Turn 3 Muxus, Goblin Grandee and you just die; sometimes you cast Turn 4 Massacre Wurm and they just die. Overall, I feel favored in the matchup.
Out:
In:
This sideboard plan was our biggest “breakthrough” with the list. Originally, Goblins felt really tough after sideboarding, since they have access to Abrade, Goblin Trashmaster, Goblin Cratermaker, and often Leyline of the Void and things like Scrabbing Claws and Magma Spray, but I think our sideboard plan actually addresses all these concerns very effectively, since you take out all your Gift package and turn into a Massacre Wurm deck.
In fact, with this sideboard plan, a lot of the time their deck becomes worse the more they sideboard. Obviously something like Abrade is still going to have a use, but Scrabbling Claws and Leyline don’t do that much, and they sideboard in so many non-Goblins that their Muxuses become a lot less threatening.
Some people might be puzzled at the inclusion of Thoughtseize against a Mono-Red deck, but Goblins isn’t your traditional aggro build – they rely on specific cards and don’t threaten your life total very much, instead attacking in chunks of 40. Thoughtseize is very good against them.
VS Sultai Decks
Sultai ranges from being a good to a pretty bad matchup depending exclusively on their list. For example, I played against Brad Nelson and I thought his Aether Gust– and counterspell-heavy list with no sideboard Leyline of the Void was very favorable for me (though I ended up losing), but I also played against Sultai decks that had multiple copies of maindeck Cry of the Carnarium; Scavenging Ooze; Ugin, the Spirit Dragon; Maelstrom Pulse; and even the occasional Bojuka Bog, on top of sideboard cards like Leyline of the Void. I think those can be quite hard.
Against most lists, the goal is to just stick God-Pharaoh’s Gift. It’s possible to lose this matchup even with Gift, since Hydroid Krasis; Nissa, Who Shakes the World; and Uro, Titan of Nature’s Wrath can go over the top of it, but as a general rule, if you land it relatively early you win as most lists don’t have more than one or two ways of removing it. Most of the time, I’ll just cast Gate to the Afterlife over casting a creature, as you should have enough time to develop it. The main way you lose this game is to an early Nissa, Who Shakes the World, as you have no good way of pressuring it effectively.
Out:
In:
After sideboarding your deck doesn’t change much. If you know for a fact that they have copious amounts of graveyard hate, then you can trim one God-Pharaoh’s Gift or some Stitcher’s Suppliers instead of the Woe Strider, or you can add some Thoughtseize.
VS Rakdos Arcanist
I’ve found this to be a good matchup – you simply go over the top of them with God-Pharaoh’s Gift and they usually just don’t have any answers. Luis Salvatto’s list runs maindeck Bedevil, which may or may not become stock, but the rest of your deck is also pretty well set up versus them anyway.
Out:
In:
After sideboarding you bring in some very powerful cards. The cards you’re sideboarding out aren’t necessarily bad, but I think it’s good to hedge against graveyard hate. If they have a particularly hateful version, you can sideboard out the other Gate to the Afterlife for Grasp of Darkness.
VS Jund Sacrifice
I think this matchup is pretty even. Game 1 you’re favored, as they have no way of dealing with God-Pharaoh’s Gift and Ravenous Chupacabra shines here, but Games 2 and 3 are much tougher as they bring in a combination of Reclamation Sage and graveyard hate.
Out:
In:
Things get tougher post-sideboard, but Massacre Wurm is very effective against them, so just try to ramp into that if possible. We take out some of the graveyard stuff as a hedge against hate.
Moving Forward With Zendikar Rising
I thought our version of the deck was pretty nice for the event, and I didn’t find the field to be overly hateful outside of a few Sultai builds I played against. With Jund Sacrifice placing itself as one of the most popular decks, I expect the number of Grafdigger’s Cages to rise and the number of Leyline of the Void to decrease, which should make this a good choice. If this deck ever becomes overly popular, then it’s probably not a good choice anymore as you can sideboard against it relatively easily.
As far as Zendikar Rising cards, there’s one that I believe is an auto-include – Agadeem’s Awakening. Mono-Black God-Pharaoh’s Gift has a lot of cheap creatures and ways to throw them in the graveyard, which makes it the perfect home for Agadeem’s Awakening. You run several one-, two-, three-, and four-mana creatures, and between Priest of the Forgotten Gods and Phyrexian Tower it’s not hard to generate enough mana to cast it for X equals three or four. Even spending five mana and getting back Cryptbreaker and Lazotep Reaver, or Fiend Artisan and Stitcher’s Supplier, seems very powerful out of your land slot.
Historic right now doesn’t punish life totals – most of the popular decks aren’t trying to burn you out, instead attacking in very big chunks. This means you’ll rarely get in trouble if you have to pay three life once or even twice in one game, and the biggest downside of playing Agadeem’s Awakening in your land slot is that it clashes with Castle Locthwain. Personally, I’d start with three copies; for that, I’d cut two Castle Locthwains and a Swamp. You could also just play four copies and cut a spell for the fourth one. Here’s what I’d play:
Creatures (30)
- 2 Massacre Wurm
- 4 Cryptbreaker
- 4 Ravenous Chupacabra
- 4 Stitcher's Supplier
- 4 Priest of Forgotten Gods
- 4 Lazotep Reaver
- 4 Woe Strider
- 4 Fiend Artisan
Lands (21)
Spells (9)
If you’re looking for a fun and different Historic deck that also happens to be quite powerful, look no further than Mono-Black God-Pharaoh’s Gift. Do keep in mind though that it’s a somewhat complicated deck to play, both in individual interactions as well as in figuring out what your gameplan should be, so at least some testing with it is advised before you play it in a tournament.