Mixed Media Category Submission for the 2010 StarCityGames.com Talent Search
#scgsearch
Jeremy Froggatt presents us with step-by-step instructions on how to do your very own card alters, where you take a Magic card and use acrylic paint or other methods to change the original image. Here, he removes the borders entirely of a Molten-Tail Masticore and extends the art! Tell us what you think in the forums!
I won’t lie to you; I love a good pat on the back. I thrive in an environment where I’m receiving some form of positive reinforcement. I don’t know if it was something I was born with or just a result of my relentless attempts at being an overachiever. Regardless, starting my day with a little praise always lifts me right up. When some young lad at the local nerdopolis looks at a card in my binder and exclaims: “Whoa! Where did you get that!?” and I inform him that I painted the card; I feel the same excitement that he feels. When one of my best friends handles my latest piece and tells me that my work has been getting better and better, I’m over the moon. Is this why I keep picking up the paintbrush? Maybe; recognition certainly helps. Getting started on a new alter is always a little daunting and off-putting, so there must be more to it than that. Fun, monetary gains, artistic release, fame, respect? It all adds up I guess, so I’ll continue to paint these cards until the day arrives where the procrastination and hesitation outweighs all the aforementioned benefits. In the meantime, I’ll paint and write in an attempt to spread this hobby that has given me so much to as many people as possible.
To this day I still don’t consider myself an artist, despite all of the praise I’ve garnered since I began altering. My father—he’s an artist. He’s been a registered graphic designer for twenty-five-plus years and can take a blank canvas and fill it with colors in such a meaningful way that a beautiful picture forms. I’ve never started with a blank canvas; be it cardboard or otherwise. I wouldn’t know where to begin. When provided with the original artwork though, I seem to add on pretty well. I’d like to say I’ve learned everything from Dad, but I honestly was never artistic previously; I never expressed any interest or displayed any aptitude in art, so I never asked to learn. How odd that my love of gaming and Magic would somehow steer me down a similar path to his. Maybe that’s another reason I keep painting these cards. I’ve always respected and admired my father (who continues to play rugby competitively in his mid 50s!), and I love to show him the newest cards I’ve been working on to get his opinion, and if this article ever hits the interwebs, he’ll be among the first few people with a link in his inbox. Maybe altering is how I emulate him in some small way. Wow, revealing. Thanks for being there and encouraging me, Pops.
There’s no better encouragement than somebody offering to pay you for your work, definitely a factor that keeps me altering. Sure, my alters have brought me exclusively Magic product as payment so far, much to the chagrin of my wife, but that’s typically money I’d be spending on this hobby anyway, right? Until I wake up with a BAMF mindset like
@mtgmetagame,
I’ll continue altering without financial gains I guess. Making this foray into site content production might be the boot in the rear I’ve needed to turn things around to take my hobbies and shape them into a career. So few people get to truly make a living doing what they love and achieving such a thing would be epic. Do you hear me doors? Open Sesame! …please.
Enough of this stuff, let’s get to why you’re actually here: the alter.
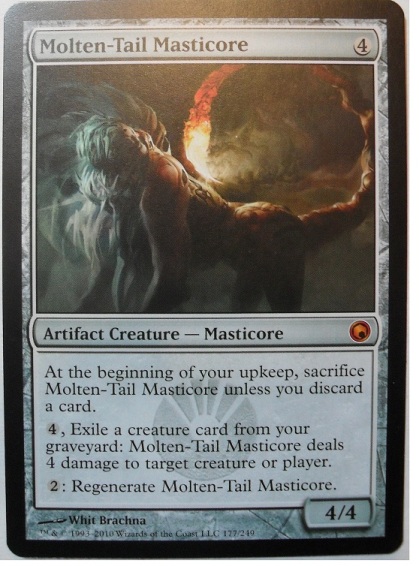
For this article’s alter, I’ll be starting off fairly simple. This is a Molten-Tail Masticore. Look at his face-like-thing. Isn’t he cute? My acrylics hung out with him for a while the other night, and I think he benefited from the experience. One could say that he has “leveled up.” I’ll go through a fairly brief step-by-step process into altering this mythical beast to leave some room for procedure expansion in future articles.
I always begin with base coating. You may have read about this in another article of mine, but it bears repeating so you can pick the method that suits you best. The other option to base coating is to use masking tape or painter’s tape to mask off the art portion and then you can take your eraser to the frame. This basically gets you right down to the plain white card underneath the printing. Although this is best for keeping your alter within the standard thickness, I find it very tedious and a strain on my arm, so I just do several thin coats of paint over the borders until they are no longer seen.
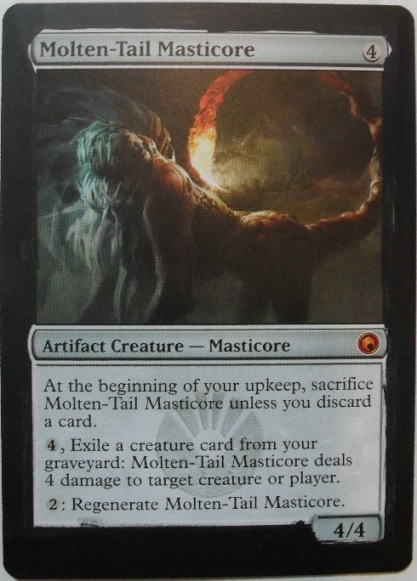
Once the base coat is dry, which should take less than a minute with acrylic paints, you can start to flesh out the background colors a little more, trying to draw your strokes into the art on the card wherever possible to give us something as close to seamless as possible.
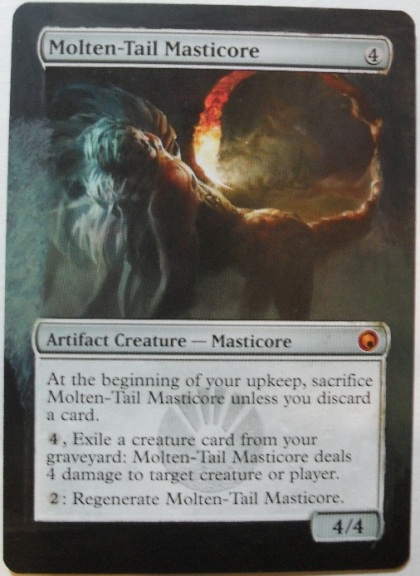
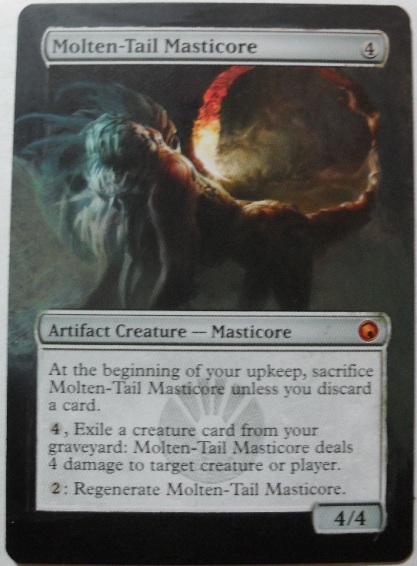
Between each step I’ll take a toothpick or an X-Acto knife (careful!) and scratch off where the paint has gone over the framed bits that I’ll be keeping. Do this slowly and carefully, as a slight slip can shoot you down the snake back to square one, and in this game, there are no ladders. I try to do this clean-up step often as it’s easier to scrape off one layer of thin paint than tackle a thicker clump down the road.
Once we have the background looking fairly decent we can start working on the subject himself. I started over at his head, expanding his wispy blue hair outside the normal boundaries and then accented them with a lighter shade of that blue. Pretty straightforward so far, now on to the tail!
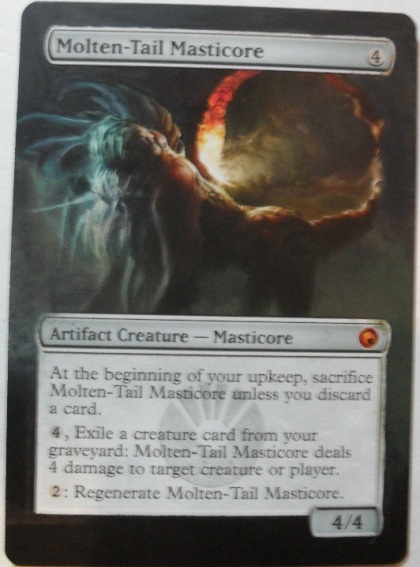
I began the tail by just grabbing a stock red/orange color I had and tried to roughly define the shape of the tail that I was looking for.
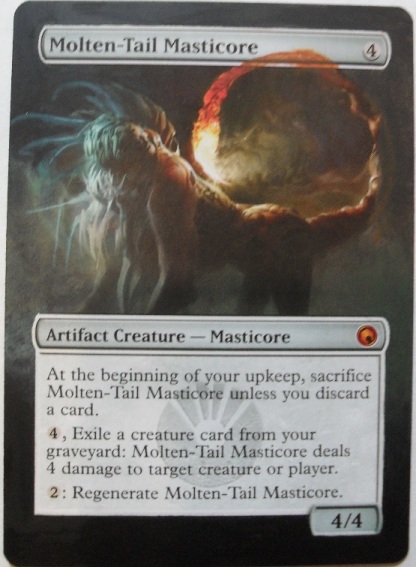
Once the shape of the tail was defined, I focused on the right hand side and slowly built depth on the interesting section of his tail using no less than seven different paint colors by the end.
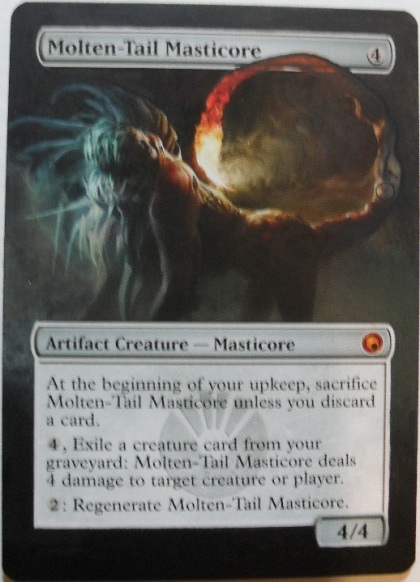
I added some lighter bits to jive with the light coming from the end of his stinger and then tried transitioning the thick tail portion into the thinner fiery red part. At this point, it was 12:30, and my wife was bugging me to come to bed as I had to work the next morning. “But honey, the Masticore still needs his tail!” was my response; which resulted in a “Good night, Jeremy.”
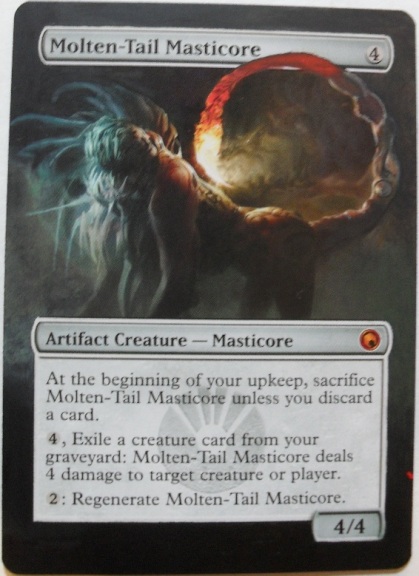
A few more minutes spent on the thick tail section just getting lighting and definition a little better, and it was time to move on to the red section.
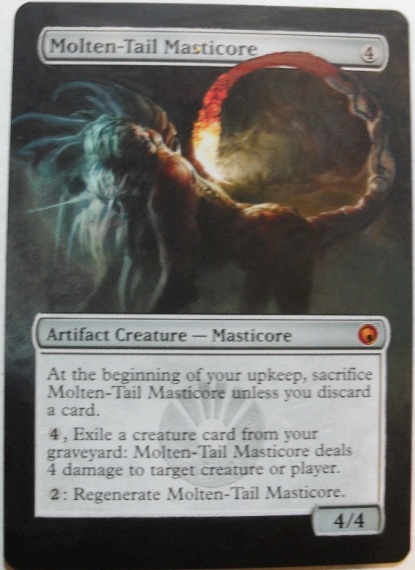
After a little work on the red end of the tail, I added some of that thin black segmenting (which I’m not entirely happy with and wouldn’t mind revisiting) to finish off the look. A few more minutes of cleanup and then putting my signature in the nether regions, and the alter is almost complete. Some sprays from an acrylic sealer, and it’s time to clean up for the night. Again, although there hasn’t been a ton of different elements to work on, even a simple alteration to the card makes a world of difference.
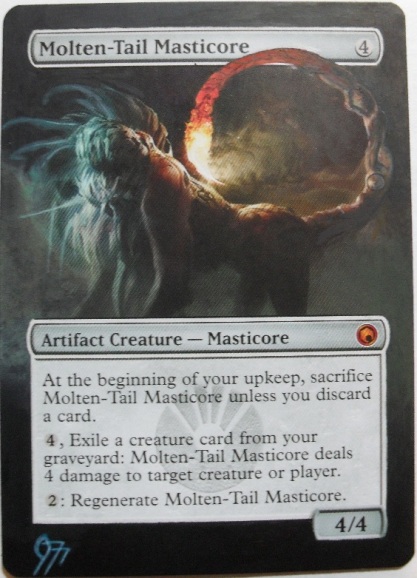
There are so many interesting aspects of this game we play. Why not diversify and try your hand at card alterations? It’s not as difficult as you may think to get started. When I began I was using exclusively Games Workshop paints that had been lying around for years. I still use them to this day. If it ain’t broke, don’t fix it right? You’ll also need a couple of brushes; one very thin and small for all the detail work and the other one should be roughly as wide as the border that we’re covering which I use to do most of my base coating. Of course, down the road you’ll want a variety of brushes for different uses, but completing a single alter will get you hooked, so start there.
For additional inspiration and to see where it all began (for me and many others) visit the
MTGSalvation.com Artwork
forums.
Feel free to drop me a line
@Jerfroggatt
on Twitter with any questions you may have. Make sure to also leave me some positive feedback and a little back patting so I can come and do more of this for you!
Cheers,
Jeremy Froggatt
