Mirage was the first set designed to be drafted as part of a three-set block. It was released in October of 1996, during the time I was working for Neutral Ground. This was also during the height of my competitive playing days – we’d draft Mirage multiple times a day, multiple days a week. We draft one-on-one, two-on-two, three-on-three, eight-man free-for-alls, whatever – the competition at Neutral Ground was fierce (Jon Finkel, the OMS Brothers, the Jersey kids, and other Pro Tour regulars).
We would usually play winner-takes-all, with a little side action to boot. I accumulated so many cards that I began to make complete sets. By the time Visions was released, I had put together a full 330 page binder – each with nine copies of every card in Mirage! This was done without any trading.
Well, it’s nine years later and Wizards of the Coast has released Mirage for Magic Online. Some of the rules have changed since the initial release – for instance, tapped creatures dealt no damage on defense back then, damage wasn’t put on the stack, and you couldn’t respond to interrupts, except with other interrupts. By-and-large, the format remains the same today as it did nearly a decade ago.
I present to you the Definitive Mirage/Mirage/Mirage Draft Guide.
Kaervek’s Torch Notice:
Your goal in Mirage draft is to end up with a two-color deck, with a possible splash for a third color (usually Red). This guide is set up into ten sections – one for each of the ten color combinations. Different cards have different rankings depending on your color combinations – Granger Guildmage is great if you’re playing Green/Red, but decreases significantly in value if you’re playing Green/White.
No matter which color you’re playing, if you open Kaeverk’s Torch, you take it.
I’ll repeat: First pick Kaervek’s Torch no matter what!
There are arguably only three cards in the entire set that you would take over Kaervek’s Torch – Hammer of Bogardan, Sacred Mesa, and Phyrexian Purge. All three are debatable, because often games end with a race to the Torch – whoever gets the Torch first wins. I’d personally take Hammer over the Torch, I’d think long and hard about taking a Torch over the Purge, if I’m already in Black/Red, and I’d take a Torch over Sacred Mesa.
Remember: Take the Torch! Play it! Splash it! Kaervek’s Torch = Win.
The Colors
The great thing about Mirage/Mirage/Mirage is that all ten color combinations are viable. Each color has removal, combat tricks, 2/2 creatures, 3/3 creatures, common flyers (except Red), and ways to break a stalemate. Because the essentials of a successful draft are present in every color, no one color combination is hopeless. This is not to say that all combinations are created equal, at least on paper – they are not. However, every two-color combination (or three, if you are splashing for a Torch or bomb) is capable of reliably drafting a good, table-sweeping deck.
Green/White
Green/White is all about combat tricks and smashing with big men. Green/White doesn’t try to run defense – instead, it drops some early beats and/or combat-affecting creatures (Femeref Healer, for instance), follows it with White flyers, and finishes it with Green fat.
The common/uncommon cards you should prioritize are the White Griffins, the White flankers, Pacifism, Ward of Lights, Armor of Thorns, Noble Elephant, Jungle Troll, Gibbering Hyenas, Femeref Healer, Melesse Spirit, Mtenda Lions, and any three-power/four-mana Green four-drops.
Quirion Elves are more important to this archetype than Wall of Roots, for three reasons. The Elves can swing, the Elves will give you off-color mana to splash for Granger Guildmage’s Red activation/Kaervek’s Torch, and it doesn’t hurt to accelerate to four mana on turn 3. Wall of Roots is quite good in most Green decks, but drops in importance for Green/White. I’d probably run Rampant Growth over Wall of Roots if I had a Red splash in this deck.
A good curve is not necessarily important to the Green/White archetype. You’re going to end up with a lot of three and four drop quality creatures (flankers, 3/3 Green guys, and 2/2 flying Griffins), and so you might end up with twelve to fifteen guys in the three and four slots. That is fine for Green/White – it’s somewhat more important to keep dropping guys while leaving mana open for your tricks/Removal (Pacifism, Ward of Lights, Armor of Thorns) than to keep dropping larger guys.
Green is light on creature removal compared to the other four colors, but that is not to say that Green/White can’t kill creatures. Pacifism, Afterlife, Ward of Lights, Armor of Thorns, and Alarum are all either straight removal spells, or act as faux-combat removal tricks.
I’d maindeck at least one Disenchant in any White deck in this format. It kills numerous playable golems, removes several important opposing enchantments (Ward of Lights, Armor of Thorns, Thirst, Pacifism, Grave Servitude, Mind Harness, Ritual of Steel, Soar), and takes out a few Rare bombs (Amber Prison, Mangara’s Tome, Teeka’s Dragon).
As a rule, you’d want to take any of the big White or Green rare flyers. These include Asmira, Pearl Dragon, Canopy Dragon, and Zuberi. Sidar Jibari works very well with your attacking plan.
The absolute best White card you can open in all of Mirage is Sacred Mesa. Once Sacred Mesa gets going, you are unbeatable. No matter which White-based deck you’re playing, first-pick Sacred Mesa unless Kaervek’s Torch is in your pack. Sacred Mesa is one of the three best cards in the set (Torch, Mesa and Hammer).
Noble Elephant is incredible in this deck, especially if you throw a Ritual of Steel on him. Let’s say that you attack with Noble Elephant and a Stalking Tiger. Your opponent blocks with a 3/3 creature – you can stack the damage so that neither of your creatures die, and your opponent takes two trample. Remember to choose to have the (up to two) damage from the Elephant be trample damage! The extra two damage a turn adds up.
There are four cards that would automatically push you into splashing Red – Kaervek’s Torch, Granger Guildmage, Energy Bolt, and Savage Twister. It is easy to splash a third color in Green-based decks in Mirage, thanks to Quirion Elves and Rampant Growth. If you are passed a Rock Basilisk or Sawback Manticore, you probably want to find a way to get Red into your Green/White deck as well.
If you end up playing Alarum in your Green/White deck (and you probably shouldn’t – Alarum is better served in more defensive decks), remember that you can cast it before combat to get an extra point of damage in. I’ve seen many games ended by casting Alarum on a Griffin before the attack when the opponent is at three life.
A note about Instant/Enchantments: Do not get stuck in the mindset that you have to cast these as either enchantments or as instants. I’ve seen many players go on auto-pilot and save Ward of Lights and Armor of Thorns to be used only as combat tricks. There is definitely a time and a place to cast them as good-ol’-fashioned enchantments. A Femeref Knight with Ward of Lights Red/Black can shut down an entire Red/Black deck. Ekundu Griffin enchanted with Armor of Thorns can beat through Azimaet Drake each and every turn.
Another note about Ward of Lights: this is one of the most underrated cards in the set. It is very subtly powerful – it can act as removal (saving your creature after combat damage is on the stack), enchantment removal (for creature enchantments), countermagic (to save your creature from removal spells), a way to break through (protection-from means your creature can’t be blocked by creatures of that color), and defense (to hold up attackers – all damage done by a creature of the protected color to the creature with protection-from is reduced to zero).
White/Red
White/Red is all about flankers and removal. You’ve got access to no less than five common and uncommon three-drop flankers – Burning-Shield Askari, Femeref Knight, Searing Spear Askari, Zhalfirin Commander, and Zhalfirin Knight. Unfortunately, your one and two drops aren’t as impressive – none of the creatures are really offensively-oriented except for Mtenda Herder. You won’t get going until the three and four slots, but what you lack in early momentum you make up for in removal.
White/Red has an awesome array of common removal spells. Kaervek’s Torch, Spitting Earth, Pacifism, Incinerate, Kaervek’s Torch, Flare, Alarum, Ward of Lights, and Chaos Charm are all solid removal spells. In fact, you can end up with too many removal spells in White/Red with not enough creatures! Make sure that you’re stocking up on solid creatures (Talruum Minotaur, Ekundu Cyclops, Noble Elephant, and the Griffins should round out your four drops) instead of sub-par (anything past the Torch on the list above) removal.
Chaos Charm is another underrated spell. It is primarily used to kill an early Granger or Shadow Guildmage. It also gets rid of multiple walls (most importantly Wall of Roots and Wall of Corpses). Its last ability, haste, is least used but sometimes overlooked. I’ve witnessed people miss using the haste ability to kill an opponent, so please keep the haste part of Chaos Charm in the back of your mind during close games.
White/Red is all about dropping creatures, removing the opponent’s creatures, and smashing face. There are no cards you’ll take higher than the good direct damage spells, which include Kaervek’s Torch, Volcanic Geyser, Incinerate, Reflect Damage, and most importantly, Hammer of Bogardan.
Is Hammer of Bogardan the best card in Mirage? Arguably yes, though Kaervek’s Torch is more playable. If you open up a Hammer in your first pack, you take it and play Red, no matter what. The Hammer is nearly impossible to deal with. Dissipate is the only regularly played anti-Hammer card, with Ebony Charm and Bazaar of Wonders being the only other solutions to Hammer in the set, once the Hammer is drawn.
Unfortunately, it takes five Red mana (and eight mana total) to get the Hammer cast and recurred every turn. This is what makes it potentially worse than the Torch – if you’re not in Red by the time you open Hammer, it might just be a sorcery-speed Incinerate. Still, the Hammer is so powerful that you should consider switching to Red in the second pack if you open one. If I opened both Torch and Hammer in pack two, and I wasn’t yet playing Red, I’d take the Hammer. If it was pack three, I’d take the Torch. That’s just my personal preference though.
There isn’t a whole lot more to say about White/Red, because the White/Red deck will pretty much build itself – draft removal spells, add in a 16-18 three/four drop creatures – with occasional larger guys, if you draft Melesse Spirit or Crimson Roc – and swing until your opponent is dead.
White/Blue
White/Blue shines with the addition of Visions (and later Weatherlight) and eventually becomes the most powerful archetype in Mirage/Visions/Weatherlight draft. Unfortunately, you don’t have Undo, Man-o-War, Empyrial Armor or Heavy Ballista kicking around the common slots of Mirage. What you do have is access to the most tricks of any color combination in the set.
In fact, White/Blue is categorized by having too many spells and not necessarily enough creatures.
White/Blue Creatures you’d want to play (Common):
1CC: None
2CC: Femeref Healer, Merfolk Raiders, Sea Scryer
3CC: Azimaet Drake, Dream Fighter, Femeref Knight, Femeref Scouts, Merfolk Seer, Teferi’s Drake, Zhalfirin Knight
4CC: Ekundu Griffin, Kukemssa Serpent, Noble Elephant, Teremko Griffin
5CC: Sandbar Crocodile
That’s a total of fifteen playable creatures between the two colors in the common slot – a low number compared to the other colors. On top of this, three of them are phasing creatures, six of them are primarily defensive/utility creatures (Femeref Healer, Sea Scryer, Dream Fighter, Femeref Scouts, Merfolk Seer, Kukemssa Serpent), leaving you with only six creatures that can provide a steady offense.
On the flip side, White/Blue has an absolutely insane number of good Uncommon creatures. Cerulean Wyvern, Floodgate, Harbor Guardian, Harmattan Efreet, Hazerider Drake, Iron Tusk Elephant, Melesse Spirit, Mtenda Griffin, Suq’Ata Firewalker, Unyaro Griffin, Vaporous Djinn, Vigilant Martyr, Wave Elemental, and Zhalfirin Commander are all playable creatures. In fact, you shouldn’t be sad to draft Melesse Spirit or Cerulean Wyvern as a first pick, and many of the others on this list (Harmattan Efreet, Hazerider Drake, Mtenda Griffin, Suq’Ata Firewalker, Unyaro Griffin, Vaporous Djinn, Zhalfirin Commander) will usually be picked ahead of any of the common creatures for these colors.
So in short, White/Blue has fifteen playable Common creatures, and fourteen playable Uncommon creatures. Only six of the Common creatures are offensively oriented, whereas ten of the fourteen Uncommon creatures are made for attacking – the remaining four being Floodgate, Harbor Guardian, Suq’Ata Firewalker, and Vigilant Martyr.
Don’t forget that Harbor Guardian can attack at the cost of giving your opponent a card. I’ve seen the Guardian swing in for the last three to nine damage just as often as I’ve seen a player fail to kill the opponent with the Guardian due to fear of giving their opponent free cards.
Phasing creatures: Worth it or not?
Since we’ve hit the first Blue section, it seems high time to talk about phasing creatures. Blue is the only color with phasing creatures in Mirage. Your phasing creatures phase at the beginning of your turn if they are in play, and come back into play at the beginning of your turn if they are phased out. When a creature phases out, it is out-of-play – but phasing does not trigger leaves-play effects (this has changed with the release of Mirage on Magic Online – in older rules, phasing would trigger leaves-play effects. It doesn’t anymore), and phasing does not trigger comes-into-play effects. Enchantment – Auras on phasing creatures stay on that creature when it phases in/out – so if you have a Sandbar Crocodile enchanted by Pacifism, the Pacifism will phase in/out along with the Croc.
The Mirage phasing creatures are Merfolk Raiders, Sandbar Crocodile, Taniwha, Teferi’s Drake, Teferi’s Imp, and Warping Wurm. Let’s forget about Warping Wurm, as it is pretty junky and shouldn’t make the cut into your Blue/Green deck.
Merfolk Raiders: 2/3 Islandwalker for two mana. I generally tend to cut the Raiders, even when playing against an opponent with Blue. Kukemssa Serpent is a much better attacker and defender than the Raiders. Raiders can’t successfully block most of the common creatures in the format (2/2 flankers, 3/3 ground pounders, and 2/2 flyers), and can only attack every other turn – for an average of one damage a turn.
Sandbar Crocodile: 6/5 for five mana. Unlike Merfolk Raiders, Sandbar Crocodile will stop virtually every ground attacker in Mirage. It has a direct impact defensively the turn it comes into play, and it can smash through opposing blockers every other turn. I tend to include Crocodiles in my draft decks.
Taniwha: This Legendary creature is going to be the largest guy on the board, each and every turn. Is it worth losing your mana those turns? You still get to cast instants during your upkeep, allowing you to get off a critical Ray of Command/Boomerang/Reality Ripple/off-color, instant-speed removal spell on those turns.
Teferi’s Drake: The best of the phasing creatures. It is simply as-large or larger than every other Common flyer in Mirage, and it comes down a turn earlier. It also deals with all the creatures that Merfolk Raiders cannot, making it a much better defender/trader.
Teferi’s Imp: Aside from cantrips, there aren’t many ways to draw cards in Mirage. Teferi’s Imp approximates the Thought Courier/Merfolk Looter ability on a small, flying creature. I’ve found the Imp to be surprisingly effective, since you can plan ahead on which cards you want to discard due to the every-other-turn nature of the Imp’s phasing.
What White/Blue lacks in common creatures, it makes up for with tricks and utility.
1CC: Healing Salve, Ivory Charm, Sapphire Charm
2CC: Alarum, Boomerang, Disenchant, Memory Lapse, Pacifism, Reality Ripple, Soar, Ward of Lights
3CC: Dream Cache, Jolt, Ritual of Steel, Thirst
4CC: Ray of Command
XCC: Power Sink
That’s an amazing seventeen playable spells in the common slots of White/Blue! Afterlife, Dissipate, Ether Well, Favorable Destiny, Mangara’s Equity, Meddle, Mind Harness, Mystical Tutor (if you’ve got Kaervek’s Torch), Prismatic Boon, Shadowbane, and Tidal Wave bring this total to twenty-eight tricks for a twenty-three spell deck. This does not include rares.
The question becomes, for White/Blue, “Which spells do I play to compliment my creatures?” Some of the spells are auto-include – Thirst, Pacifism, and Ray of Command should always be played, no matter what. The others need to be mixed and matched.
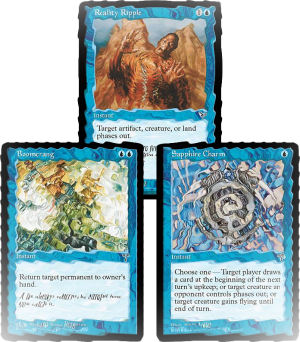
Boomerang versus Sapphire Charm Versus Reality Ripple
All three of these spells serve a similar purpose – they remove creatures from the board for a turn, or save your guys from dying/spells (except Sapphire Charm, which can only target opposing creatures). You’re going to want to play some mix of these cards in your deck, but which should you play?
Boomerang removes an opposing permanent from the board entirely – that permanent will be out of play until recast. It’s also possible to try to go the “Play first, Boomerang your opponent’s first land” route, setting them back a full turn behind your board – but I generally don’t recommend going that way since Blue isn’t the speediest color in Mirage. Boomerang is also handy for returning negatively-enchanted creatures to your hand (ones that have been Pacified or Thirsted) or for returning your own Pacifism/Thirst to hand in order to put it on another opposing creature.
Reality Ripple will save your own creatures from removal, but only at the time of the removal spell. Unlike Boomerang though, you won’t need to recast your own creature. Reality Ripple can remove an opposing attacker/blocker for a turn, but that creature will return to play at the beginning of the opponent’s next turn. Reality Ripple is a lot better than Boomerang during combat – putting damage on the stack and then phasing out your own creature is much better having to Boomerang and recast that same creature.
Sapphire Charm gives your ground guys evasion, can cycle, and can remove an opposing blocker. It also stops an opposing creature from being enchanted (you phase them out in response to an Armor of Thorns or Ward of Lights from being cast). In general though, I prefer the utility of Boomerang or Reality Ripple to the draw-a-card ability of Sapphire Charm.
Personally, I tend towards Reality Ripple more than Boomerang. There are more situations where you’d want to use the Ripple – keeping your creatures in play after damage-on-the-stack tricks, dodging an opposing removal spell – than when you’d want to use Boomerang.
Phasing creatures and Reality Ripple interact really well. At the end of an opponent’s turn, you can Reality Ripple your Teferi’s Drake/Sandbar Crocodile, have it phase back in at the beginning of your turn, and get in an unexpected attack. I’ve won and lost games when I didn’t account for the Ripple/phaser trick when calculating math, so always keep this possibility in the back of your mind.
Ray of Command is the best Blue Common/Uncommon in the set. Just the threat of a Ray of Command acts as a deterrent for an opponent’s attack – if they play around the Ray, they are attacking with fewer creatures than they otherwise would come in with. If you do have a Ray, you have a good chance of getting a two-for-one removal exchange on the opponent’s creatures.
Moreover, Ray of Command lets you play offense as well – simply grab an opponent’s creature during your turn, and you’re up one attacker while they’re down one defender. The Ray is an extremely powerful offensive and defensive tool, and having the threat of one changes the entire way the game must be played, on both sides. Do not undervalue Ray of Command.
Is Countermagic worth it? Yes, but not Memory Lapse. Some people swear by Memory Lapse, but I’ve found Reality Ripple, Boomerang, and Ward of Lights to be much more versatile cards to use instead of Memory Lapse. Some people swear by Memory Lapse’s momentum-swinging effect, but I find that it’s a dead card just as often as it’s a useful one. In a land filled with tricks, I’d rather have ones that are reliable.
Power Sink and Dissipate are quite good, and I try to get them into decks. Most of the format revolves around three and four drop creatures, and so having two mana up on turn 3 (assuming your opponent is playing) for Power Sink is almost as good as having two mana up for a real Counterspell. Dissipate is also a key spell, since it deals with Gravebane Zombie (I’ll get into Bone Harvest in a minute) and Hammer of Bogardan.
Dream Cache is the most reliable card-drawing spell in the format. With that said, I’ve personally never liked it, though others I’ve known swear by it. There are so many good spells in White/Blue that I’ve never felt that I wanted to move cards/lands from my deck to my hand/bottom of my deck. There are so many spells and so much mana to be left open for tricks in Blue/White that I almost never want to tap down three mana as a sorcery to do anything other than further the board position.
Keep in mind that Soar is pretty good against Red, since it boosts a creature’s toughness by one. This ability will be more relevant than giving creatures flying with Soar in White/Blue, since half your creatures already have flying. Soar usually won’t make the cut in my White/Blue decks, for this very reason – too many creatures already fly.
Ironically, White/Blue is the color with the best Falter/Panic Attack type card in the set – Prismatic Boon. The Boon can allow you to send your team all-in for one final, unblockable attack. Keep this in mind, as it makes the Boon more playable than it might otherwise appear.
In short, White/Blue wants to control the pace of the board with combat tricks. You’re not likely going to be as aggressive as White/Green or White/Red (although it is possible if you draft a ton of White flankers), but you will be able to control the board better than either of those colors.
White/Black
White/Black is a weird color combination, and one that usually centers more around Black than White. You get a really good offensive creature curve in these colors:
1CC: Mtenda Herder, Sewer Rats, Shadow Guildmage
2CC: Femeref Healer, Restless Dead, Skulking Ghost
3CC: Breathstealer, Cadaverous Knight, Femeref Knight, Feral Shadow, Urborg Panther, Zhalfirin Knight
4CC: Dirtwater Wraith, Ekundu Griffin, Fetid Horror, Gravebane Zombie, Noble Elephant, Teremko Griffin
Again, there’s a glut in the three- and four-drops, but there are several playable one and two-drops in these colors. Skulking Ghost can be a monster – half the spells that target it would kill it anyhow (Chaos Charm, Pacifism, Spitting Earth) and it is only really weak against Guildmages. Please note that Skulking Ghost triggers its dying effect when targeted – this means that if you shoot it with a Guildmage, you will not take a point of damage (since the effect is countered), and if you shoot a Skulking Ghost with Flare, you won’t draw a card.
In addition to a good creature curve, White/Black has access to a lot of good removal spells – Pacifism, Drain Life, Enfeeblement, Dark Banishing, Grave Servitude, Disenchant, Alarum, and Ward of Lights. Five of these spells (the first five) are outright creature removal spells.
Grave Servitude is a lot more powerful in White/Black than in any other color combination, because you have the most viable creatures of your own to enchant with Grave Servitude! Cadaverous Knight, Zhalfirin Knight, Dirtwater Wraith, Ekundu Griffin, Noble Elephant and Teremko Griffin make great targets for the Servitude, as they all have some form of evasion, first strike, or damage prevention (banding). In addition, note that Grave Servitude will save your own non-Black creatures from an opponent’s Dark Banishing (keep this use in mind – it will come up every now and again).
One thing that is apparent from the above list of spells is that you will need to go a lot heavier Black than White to make White/Black work. Sewer Rats, Restless Dead, Breathstealer, Cadaverous Knight, Urborg Panther, Dirtwater Wraith, Fetid Horror and Drain Life all require a heavier Black commitment.
Fetid Horror Versus Dirtwater Wraith
Which is better? Personally, I go with the Wraith – against other Black decks, the Wraith is just game over. Fetid Horror is universally better against non-Black decks, but a lot of people are going to play Black (even as a splash for Dark Banishing) and so more of the time you’d prefer having an unblockable Kaervek’s Torch. If you end up with both (or in multiples), start with the Wraith and side to the Horror if your opponent doesn’t have any Swamps.
Bone Harvest is the secret weapon of every Black deck in the format. It allows you to trade creatures with impunity, and then recycle all of your guys. In a format where 2/2 flankers, 3/3 non-flankers, and a bevy of 2/2 flyers will go head to head, you will end up with a lot of combat trades and dead creatures on both sides. Bone Harvest allows you to keep your creature count well beyond your opponent’s creature count – plus it is a cantrip, so you can cycle it even if you don’t have any creatures you want to put back on top of your deck. You want to draft and play up to two copies of Bone Harvest in any Black-based deck you draft in this format.
Let me briefly touch on a few Black Uncommons:
Ravenous Vampire/Zombie Mob
Ravenous Vampire can quickly get out of hand (4/4 on its first attack) but there aren’t many token generators in Mirage – meaning that you are going to be eating cards/creatures each turn to keep the Vampire going. Zombie Mob can be a huge creature later in the game, but again it is reliant on having dead creatures. I would play Ravenous Vampire if I had multiple Bone Harvests (since I could recur creatures to keep him going) and I would play Zombie Mob if I did not have Bone Harvests.
Stupor will almost always be a two-for-one – the exception being when your opponent has only one card in hand. Don’t be afraid to knock that one card out of your opponent’s hand if they seem to be nursing it – oftentimes an opponent will play down to one card if they know you have a Stupor, and stay there hoping you won’t want to go one-for-one on Stupor. Trade Stupor for their Kaeverk’s Torch, Ray of Command, or basic land – piece of mind a full knowledge of your opponent’s hand is worth it.
Earlier in the game, Stupor is great because it takes out a card at random. In general, I’ll try to make room for Stupor over a marginal creature or marginal removal spell.
Withering Boon
Play this. When people first play this format, they never expect Black to bust out with Remove Soul. Even if you play around the Boon (dropping the less-important creatures first), you’re still having the game affected by the spell. I’d pay three life to Terror a creature, so the Boon ends up being a fair bargain.
Blighted Shaman
The Shaman doesn’t look like it does much, but it is a ridiculously powerful creature. As I’ve mentioned multiple times, the format revolves around 2/2 flankers, 3/3 ground pounders and 2/2 flyers. Blighted Shaman pushes all the math into your favor, allows you to make favorable trades in combat, pushes through extra damage, and keeps your creatures that much further out of Incinerate/Spitting Earth/Drain Life range. It also allows you to play around Ray of Command with impunity. In short, the Shaman is a highly underrated, yet vastly-important creature to have in any Black deck.
Green/Red
Many have already made the claim that Green/Red is the most powerful archetype in the format, and it’s hard to argue with that claim. Green/Red is the most straightforward archetype in Mirage/Mirage/Mirage draft – grab removal spells, big creatures, and beat people’s heads in. The Green/Red creature curve is quite good:
1CC: Armorer Guildmage, Granger Guildmage, Mtenda Lion, Village Elder
2CC: Quirion Elves, Uktabi Faerie, Wall of Roots
3CC: Burning Shield Askari, Gibbering Hyenas, Jolrael’s Centaur, Sabertooth Cobra, Searing Spear Askari
4CC: Ekundu Cyclops, Giant Mantis, Raging Spirit, Stalking Tiger, Talruum Minotaur, Viashino Warrior, Wild Elephant
5CC: Jungle Wurm
8CC: Crash of Rhinos
As you might notice, there are a lot of good one-drops in Green/Red, but not a whole lot of stuff to do at two mana. There are a lot of amazing four-drops in Green/Red, and so more than any other color combination, two-mana acceleration is key to making Green/Red work.
You have plethora of options for the turn 2 drop mana-accelerant: Quirion Elves, Rampant Growth, Wall of Roots, Charcoal Diamond, Fire Diamond, Marble Diamond, Moss Diamond, Sky Diamond. I cannot stress this enough though – you want to get to four mana by turn 3. Here is they key to a good game plan for Green/Red:
Turn 1: Drop a guy. Granger Guildmage and Mtenda Lion are ideal, but Armorer Guildmage works well in this archetype to allow your 2/2 flankers to become 2/3 (surviving combat with other flankers or 3/3 blocking creatures) and to allow your 3/3 or 4/2 ground creatures to survive combat with flankers or X/3 creatures. Village Elder allows you to swing without fear of losing anything more than a Forest.
Turn 2: Drop a mana-acceleration effect. It doesn’t matter which of the eight you use, but you really want this turn to be the mana-acceleration turn.
Turn 3: Drop a four-drop guy.
Turn 4: Either drop a four-drop guy, or drop a three-drop guy and use a removal spell (Incinerate, Spitting Earth) and swing, or drop Jungle Wurm.
Turn 5+: Drop more guys, keep swinging, get your opponent into Torch range for the win.
Green/Red is fairly straightforward, and your creatures will be better than your opponent’s creatures – especially if you get that turn-2 jump. You want to be dropping Stalking Tigers, Wild Elephants and Talruum Minotaurs when your opponent is trying to set up with Cadaverous Knights, Azimaet Drakes, and the such.
Red/Green has access to the two best Uncommons in Mirage: Savage Twister and Volcanic Geyser. Volcanic Geyser is basically a Kaervek’s Torch that is harder to splash, and should be first picked over anything except Torch or Hammer, if you’re already in Red. Savage Twister is a card that should also be first-picked over anything else except Torch or Hammer, except if you’re not playing Green or Red (Black/Blue, Black/White, White/Blue). If you’re already playing Green or Red in your deck (even if you’re not Green and Red), take Savage Twister.
Savage Twister is Wrath of God, except it can be quite one-sided. Remember, your Green and Red creatures are going to have a higher toughness than creatures from other colors – in a format that revolves around 2/2 flankers, 2/2 flyers and 3/3 ground creatures, your deck will have the 3/3 guys and Savage Twister will decimate the other two categories of creatures. If you’ve got Jungle Wurm, Savage Twister becomes that much more powerful – it’s the only reasonably-early cast common (aside from Wall of Roots) that will survive an otherwise-board clearing Savage Twister.
Green/Blue
Green/Blue is a really strange deck to draft, and is probably the least-seen color combination in straight Mirage drafts. This is not to say that it is bad – it just needs a certain mindset to draft. The key to a successful Green/Blue draft is twofold:
- You want to stop up the ground.
- You want to find ways to get your large Green creatures through an opposing defense to deal damage.
The first goal is easily met with Green/Blue – there are a ridiculous number of defensively oriented creatures between the two colors. Wall of Roots, Dream Fighter, Femeref Archers, Merfolk Seer, Suq’Ata Firewalker, Floodgate, Giant Mantis, Kukemssa Serpent, Locust Swarm, Wave Elemental, Jungle Wurm and Sandbar Crocodile can lock up the ground nearly indefinitely. Giant Mantis, Femeref Archers and Locust Swarm also stymie flying creatures very well.
Green/Blue is great on playing defense – but how do you kill your opponent? Ray of Command isn’t as important to Green/Blue as to other Blue combinations, because you already have enough defense that you won’t often get a two-for-one. You also won’t get a lot of offensive momentum going, so it won’t often be used as a finisher.
Green/Blue often wins by swinging with that one large flying attacker, over the course of multiple turns – or slowly whittling the opponent to death via pinging effects. There are a few key cards to this archetype:
Harmattan Efreet
This guy is crucial to a successful Green/Blue deck – there are few cards I would consider taking over him. Green has the largest bodies in Mirage, and in a world where almost every flyer is 2/2, sending your 3/3 Green guys into the red zone as flyers is game-winning. There isn’t much your opponent can do if you have flying Sandbar Crocodiles, Jungle Wurms, Stalking Tigers, and Wild Elephants coming across the table.
Unseen Walker
A disproportionate number of people at any given table will play Green, because Green can easily splash a third color (thanks to Rampant Growth and Quirion Elves). Unseen Walker will often serve the same purpose as Harmattan Efreet, except it is a little more fragile. Still, it’s just as good against an opponent who runs Forests.
Suq’Ata Firewalker and Telim’Tor’s Darts
The Firewalker is better than the Darts because it can kill creatures, but both are auto-includes in this archetype. The Darts are a slow bleed, but effective given that nobody will be attacking or blocking much.
In general, I’d want Soar over Armor of Thorns in a Blue/Green deck, simply because it is another way to give my large Green creatures evasion. This is the one archetype in which Soar shines – otherwise, it is the worst of the five substance auras.
This is a good time to discuss Floodgate. When Floodgate leaves play, it deals one damage to each nonblue creature without flying for every two Islands you control. When Floodgate gains flying, sacrifice it. Floodgate has five toughness, making it ideal for stopping a ground assault. It also can work as a one-way Wrath of God, since you can easily get rid of it via Boomerang, Soar, Harmattan Efreet, Ether Well, or other bounce/flying-granting effects. Your guys have three, four and five toughness – their guys have two toughness. Green/Blue is the best color pair best suited towards abusing Floodgate.
One last note about Green/Blue: Thirst and Unyaro Bee Sting are more important to this color pair than others, since they are your only two pieces of absolute removal in these two colors. White gives you Pacifism and Afterlife. Black and Red each have a half-dozen common and uncommon removal spells. Green and Blue have Unyaro Bee Sting and Thirst. Prioritize these over non-flying creatures – you will get plenty of chances at defensive creatures for this deck, but only two shots at removal.
Green/Black
Green/Black is a lot like Green/Red, except with less of an emphasis on acceleration towards four mana, and more of an emphasis on creature removal. Your curve is very level in Green/Black:
1CC: Granger Guildmage, Mtenda Lion, Sewer Rats, Shadow Guildmage,
2CC: Quirion Elves, Restless Dead, Skulking Ghost, Wall of Corpses, Wall of Roots
3CC: Breathstealer, Cadaverous Knight, Feral Shadow, Gibbering Hyenas, Jolrael’s Centaur, Sabertooth Cobra, Urborg Panther
4CC: Dirtwater Wraith, Fetid Horror, Giant Mantis, Gravebane Zombie, Stalking Tiger, Wild Elephant
5CC: Jungle Wurm
Green/Black is the color combination most likely to splash a third color – namely Red. This goes beyond the normal Kaervek’s Torch splash – there are simply too many reasons to run Red in this deck and so often you will end up with a Green/Black/Red deck instead of a Green/Black deck.
Granger Guildmage and Shadow Guildmage are the two best Guildmages, due to the Red ability on each. Green/Black has access to both of these Guildmages, and you bet that you’re going to be playing Red if you end up with either (or both, or multiples of both) of these Guildmages.
Green can easily grab access to a third color, thanks to Rampant Growth and Quirion Elves. In this archetype, those two cards are more important than Wall of Roots. This goes double because you want extra Black mana (for Fetid Horror, Dirtwater Wraith and Drain Life) and not extra Green. In this case, the color of mana matters more than having generic acceleration
Red is the bridge between Green and Black on the color tree – and therefore you will have the chance to draft many Black/Red and Green/Red gold cards that are definitely worth playing. Savage Twister, Jungle Troll, Kaervek’s Purge and Delirium are of note in the Uncommon slot. There are multiple Rares in those colors worth playing as well. See the Green/Red, Red/Black and Rares section for more details.
Green/Black/Red is basically the good stuff deck of the format – you are drafting all the objectively most-powerful cards in the format (the best removal, the best non-flying creatures) without necessarily a lot of care towards synergy. Green/Black/Red is all about the sheer power of your deck. These are the three deepest colors in Mirage, and you can basically force this archetype every draft if you want. The problem with this is that A) these are also the three most heavily drafted colors, and so all the good cards will likely be gone by the time they get to you, and B) you will open up the drafter to your left to end up with a ridiculously powerful White and/or Blue deck.
With that said, it’s hard to feel like the underdog when drafting Green/Black/Red. Note that Drain Life and Spitting Earth become less important, since you’ll be spreading between three colors with a mostly-Green base (usually).
Do not underestimate Bone Harvest – I would rather run my fifteen best creatures and two Bone Harvests than run my seventeen best creatures.
Red/Blue
Red/Blue plays somewhat similarly to Green/Blue, except that you have removal instead of large creatures. If momentum is most important to any one deck in this format, it is Red/Blue – you want to keep pushing through damage turn after turn in the hopes of getting your opponent into Kaeverk’s Torch/direct damage range.
Red/Blue is a deck that can easily run out of gas, since your creatures are going to be worse than White, Green and Black’s. You only have two flyers you can reliably depend on drafting – Teferi’s Drake and Azimaet Drake. This can make it hard to force through damage.
Luckily, you have a lot of tools at your disposal to get your guys through. As far as straight removal goes, you have Chaos Charm, Cinder Cloud, Ether Well, Flame Elemental, Flare, Incinerate, Mind Harness, Reign of Chaos, Spitting Earth, Suq’Ata Firewalker and Thirst to kill opposing creatures. You also get Boomerang, Jolt, Reality Ripple, and Sapphire Charm, which work marvels in this plan.
Countermagic is great in this deck, since you want to keep your board unmolested. Memory Lapse is better in this color combination than any of the others, and Power Sink is as good as any other non-X removal spell. Combat tricks (such as Lightning Reflexes) aren’t as important as just getting your guys through in anticipation of Kaervek’s Torch, Volcanic Geyser, or Incinerate damage.
Please also note that Ray of Command is a backbreaker in Red/Blue since it will most often be used to grab an opponent’s largest creature so you can attack. Please also note that I don’t highly recommend Red/Blue – it has the slightest margin of error of any of the decks, as you’ll often end up eeking through barely enough damage to win, while being one turn away from dying yourself. Still, you take what is passed to you and you can end up with a good Red/Blue deck if you grab a lot of Red and get passed a lot of Blue by people who insist on drafting Green, Black and Red.
Red/Black
Do you want to kill creatures? Draft Red/Black. Red/Black is the perfect example of a deck that doesn’t care much about it’s own creature base – you are simply going to drop guys and kill anything played by your opponent. Instead of listing creatures in a curve, allow me to list common/uncommon Black and Red removal spells:
1CC: Chaos Charm, Shadow Guildmage
2CC: Consuming Ferocity, Enfeeblement, Grave Servitude, Incinerate, Soul Rend, Spitting Earth, Wall of Corpses, Withering Boon
3CC: Dark Banishing, Delirium*, Flare, Shauku’s Minion, Stupor
4CC: Burning Palm Efreet, Flame Elemental, Kaervek’s Hex, Reign of Chaos
5CC: Cinder Cloud, Reign of Terror
XCC: Drain Life, Kaervek’s Purge, Kaervek’s Torch, Volcanic Geyser,
That’s twenty-five removal spells in the common/uncommon slots between the two colors – a density that will never be reached again. Also note that several of these cards not only remove creatures, but deal damage in the process/can deal damage instead:
Shadow Guildmage, Consuming Ferocity, Incinerate, Delirium, Flare, Cinder Cloud, Drain Life, Kaervek’s Purge, Kaervek’s Torch, Volcanic Geyser.
Here is the dirty little secret of Red/Black – you can design your deck to deal twenty damage to the head. You have access to two common “X” spells (Drain Life and Kaervek’s Torch), and Drain Life is often as effective as the Torch in Red/Black, since you don’t need more than a single Red mana in most cases. You can build Red/Black with two game plans:
- Drop dorks, clean out the opponent’s creatures with removal, and knock them down to zero, or
- Drop dorks, keep trading creatures so that you build up lots of mana, use Bone Harvest to recur your guys, keep trading, and then eventually burn your opponent for their last X life, where X can be as high as 20.
The second strategy might be a bit foreign to modern-day drafters, because there aren’t many decks capable of dealing twenty to the dome without any help from attacking creatures – but it is entirely possible in this archetype. Kaervek’s Purge and Delirium are both good for four-to-five damage a cast. Drain Life, Kaervek’s Torch and Volcanic Geyser will deal seven-to-ten damage each cast, and you can stall the board forever between your creatures (Wall of Corpses, Gravebane Zombie, 2/2 and 3/3 guys) and your removal (see above).
When I go Red/Black, I prioritize removal that can deal damage directly, then removal that can’t deal damage directly, then Bone Harvest, and then creatures. Most decks in this format want 16-18 creatures and 5-7 spells – Red/Black wants 10-12 creatures and 10-13 spells. Your creatures are there to stall or act as removal – if they deal damage, that’s a bonus.
Blue/Black
Blue/Black is often Blue/Black/Red, in order to enable Shadow Guildmage and to splash Kaervek’s Torch/Incinerate. Blue/Black is about getting your flying creatures to kill the opponent – this is the one archetype where I’d want to actively play Bay Falcon, since he can be pumped by Shaper Guildmage. You can also throw Grave Servitude on any number of blue flyers (swing for five on turn four with Azimaet Drake), and can generally control the ground through Wall of Corpses, Dream Fighter, Kukemssa Serpent, and Cadaverous Knight.
Blue/Black plays a lot like Blue/Green, except that your creatures are worse on the ground, but your creatures are better in the air. You also have a lot wider range of removal spells at your disposal, at the cost of having flying defense (you trade Giant Mantis, Locust Swarm, and Femeref Archers for Dark Banishing, Enfeeblement, and Drain Life).
The power of Black/Blue doesn’t fully emerge in Mirage block until the release of Visions, when you add Undo, Man-o-War, Impulse, Fallen Askari, Funeral Charm, Cloud Elemental, Coercion, Crypt Rats, Knights of the Mist, Python, Breezekeeper and Wake of Vultures to your card pool. At that point, Black/Blue becomes one of the best decks, as your early curve becomes completely insane.
Unfortunately, in Mirage/Mirage/Mirage, Blue/Black doesn’t have a lot going for it, and you will generally end up drafting these colors only if A) you end up with bombs, or B) you are being fed a lot of Blue cards to go with your early Black picks. Blue tends to be an ignored color, so you can end up with later-pick Azimaet Drake, Ray of Command, Power Sink, and other top-notch Blue cards while other people fight out Red, Black and Green.
Five-Color Green
There are a lot of mana fixers in Mirage, including Quirion Elves, Rampant Growth, five sacrifice lands (Bad River, Flood Plain, Grasslands, Mountain Valley, Rocky Tar Pit), five diamonds (Charcoal, Fire, Marble, Moss, Sky), and Mana Prism. It is entirely possible to audible a two-color draft into a five-color draft if you’re getting passed the goods left and right. I’ve had many successful decks that ran all five colors, assuming that the extra colors are worth it – for bombs like Torch, Sawback Manticore, Phyrexian Purge, Savage Twister, dragons, etc. Do not be afraid to go five colors if you end up with a lot off-color bombs – sometimes the sheer power of a deck outweighs mana issues, especially if the spell your are splashing for will single-handedly win you the game/turn the game in your favor from a losing position.
Artifacts
I haven’t touched much on artifacts, because they are non-color specific. Let me explore the Uncommon artifacts quickly.
Basalt Golem
Very playable, since it is nearly impossible to block effectively, and acts as a good defender thanks to its four toughness. Basalt Golem is an auto-include in any deck, and should be drafted highly.
Chariot of the Sun
Good for getting through your Green fat guys, but circumspect thanks to so many effects that deal one damage – such as Chaos Charm, 2 Guildmages, Flare, Grave Servitude, etc. I tend to try to avoid using Chariot unless my opponent is not playing Red.
Crystal Golem
I’d run Crystal Golem in any offensively oriented deck, since he ducks a lot of removal spells (Spitting Earth, Drain Life, Enfeeblement). I’d avoid him in decks that want to block or play defense, such as Green/Blue.
Elixir of Vitality
This is a good card to bring in against an opponent who runs Torch. It is a backbreaker against Red/Black, but not as good against a deck that will steadily reduce your life total (White/Blue) or that will run you over quickly (Red/Green).
Horrible Hordes
Passable on offense, bad on defense. The hordes fill the same niche as Urborg Panther and Sabertooth Cobra – a 2/2 body for three that can swing. Nothing special, and you’ll probably have better, but you shouldn’t be ashamed to include it.
Igneous Golem
Four toughness is key in this format, and there are few (if any) decks that would cut him out. Trample matters as well.
Lead Golem
Amazing in any deck that plays defense, because it is bigger than anything on this side of Crash of Rhinos. You’ll have two creatures to block Jungle Wurm, most likely. Prioritize him if you’re playing a deck that wants to lock up the ground.
Patagia Golem
Another creature I’d pick highly, especially in color combinations that are naturally low on flyers (Green, Red and Black). It stops most of the White flyers (the Griffins), but it is also vulnerable against White (Disenchant, Divine Offering).
Phyrexian Vault
The Vault should be a top priority – and I have seen it go way later than it should on Magic Online. The Vault allows you to turn all of your creatures into cantrips – which means that you can trade creatures in combat and come out ahead, get rid of creatures that have been negatively enchanted (Pacified, Thirsted), draw a card off of creature removal (Vault a creature that has been targeted by Incinerate) or simply sacrifice creatures late-game to get towards a spell you need (Torch).
There are few cards in Mirage that allow you to draw extra cards, and given how often creature-trades happen in this format, the Vault is invaluable to almost every deck.
Sand Golem
Much like Horrible Hordes, you play him if you have to, but he’s not amazing. The discard ability will rarely come into play in straight Mirage Draft.
Telim’Tor’s Darts
Best in stall decks, but they will deal a good amount of damage every game – which is especially good if you plan on Torching an opponent out. Not as good in decks that want to drop creatures every turn and keep them attacking (White/Green, Red/Green), but good in slower decks (Green/Blue, Black/Red).
Unerring Sling
A great sideboard card against flyers, but not necessary against a majority of the decks in the field.
Color Hosers
There are a ton of color hosers in Mirage, most of which are in the uncommon slot. I’ve already talked about Dirtwater Wraith and Merfolk Raiders, so let me concentrate exclusively on the uncommon hosers.
White
Mangara’s Equity: I’d leave this in the sideboard, and bring it in if my opponent’s creature base is primarily Red or Black. Remember, it’s easy to face a Green/Red deck where most of the opponent’s creatures are Green, and the Red is there primarily for removal. Also note that the Equity is not necessarily good against creatures with a higher toughness than power, such as Ekundu Cyclops, Fetid Horror, and Dirtwater Wraith.
Melesse Spirit: Auto-include in White decks, as it’s a 3/3 flyer for five – and that’s as good as non-rares get in this set. You’d auto-include the Spirit if it was 3/3 for five without protection from Black, so the additional protection is just gravy.
Shadowbane: Great against X spells, and it can act as a way to save your creature from any combat damage to boot. Remember, it works against any color of spell, not just Black – the gain-life aspect of Shadowbane is gravy. Have this in your sideboard, but bring it in against any deck which shows you an X spell, as it’s one of the ways of dealing with X to the head in this format.
Unaryo Griffin: You’re going to run him anyhow, since he’s a 2/2 flyer for four. Under its Oracle wording, it can counter any Red instant or Sorcery, not just those that deal damage.
White/Blue
Hazerider Drake: This is an auto-include in White/Blue decks, as it is a good flyer even without protection from red. If you’re playing White/Blue, you’re going to always play Hazerider Drake.
Blue
Ether Well: An instant-speed Time Ebb, and one that gets rid of Red creatures entirely. Sometimes you’ll still want to put the Red creature on top of the deck, so remember you have a choice. You’re probably going to play this no matter what colors your opponent is playing, since it’s a good trick.
Mind Harness: I’d always run Mind Harness maindeck. Most decks you will face will run either Red or Green, since Green is the best color-base in the set, and Red has the most bombs. There are very few games in which you will draw a dead Mind Harness. It will act as a ridiculously fast Control Magic.
Suq’Ata Firewalker: Auto-run, and the anti-Red ability comes into play more often than you’d think. Note that effects are the color of the card generating them, and not the color of the mana used to generate them – IE: Granger Guildmage dealing a point of damage will still be counted as a Green source, even though you are spending Red mana to activate the tim ability. Granger Guildmage and Shadow Guildmage will kill Suq’Ata Firewalker dead.
Blue/Black
Haunting Apparition: I’d probably leave this guy in my sideboard, since he’s very narrowly focused, and three for a 1/2 flyer isn’t a great deal. I’d definitely bring him in the second I saw my opponent lay a Forest.
Black
Barbed-Back Wurm: You’re going to run a 4/3 for five, and the -1/-1 ability is very relevant, since it will allow the Wurm to break through virtually any Green blocker – including Wall of Roots, Jungle Wurm, and Locust Swarm.
Kaervek’s Hex: I’d usually leave this in the board, since it is useless in the mirror, and marginal against non-Green decks, since most creatures will be X/2 or X/3. Against Green, bring this in immediately – it will clean out Jolrael’s Centaur, Granger Guildmage, Village Elder, Gibbering Hyenas, and several other post-combat-blocking creatures.
Reign of Terror: Much like Mind Harness above, I’d include this in most of my main decks, since it acts as a one-sided Wrath. I’ve often paid eight to ten life to take out my opponent’s entire board – and seven out of my ten opponents are going to be playing White or Green. Two notes on the Reign: You get to kill either Green or White, but not both, and you must kill all creatures – so it’s an all-or-nothing proposition.
Soul Rend; Note that due to the wording on Soul Rend, you can target a non-White creature if you just want to cycle Soul Rend and draw a card. Because of this, there’s no reason to cut this from your deck – it’ll be good against White, and you can cycle it against non-White decks.
Red/Black
Shauku’s Minion: I’ll usually include this in the maindeck of Red/Black decks, since it is comparable to any other 2/2 for three in those colors, if you’re going with the removal-first strategy. It doesn’t matter if your 2/2 is Burning Shield Askari Urborg Panther or Shauku’s Minion if your opponent has no blockers – and the Minion’s ability will absolutely decimate a White player – most White creatures are 2/2 flankers or 2/2 flyers.
Red
Cinder Cloud: Cinder Cloud will outright kill a creature, so you’re going to play it no matter what. It’s Fissure in Mirage – with the bonus of dealing a kick-in-the-pants against White decks. Maindeck material for sure.
Goblin Scouts: I’ll often leave the Scouts in the sideboard, because 1/1 creatures are easily killed in this format. They come in against the mirror match, but in general I’d rather have a 3/3 for four than run three 1/1’s for five.
Reign of Chaos: I’ll run this maindeck if I’m lighter on removal, and side it if I already have a good amount (four to five) of removal spells. You are less likely to face White or Blue than you are to face Green (Reign of Terror) or Red/Green (Mind Harness), which is why I give the nod to Reign of Terror over Reign of Chaos. Still, the momentum this card provides (killing a creature plus a land on turn four) can win you the game outright, especially if you’re on the play.
Sirocco: Don’t play this.
Wildfire Emissary: An auto-include, as it wins combat against virtually every other creature in the format – it can pump to kill 3/3’s, 2/2 flankers, and can wreck house on its own. White has a nightmare of a time dealing with the Emissary, since it is usually larger than red removal (Spitting Earth, Incinerate), and black Removal (Enfeeblement, Drain Life).
Green/Red
Windreaper Falcon: I’d leave this in the board, but bring it in the second I saw an Island. It stops a ridiculous number of creatures, from Azimaet Drake to Sandbar Crocodile. Blue/X has a hard time dealing with it, since Blue/X usually won’t have access to Red mana for Granger Guildmage or Shadow Guildmage.
Green
Decomposition: Great against Black, but strictly sideboard material. This card will frustrate regenerators, which is key for Green against Black – it is one of the few ways to remove Restless Dead and Cadaverous Knight.
Karoo Meercat: I’d include a 2/1 for two in most of my decks, since there are so few of them in the format. The protection ability is a bonus in what is essentially a Grizzly Bear.
Roots of Life: I’m of a split mind about this card. I’d definitely leave it in the sideboard, and I probably wouldn’t bring it in against Blue. Against Black, it is a good card for negating Drain Life, Dirtwater Wraith, and Fetid Horror. If you see those spells/creatures, bring it in. Otherwise, it’s probably best left in your board.
Tropical Storm: I’d maindeck this every time. It kills a lot of common creatures, deals with a problem area for Green (flyers), and has the bonus of wrecking Blue. I cannot tell you how many times I’ve taken out a Blue players entire board with Tropical Storm – from Dream Fighters to Suq’Ata Firewalker to their flyers – remember, you only need to deal X minus 1 damage to the flyers, since you’ll get an extra bonus point in for free. That’s G2 to kill Azimaet Drake, G1 to kill Teferi’s Drake.
Unseen Walker: Another card I’d run main deck, since so many people play Green in their decks. Remember, it has Forestwalk on its own, so you can swing with it against Forests without any need for activation. With Green fat creatures, Unseen Walker will turn the game into a one-sided massacre.
White/Green
Radiant Essence: 2/3 for three is not a bad deal, and Radiant Essence becomes a board-dominating monster at 3/5. Therefore, you are probably going to include the Essence in your maindeck, since it is along the curve on offense. Keep in mind that if your opponent has no Black permanents, your Essence will revert back to 2/3 – so if your opponent only has a Gravebane Zombie on the table, beware attacking into it/blocking it with the Essence.
Rares:
Okay, so I’ve gone over a lot of strategy for the cards that you’ll reliably see from draft to draft. What about the rares? There are a lot of bombs in the rare slots of Mirage, just as there is a lot of chaff. Let me break the Rares down color-by-color.
White Bomb
Pearl Dragon: First pick this, as it’s a 4/4 flyer and is larger than anything else you’ll see. All of the Dragons should be first picks in their colors, with the exception of the Savage Twister/Kaervek’s Torch rule.
Sacred Mesa: The best White card in the set, and one of the top five cards in the set period. Take this over anything except Kaervek’s Torch if you open it in the first pack – and debate taking it over the Torch even then.
White Playable
Auspicious Ancestor: The lifegain abilities of the Ancestor will often swing a damage race in your favor.
Divine Retribution: Removal, albeit not absolute.
Ethereal Champion: Green and Red have nightmares about this creature, since they virtually cannot deal with it at all. It has a steep color requirement, but it is worth it if you are more heavily White than your second color.
Rashida Scalebane: Four-toughness creatures are key, since they kill 3/3 creatures and 2/2 flankers. It’s worth playing any of the 3/4 creatures that cost five mana, just as vanilla creatures.
Sidar Jabari: Great for offensive decks, since you’ll remove their best blocker every turn. This should be included in your deck.
Sunweb: Good against Green and Red, bad against most of the other colors – it can’t stop 2/2 flankers, it can’t stop 2/2 flyers, and it can’t stop the 1/X Black pumpers. I’d probably cut Sunweb if I already had a lot of flyers in my deck.
Zuberi, Golden Feather: This is a bomb if you’ve already gotten a few griffins/expect to push White, but is otherwise about as good as Cerulean Wyvern or Melesse Spirit – and he also pumps opposing griffins, so keep that in mind.
White Sideboard
Celestial Dawn: If you want to mana fix, play Green. Don’t play this.
Jabari’s Influence: Jabari’s Influence is deceptively weak – it can’t affect Black creatures, it can’t affect artifact creatures, it can only be played after you’ve taken damage, and it requires that you keep five mana open a turn. I have rarely been happy playing it, even if it is a Control Magic effect.
Null Chamber: If you are deathly afraid of an opponent’s bomb (Hammer of Bogardan, Kaervek’s Torch), side in Null Chamber. Remember that your opponent can Null Chamber you as well, since both players name a card.
Soul Echo: This is another anti-Torch card that you might run if you are afraid of being burned out, but generally you want to leave Soul Echo in your sideboard.
Spectral Guardian: 2/3 for four isn’t good, given that it has no relevant special ability.
Yare: Not very relevant most of the time.
Blue Bomb
Mist Dragon: It’s a large, flying, unkillable Dragon. First pick it.
Blue Playable
Ancestral Memories: Amazing for digging for that game-ending bomb, but otherwise it is too color-specific to be run reliably. This is best suited for Blue/Red, when you want to dig for Kaervek’s Torch, Hammer of Bogardan, or some other bomb.
Hakim, Loreweaver: A very solid flyer, and one that will rule the air even without its enchantment-moving ability. Hakim works well with Armor of Thorns, Ward of Lights, Ritual of Steel, and other beneficial enchantment – auras.
Polymorph: Useable to turn 1 of your creatures into a different creature – either if you desperately need a better creature and/or you want to get rid of a Pacified guy. It also kills an opposing creature, hopefully turning their Jungle Wurmish type dude into a Wall of Roots or something less important. Note that Polymorph destroys without ability to regenerate, so it deals with Cadaverous Knight.
Shimmer: The ability to turn off your opponent’s mana every other turn is pretty good, even if you’re only affecting one of their two colors. Solid, if unspectacular.
Taniwha: See the section about phasing creatures above, but in general you want to play the 7/7 trampler for five mana, no matter the drawback.
Teferi’s Imp: Also see the phasing section at the beginning of this guide – this guy is pretty solid.
Blue Sideboard
Bazaar of Wonders: This is a last-ditch card to bring in against Hammer of Bogardan. Otherwise, don’t play it.
Daring Apprentice: I don’t like running Dream Fighter, because it is vulnerable to the massive amounts of one-damage dealing commons in the set – Granger Guildmage, Shadow Guildmage, Chaos Charm, Flare, Spitting Earth, Drain Life, Grave Servitude. Daring Apprentice would be good if it didn’t require to tap, but in general it does too little for too high a cost.
Energy Vortex: Energy Vortex deals three damage no matter how many counters it has – making it less than ideal. Note this – many people misread the card and think that it deals X damage to the opponent, when it’s three damage, even if X is ten or some absurd number.
Flash: Trash.
Kukemssa Pirates: It will never get through, since it is a 2/2 for two with no combat-related abilities. Trash.
Political Trickery: Good against Thawing Glaciers and man-lands, of which there are none in Mirage. Don’t play it.
Prismatic Lace: Junk.
Psychic Transfer: Junk.
Black Bomb
Abyssal Hunter: Icy Manipulator and Granger/Shadow Guildmage rolled into one. Abyssal Hunter can single-handedly control the entire board, especially if it gets large enough to kill X/2 or X/3 creatures (Shaper Guildmage, Afiya Grove and Lightning Reflexes help in this regard – Armor of Thorns unfortunately does not). First pick this over almost anything else if you’re playing Black.
Catacomb Dragon: It flies, it’s a bomb, take it first.
Harbinger of Night: Capable of slowly Wrathing the entire board away. It takes down Guildmages on the first turn, flankers and flyers on the second turn, and most everything else on the third turn. You can get your creatures back with Bone Harvest, whereas you may well have destroyed your opponent’s chance of wining the game.
Black Playable
Ashen Powder: If you’re playing Black, chances are you are killing a few of your opponent’s creatures. Use Ashen Powder to get the best of what you’ve already dealt with. Please note that this is risky against Blue once Visions is added into the draft mix, since Man-O-War and Undo make this sort of reanimation a risky proposition.
Carrion: Surprisingly good, since you can turn an otherwise-dying creature into four-to-six turns of chump blocking. It’s also good combined with Blighted Shaman, Ravenous Vampire, and Superior Numbers.
Forbidden Crypt: Remember the Black/Red deck above that cared more about burning out the opponent than winning with creatures? In that deck, where you’re going to running through ten to twelve direct-damage and creature-kill spells a game, Forbidden Crypt is amazing. It’s Demonic Tutor every turn for your best spell each turn, and will double your direct damage. In other decks, it’s less reliable – you won’t have as important spells to recur – and will backfire as often as it will work.
Infernal Contract: Three mana and half your life for four cards is not a bad deal… later in the game. If you’re already low on life – two life through ten life – and going to be in Torch range, go for broke and try to draw solutions. There are too many things you want to do early in the game to warrant casting this while you’re at a higher life total, plus who wants to have triple Black on turn 3?
Purraj of Urborg: Purraj might be a bomb if you are very heavily Black – she will quickly grow to monstrous proportions if left unchecked. A bomb if you are Black/X, playable if you are X/Black.
Shauku, Endbringer: Shauku is extremely powerful, but has three major drawbacks – she cannot attack 99% of the time, she comes out late in the game, when you might already be low on life, and she zonks you for three life a turn. Note that Shauku will pretty much prevent your opponent from attacking, since she is a 5/5 flyer – and she will pick off your opponent’s best creature each turn. Also note that Shauku can kill herself if you need to get rid of her, but you will still lose three life on that turn.
Spirit of the Night: You’re not going to sacrifice Breathstealer, Urborg Panther and Feral Shadow to search for Spirit of the Night – chances are that if you have all three of those guys out at once, they are attacking and you are already winning. With that said, Spirit of the Night and Crimson Hellkite are two creatures that will win you the game on their own, but require a huge mana contribution to get out in the first place. It’s not unplayable, even at nine-mana – but don’t feel bad cutting it out if you don’t feel comfortable having a nine-mana card clogging your hand for the majority of the game.
Tainted Specter: Kills X/1 creatures, and forces your opponent to either discard or Time Ebb their hand. It’s also a 2/2 flyer, making it a very solid choice.
Tombstone Stairwell: If you’re going for a creature-heavy, Bone Harvest plan, then Tombstone Stairwell will deal 2X damage a turn, where X is equal to the number of creatures you have in your graveyard in excess of how many your opponent has in their graveyard. This can win games on its own, but you have to build your deck to plan for the Stairwell – making it more attractive for Black/White and Black/Green, and less attractive for Black/Blue and Black/Red.
Black Sideboard
Forsaken Wastes: Most of the Black decks in Ravnica don’t want to race – they want to control the board. The exception to this is Blue/Black. Play this main in Blue/Black, leave it in the board otherwise.
Phyrexian Tribute: No. Please don’t.
Shallow Grave: If there were more comes-into-play creatures in the set, Shallow Grave would have a place. Since there are not, I’d avoid playing it.
Red Bomb
Hammer of Bogardan: The best card in the set, period. Take this over anything else, as I mentioned at the beginning of the article. Pray that this is the card you open, and then build your deck around it. The five best cards in the set, coincidentally, are Hammer of Bogardan, Kaervek’s Torch, Sacred Mesa, Phyrexian Purge, and Savage Twister, probably in that order.
Reckless Embermage: If Guildmages are good, Reckless Embermage is great. Remember, it can ping once on both your turn and your opponent’s turn without any ill effects. It makes blocking or attacking nearly impossible for your opponent, since you can get that extra one damage in. If you somehow increase Reckless Embermage’s toughness (Armor of Thorns, Ritual of Steel), he will absolutely dominate the board. The Embermage also acts as a Rocket Launcher if you’re playing Blue, since you can Reality Ripple and/or Boomerang him in response to activating him several times, and have him come back the next turn.
Subterranean Spirit: Protection from Red is huge, especially on another Red creature. This kills Guildmages, screws up combat math, and swings pretty well to boot. Take this over other creatures, and over most other removal spells.
Torrent of Lava: One of the few mass-removal cards in the format, and one that you can prepare for, thanks to the oddly non-Red built-in damage prevention ability present on the Torrent.
Volcanic Dragon: It’s big, it has haste, it flies, and it’s a dragon. I think that you should know to first pick this creature.
Red Playable
Crimson Hellkite: See Spirit of the Night, above. If you cast it, you’ll probably win – unless it gets hit by Ray of Command or Delirium. Good luck getting to nine mana!
Emberwilde Djinn: If your opponent isn’t playing Red, they will most likely have to pay two life a turn to grab the Djinn – making it a very worthwhile addition to your deck. Plus, I’ve seen an opponent pay two life to take the Djinn, only to have their opponent grab the Djinn back with Ray of Command, dealing a total of seven damage in one swing – perfect for the Blue/Red deck.
Final Fortune: One extra turn is all it takes to win sometimes, especially since it can be cast as an instant. Any card that can lose you the game just by being cast is always a risk, so proceed with caution – you probably want to run this in Red/Green or Red/Blue, but probably not in Red/White or Red/Black.
Hivis of the Scale: See Rashida Scalebane – you want to play 3/4’s for five mana in this format.
Illicit Auction: Illicit Auction will either act as a Control Magic or as a mega-Lava Axe. If you are ahead, it will put you ahead for good. If you are on even footing, it can potentially put your opponent in burn range.
Telim’Tor: Telim’Tor is amazing in Red/White, and just ok otherwise – it’s still only a 2/2 on offense. Pick him highly if you’re Red/White (since you’ll have a lot of other flankers), and don’t worry about him too much in other Red/X combinations.
Zirilan of the Claw: See Hivis of the Scale and Rashida Scalebane, with the added bonus that you might be able to tutor out a dragon if you’ve drafted one. Yay!
Red Sideboard
Barreling Attack: It’s not bad, since it will give your blocked creature at least +1/+1 and allow it to trample. However, Red has better common choices (Agility, Lightning Reflexes) than Barreling Attack, especially since the Attack costs four mana.
Chaosphere: I’ve definitely brought this in against flyer-heavy decks, and wrecked the opponent. That said, you don’t want to main deck this card, since it’s very likely to do nothing.
Telim’Tor’s Edict: Not useless, since it can counter Ray of Command and Mind Harness. Not something you want to run main deck though.
Green Bomb
Canopy Dragon: The worst of the five colored dragons, and still a bomb. First pick him.
Maro: Maro gets even more insane after Visions, thanks to Quirion Ranger. As it stands, Maro is often the largest creature on the board on the third turn, and can swing in for a good ten-to-twelve damage uncontested if you get him out early. In Green/Red or Green/White, this is key – pick him over other creatures in those colors, except for maybe Melesse Spirit.
Preferred Selection: The ability to choose from among two cards a turn (and to draw that card if you need it) is huge in this format, and Preferred Selection will assure that you see your bombs pretty much every game. Definitely worth first-picking.
Green Playable
Afiya Grove: +3/+3 over three turns is not bad, but note the one drawback – even if you control no creatures, you have to give something a +1/+1 counter. This means that if your opponent is the only one with creatures in play, they’re getting larger creatures. Still, +1/+1 is a big bonus in Mirageland, and so this is very playable.
Brushwagg: 1/4 on defense, 3/2 on offense if it gets through. A good, solid attacker, since very little can block and kill it.
Jungle Patrol: A 3/2 creature for four that can make chump blockers – and ones that will help fuel your X spell later in the game. Very solid, and I’d take this over the other four-drop creatures Green or Red has to offer.
Mindbender Spores: The Spores take out a creature for four turns, which is quite a long time. They are great on defense, but vulnerable. Play these in Blue/Green, and consider them in other Green decks if you are anticipating trouble with flyers.
Green Sideboard
Cycle of Life: I’d bring this in against non-Guildmage heavy decks, but leave it out otherwise. It’s a free +1/+1 counter on your creature, at the expense of leaving the creature very vulnerable for a turn. Still, a 3/3 griffin or a 4/4 Stalking Tiger is significantly better than a 2/2 griffin or a 3/3 Stalking Tiger.
Early Harvest: Only if you are Torch heavy, and even then I’d probably leave it in the board.
Hall of Gemstones: Very good against decks that are heavy on off-color mana activations (Guildmages), have more than two colors (Green-based) or have many gold cards (any). I’ve seen this wreck people before but you have to know when to bring it in from the board.
Lure of Prey: Junky, avoid.
Natural Balance: Great when combined with Prosperity, Cadaverous Bloom, Impulse, Squandered Resources, Infernal Contract, and Drain Life. Since this isn’t constructed, you won’t have much use for Natural Balance.
Seeds of Innocence: Bring this in if your opponent has any artifact bombs or a lot of golems. That is, if you haven’t taken Builder’s Bane, Disenchant, or Divine Offering, all of which are better.
Uktabi Wildcats: I’ve never seen these guys be effective, and they require a heavy Green commitment – something that does not pay dividends. You’re better off playing Jungle Wurm or Crash of Rhinos instead of a Wildcats.
Waiting in the Weeds: If this counted all Forests you control, it would be good. It only counts untapped Forests you control, so it’s junk.
Artifact Bomb
Amber Prison: There are few cards in this format that can dominate the board as effectively as Amber Prison. It deals with creatures that have tap abilities (since you can keep those creatures tapped down indefinitely), it stops large attackers, it clears blockers away for your attackers – basically, take this as a first pick.
Mangara’s Tome: The Tome serves two purposes. The first is to tutor for the best five spells in your deck, so you can draw them in some indeterminate order over the next five turns. The other use is to thin out the first worst cards from your deck – useful if you think your opponent is going to kill the Tome. Generally though, you’re going to use the Tome to get Kaervek’s Torch, your first-pick bomb rare, and three other solid spells.
Artifact Playable
Amulet of Unmaking: Slow, mana-intensive removal, but effective once it’s on the board. You’ll play it, but you won’t necessarily like that you’re playing it.
Grinning Totem: Great for taking that X spell out of your opponents deck, and allowing you to use it yourself. At the worst, you get a land – at the best, you neuter your opponent’s biggest bomb, and use it for yourself. Playable, but slightly worse than it initially appears, since you can’t really use it the turn it comes into play.
Teeka’s Dragon: See Spirit of the Night and Crimson Hellkite above, except that Teeka’s Dragon will not necessarily win you the game on its own, since it is more vulnerable and does less.
Artifact Sideboard
Acidic Dagger: The only real use for this is if you have a lot of Black regenerators, since the Dagger dies if your creature dies. Generally, this card is not very good.
Bone Mask: Usable against a deck with a lot of X spells, or if you’re racing land versus air (Blue/Red) – otherwise, you’ll deck yourself too often.
Cursed Totem: The Totem is good if you have a lot of creatures without activated abilities, and your opponent has a lot of creatures with activated abilities. Unfortunately, chances are both you and your opponent will have a lot of creatures with activated abilities, making it rare that you’ll have a deck unaffected greatly by your own Totem.
Lion’s Eye Diamond: Not meant for Limited play.
Misers’ Cage: Your opponent will rarely have five or more cards in their hand.
Paupers’ Cage: It’s more likely that your opponent will have fewer than three cards in their hand, but it won’t happen often enough o make this card worthwhile.
Phyrexian Dreadnought: Good luck getting twelve power worth of creatures in play to sacrifice. If you have that many creatures, chances are you’re either stalemated – which means that removing five-to-six blockers will get you killed – or you’re already winning.
Razor Pendulum: I might play this as a 23rd card in Blue/Green or Red/Blue, but otherwise it does too little for too high a cost. It could have cost one mana and still been fair.
Venifact Bottle: If you have 2+ X spells, play the Bottle, because you can Torch/Volcanic Geyser people for fifteen+ damage in one turn. Otherwise, avoid this artifact.
Land Sideboard
Teferi’s Isle: Junk. You’re better off playing an Island, since the Isle comes into play tapped, and won’t accelerate you until three turns down the road.
Red/Green Bomb
Rock Basilisk: Bigger, meaner and nastier than virtually every other creature in the format. There is little that can stop the Basilisk on either offense or defense, and it has a huge toughness when compared to most of the creatures in this format.
Sawback Manticore: The Manticore is just outside the list of the top cards in the set, and is definitely in the top ten. Once it hits the board, your decide how combat goes the rest of the game. The only drawback to the Manticore is that it must be taking part in combat to use its second ability – but this is negligible given that you can give it evasion, making it virtually unkillable through blocking.
Black/Green Sideboard
Cadaverous Bloom: I’ve run this if I had multiples of Drain Life or Kaervek’s Torch. Otherwise, avoid running this.
Grim Feast: If this had been Black/Red, it would have been amazing. Since it’s Black/Green, try to avoid it – I’ve seen it work, but more often I’ve seen it ping someone to death.
Black/Red Bomb
Phyrexian Purge: One of the five best cards in the set, and a reason to splash Red in your Black deck, or Black in your Red deck. Phyrexian Purge is a Savage Twister that will unequivocally kill all of your opponent’s creatures. You choose which creatures, and how many of those creatures. Note that it is targeted – you cannot kill protection from Red or Black guys.
Black/Red Playable
Discordant Spirit: Note that Discordant Spirit gets a +1/+1 counter for each damage dealt to you, regardless of the source – so taking damage from your own Shaper Guildmage will make the Spirit larger. It’s not a great blocker, but it can be an amazing retributive attacker.
Blue/Green Playable
Malignant Growth: Blue/Green can tie up the board, which makes Malignant Growth into a slow-death scenario – but at the cost of allowing your opponent to draw extra cards. Still, your opponent takes one damage, then two damage, then three damage, and then four damage within the first turns you have cast the Growth, and that is half their life total right there – so if you already have whittled away their total, the Growth is a playable finisher.
Blue/Green Sideboard
Warping Wurm: Not unplayable, but you’d have to be pretty desperate to run it. Unlike
Malignant Growth, Warping Wurm’s slow burn can be blocked, killed, and stopped easily.
Black/Blue Bomb
Unfulfilled Desires: A great way to cycle through your deck, given that there are few ways to draw extra cards. I would choose it over anything except the bet of removal spells or creatures, because you assure drawing your best cards every game.
Blue/Black Playable
Benthic Djinn: This is Juggernaut, except in Blue/Black – a color combination that is otherwise short on fatties. Watch out for Thirst and Pacifism – they can turn this monstrous creature into a massive liability. Great against Blue (if it doesn’t get Thirsted), Green, Red and Black. Not so good against White, because it can be Pacified or blocked indefinitely with a Ward of Lights enchanted creature.
Blue/Red Bomb
Emerwilde Caliph: Remember how I said that Blue/Red was a race to zero? Emberwilde Caliph is the perfect example of a card that fits into that archetype. It’s a flying, trampling Flesh Reaver in a color combination that would benefit from a flying, trampling Flesh Reaver. Please note that the damage/life loss ability is triggered, so if both you and your opponent are at four life, they will die before you.
Blue/Red Playable
Frenetic Efreet: A 2/1 flyer for three that is unkillable half the time. Definitely a solid guy in Red/Blue, but I’d take removal over him (Incinerate, for instance).
White/Green Playable
Asmira, Holy Avenger: It’s a 2/3 flyer for four that gets bigger when your other flyers (griffins) die. Play it, but don’t be afraid to pass it over something like Pacifism.
White/Green Sideboard
Wellspring: Junk.
White/Red Bomb
Energy Bolt: A reason to splash Red in your White deck, or White in your Red deck. First pick this if you are playing either Red or White, and find a way to fit it into your deck.
Reflect Damage: I’d also play this as a splash, since it can end the game in one casting. Note that is redirects all damage dealt by a source, no matter how many places that source deals damage. For instance, if your opponent casts Savage Twister for four, and you have five creatures in play, Reflect Damage will redirect twenty damage to your opponent.
White/Blue Playable
Leering Gargoyle: A solid 2/2 flyer for three, and one that also works as an effective blocker.
White/Blue Sideboard
Reparations: If Reparations drew you a card whenever a creature you control was targeted by an effect it would be an auto-include. Instead, it is useful primarily against removal-heavy decks.
White/Black Playable
Purgatory: Purgatory is a great alternative to Bone Harvest, since you can keep bringing creatures back into play each turn. Remember, Purgatory returns the creature to play, and there are a lot of four-mana creatures that you’d want to bring back anyhow (griffins).
White/Black Sideboard
Circle of Despair: This has the potential to give you good trades in combat (put damage on the stack, save one of your creatures with another), and it works well with Bone Harvest. I’d leave this in the board, and bring it in if I saw any X spells, since it would negate any potential Kaervek Torch sillyness from my opponent.
Some Final Words
Serene Heart is worth playing maindeck, as it deals with the instant-cast auras. Tranquil Heart is not, since there are few non-aura enchantments of note in Mirage. I’d want at least one Serene Heart between main deck and sideboard if I’m playing Green.
Dream Fighter is pretty junky, because it dies to both of the good Guildmages, plus a lot of common removal. Don’t rely on Dream Fighter to secure your board position, because it can and will die at a moment’s notice.
Remember that Kaervek’s Torch has a second ability – you must spend an extra two mana to counter it. Because of this, don’t fear Torching out a Blue mage who is keeping open only three mana for Dissipate because they can’t Dissipate the Torch in that case. Also, give yourself an extra two mana to work with if you’re trying to get around Power Sink.
Chaos Charm can kill walls. This includes the token created by Tidal Wave.
I hope that this guide helps you win many a Mirage draft on Magic Online! All comments and questions can be directed towards the forum of this article.
A big thank you to everyone who followed and read my dailies this week!