“….and I’ll sacrifice a Food in order to return my Cauldron Familiar to the battlefield. My go?”
If you’ve been playing much Throne of Eldraine Standard in the last few weeks, this has become an increasingly common thing to hear. With Trail of Crumbs, Witch’s Oven, and all kinds of other Food cards making the rounds, it isn’t really possible to ignore Food.
Despite Oko, Thief of Crowns getting nailed with a ban a few weeks ago, Food is starting to feel a bit like the Energy mechanic from Kaladesh. That’s to say that people are taking note of all the cards that convert a near-free resource into tangible advantages, both on the battlefield and in raw cards.
Since the Field of the Dead era of this Standard format, the Mayhem Devil-fueled Rakdos Sacrifice deck has been a way that people tried to subvert the midrange games the green-based decks have been creating. The primary draw to the archetype is that it has the ability to emulate a black-based aggro deck with some fast starts, while also having the card advantage engines necessary to make it through longer games.
Creatures (23)
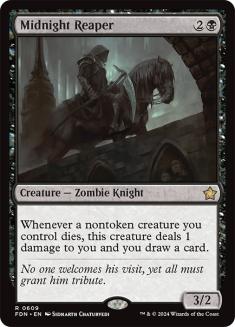
- 4 Midnight Reaper
- 2 Gutterbones
- 4 Priest of Forgotten Gods
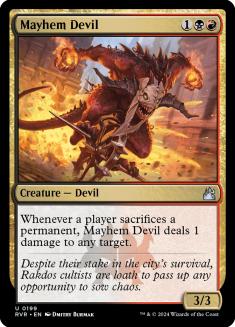
- 4 Mayhem Devil
- 4 Rankle, Master of Pranks
- 1 Murderous Rider
- 4 Cauldron Familiar
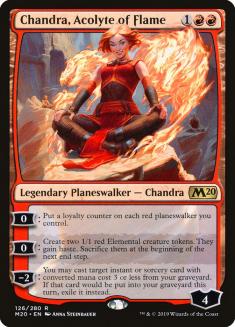
Planeswalkers (2)
Lands (24)
Spells (11)
Sideboard

Variations of Rakdos Sacrifice have homogenized over the last few weeks, so rather than hyper-fixating on card selections in my list, it’s more productive to talk about the minutiae of what people are screwing up: sequencing and maximizing value.
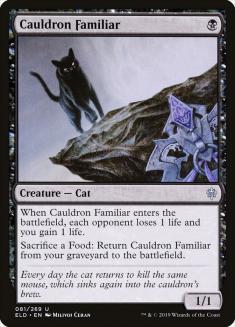
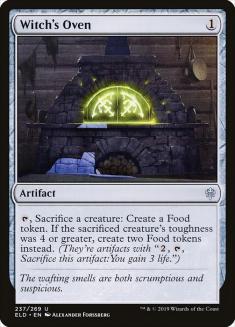
When it comes to using Cauldron Familiar and Witch’s Oven, it isn’t always as simple as “blinking” the Cat during the opponent’s end step. Prioritizing the Witch’s Oven is going to be correct 99% of the time, but returning the Familiar isn’t always that easy.
Why?
Mayhem Devil cares a lot about how many times a permanent is sacrificed. This matters a great deal when sequencing during early turns. For example, assume the first two turns simply involve casting a single copy of both the Cat and the Oven.
Traditional heuristics would dictate that it’s going to be correct to immediately return the Cat to the battlefield. That way, it won’t be summoning sick and has the ability to attack. Despite that being the “correct” thing to do in a vacuum, it’s important to account for what the opponent has on their side of the battlefield.
If the opponent has a creature that will prevent Cauldron Familiar from dealing any relevant combat damage, it’s better to just keep it in the graveyard. That way, Mayhem Devil gets an extra trigger off the Food that’s on the battlefield when the Devil comes down.
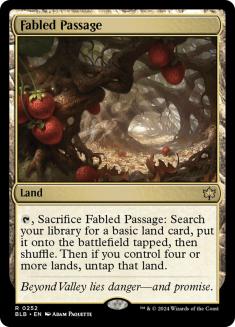
For similar, Devil-related reasons, being conscientious of land sequencing comes up a surprising amount of the time. In a deck that has a curve as odd as this one, it’s tempting to let Fabled Passage act as an Evolving Wilds on the second turn, but in later turns of the game, Fabled Passage feels much closer to a Bloodstained Mire that the opponent has to pay the life for. Or lose a creature. Whatever.
The prioritization of three-drops is going to come down to the matchup, but there are a few rules of thumb to consider when trying to figure out which to commit to the battlefield first.
- Midnight Reaper is frequently the most expendable creature. It’s the easiest to deploy first, because it doesn’t require very much investment to get anything else out of it. If the opponent uses a removal spell on Midnight Reaper, it’s going to replace itself. The same can’t be said for Mayhem Devil and Chandra, Acolyte of Flame.
- Mayhem Devil, on the other hand, relies on synergy in order to not be a glorified Centaur Courser. This is going to mean it wants there to be something already on the battlefield before it’s cast. In a deck built around sacrificing things, this isn’t exactly a high bar to clear, but without an active Priest of Forgotten Gods or Witch’s Oven, it isn’t a given on Turn 3.
- Luckily, Chandra is a great thing to put onto the battlefield that can create some permanents that will sacrifice themselves. On a clear battlefield, or one that’s at a clogged parity, getting the value that Chandra can generate from incredibly disposable bodies should be prioritized.
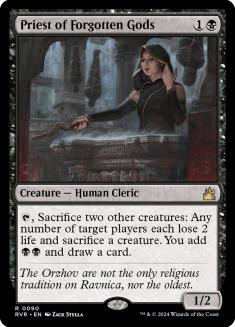
However good Priest of Forgotten Gods may look, it’s even better when a planeswalker’s zero ability pays the entirety of the cost for its effect.
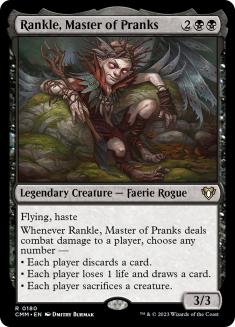
Correctly playing Rankle, Master of Pranks in this deck could have an entire article dedicated to it. In order to get through the card and back to the meat of the article, I’ll just go through his abilities, one by one:
Each player discards a card.
With Rakdos Sacrifice being a synergy deck, this ability’s efficacy is going to be as strong as the card Rankle’s forcing you to discard. If it’s weak, easily recurred, or a redundant copy of Rankle, trading it for a random card out of the opponent’s hand is a no-brainer. The times when it gets tough are when the cards your hand aren’t so clearly defined.
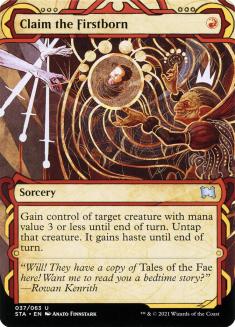
The removal in the deck has value that varies rapidly. Rankle having a way to make Claim the Firstborn worth an entire card against something like Jeskai Fires in pre-sideboard games is enormous.
Rankle’s discard ability is going to be most important against decks that are just piles of good cards. The reason for this is that their average card quality is going to be higher, which increases the odds that each discard is going to be a favorable one-for-one exchange.
Each player loses 1 life and draws a card.
This is secretly two modes. Think of drawing a card and both players losing a life as two different modes that have to be activated together.
This means that this ability will be good in two different scenarios:
- In matchups where having Rankle deal a fourth point of damage each time he connects is more important that giving both players a card.
- In instances where the extra card that Rankle draws for his controller is going to be more beneficial than the card he draws for his opponent.
Neither of these options will happen all of the time, or always together. What’s important to evaluate is which half of the deck you’re currently leaning into when Rankle connects.
That’s to say that at its core, the Rakdos Sacrifice deck is an aggro-synergy deck. This means that some games it’s going to lean into the Gutterbones-into-Priest-into-Mayhem Devil curve to try to kill the opponent as quickly as possible. Other games, it may sit back on a curve of Cauldron Familiar-into double Oven-into Midnight Reaper to simply build a more powerful battlefield than the opponent can reasonably overcome.
When the deck is adopting a more aggressive role, card advantage isn’t the fight it’s fighting. That means having both players lose a life, and doing something else that doesn’t play into the deck’s gameplan, is fine.
On the other side of things, in the more synergy-driven games, or games where the Rakdos Sacrifice deck is behind, accruing additional resources is going to benefit a synergy deck more than a more traditional “good cards” deck.
At this point, it probably sounds like Rankle should just be drawing cards and losing life every time he connects, but there’s an instance where activating Rankle is a serious drawback: games you’re already winning.
Rankle allowing both players to draw cards and lose life is a double-edged sword, and sometimes, the game may seem wrapped up, only for the opponent to draw exactly what they need to claw back in a game. Every time Rankle draws the opponent a card, it increases the odds that that happens.
This means that in lower-resource games, if Rankle is connecting, that likely means it isn’t time to be giving the opponent more cards. The Rakdos deck already has the opponent on the back foot and can simply press that advantage by playing with what it already has.
Each player sacrifices a creature.
This one’s fairly easy. Is the creature you’re sacrificing one that you’d like to trade for your opponent’s worst creature? Don’t forget how Mayhem Devil can play into this math.
All of these aspects are things to consider when connecting with Rankle. Practicing these thought processes gets faster over time. In a lot of ways, Rankle feels like a planeswalker that gets to use multiple abilities in a turn.
Backdoor Tips and Tricks
Any kind of Sacrifice deck is going to end up having a ton of tricksy, “How are you doing this?”-flavored things that it can do with its cards. Most of these things don’t come up often, but knowing that they’re doable is one of the ways to squeeze every possible percentage point out of the game.
It isn’t pretty, but Claim the Firstborn can simply act as a copy of Crimson Wisps in a pinch. This is relevant against decks that don’t play many targets for Claim. It also can play well with Priest of Forgotten Gods against decks that are proficient at handling small creatures. Rather than having to untap with Priest, it allows you to find a window to cast and activate Priest in the same turn.
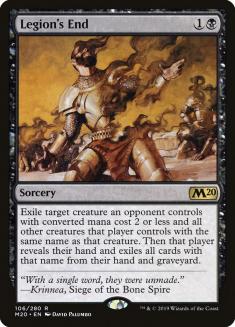
If your hand relies on a Cauldron Familiar / Witch’s Oven loop, expose Witch’s Oven before the Cat. This lets you protect Cauldron Familiar from the likes of Legion’s End and Lava Coil. Some things are worth more than attacking for one damage on the second turn.
There are a few levels to Mayhem Devil. The easiest is just that it triggers off its controller sacrificing things when paying costs.
The next level is noting that it also triggers when the opponent sacrifices permanents. This acts as a sort of hate card against the Trail of Crumbs decks in the format.
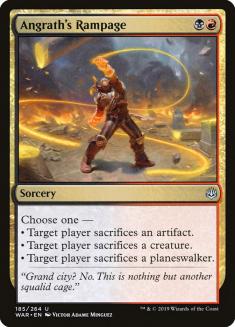
The third level is remembering that it also triggers off abilities that force players to sacrifice things. This means Angrath’s Rampage, Priest of Forgotten Gods, and so on.
The fourth level is realizing that means if the opponent doesn’t have enough things to sacrifice, you can target yourself with these effects in order to squeak final points across the finish line.
On that note, did you know that you can target both yourself and your opponent with Priest of Forgotten Gods on the same activation? It isn’t always pretty, but it is an additional Edict effect.
Remember you can hold priority with Rankle’s trigger on the stack*. This is relevant with something like Gutterbones, which can be returned to the hand with Rankle’s discard trigger on the stack in order to protect a more important card in his controller’s hand from being discarded.
* Don’t try this on Magic Arena. It’s a known bug. This works on Magic Online and in tabletop settings.
Combining the last two points, the following set of creatures can deal ten points of damage to the opponent with only Rankle actually connecting:
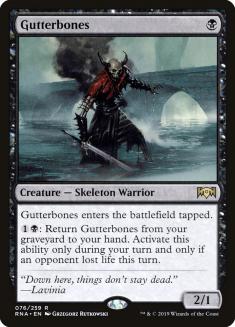
After Rankle connects, choose all three of his modes. From there, retain priority and activate Priest of Forgotten Gods targeting both players, sacrificing Rankle and Gutterbones. Sacrifice Priest to its own effect. Between the cost and resolution of this effect, there are three triggers from Mayhem Devil, and two life having been lost from Priest. Now, when Rankle’s effect resolves, both players lose a life and sacrifice a creature. Sacrifice Mayhem Devil, and the opponent loses a tenth point of life from the Devil’s trigger. That doesn’t even count additional triggers from the opponent having creatures to sacrifice to Rankle or Priest.
Learning all the levels of this kind of nonsense is what separates the good Mayhem Devil pilots from the great ones. Even if playing with decks in the vein of Rakdos Sacrifice isn’t your cup of tea, learning how to maneuver with the tools they have is instrumental in playing around what they can do.
At this point, it’s all up to you to put in the time and just do it.