The turbo Bolas’s Citadel deck first emerged in Pioneer, where it could use Catacomb Sifter as an extra scrying effect alongside Woe Strider to make sure resolving Bolas’s Citadel was game over. Soon enough, people realized they could play it in Historic as well – it didn’t have all the important cards, but it had enough of them that the deck could work. In fact, Historic even offered some upgrades, such as Phyrexian Tower. The deck quickly became popular and I expect it to remain so for the foreseeable future.
Right now, there are four main versions of Bolas’s Citadel decks in Historic — Jund, Abzan, Golgari, and Explore (which is also Golgari). The first three are all within a couple of cards of each other, and the gameplan for all four of them is very similar. In this article, we’ll make a general overview of the deck and the pros and cons on each of the four versions.
The way I see it, the Bolas’s Citadel decks are combo decks: the goal of every game is to get to six mana, cast Bolas’s Citadel, and win the game either that turn or the next turn. You are certainly capable of winning games with your beatdown, but that’s Plan B; the main win condition in the deck is Bolas’s Citadel. It doesn’t always happen, of course — sometimes you have Citadel out for a couple of turns and still don’t win and sometimes you’re low enough on life that you can’t do anything with it — but I’d say that you’re a big favorite in any game in which you cast a Bolas’s Citadel with a reasonable battlefield presence (or even with an empty battlefield in some matchups) and that’s what you should be trying to do. Approaching the deck this way will be helpful during both gameplay and sideboarding.
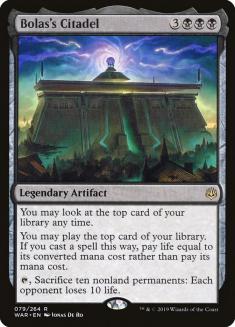
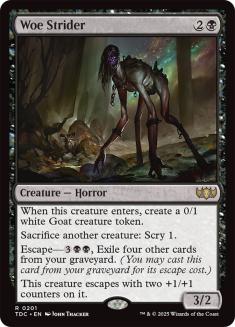
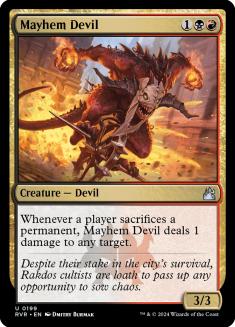
The key combination you’re trying to achieve is Bolas’s Citadel, Woe Strider, and a sacrifice payoff such as Mayhem Devil or Blood Artist. If you get to that point, you can make sure you don’t brick by using the Woe Strider to scry away every land on top of your deck, triggering the payoff in the process. Given enough life or enough Blood Artists, you will eventually either just kill them with sacrifice triggers or get to ten permanents on the battlefield which lets you activate Bolas’s Citadel (that should be enough damage alongside any sacrifice payoff).
Even though you’re a combo deck, you’re still a creature deck, which means you have trouble with sweepers as a whole, unless they absolutely cannot deal with Bolas’s Citadel. A deck of all sweepers and no disruption wouldn’t be a bad matchup, but a deck like Azorius with a bunch of Wrath of Gods and counterspells for Citadel is. This deck is pretty fast, so most matchups without interaction favor you.
Jund Citadel
Creatures (31)
- 4 Llanowar Elves
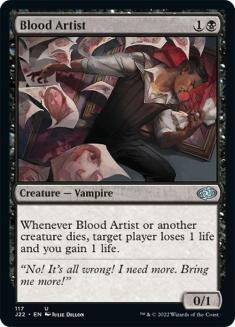
- 4 Blood Artist
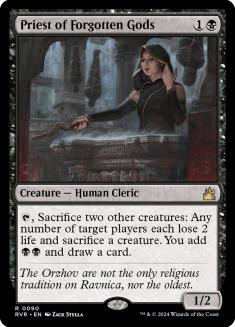
- 4 Priest of Forgotten Gods
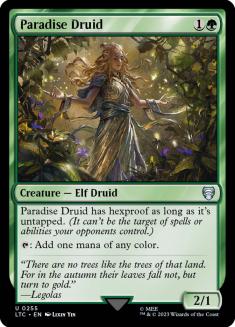
- 4 Paradise Druid
- 4 Mayhem Devil
- 4 Gilded Goose
- 4 Woe Strider
- 3 Llanowar Visionary
Lands (19)
Spells (10)

Pros:
- Very strong in the mirror
- Can kill utility creatures such as Hushbringer, Skirk Prospector, etc.
Cons:
- Three colors
- Mayhem Devil is good once you have Citadel but doesn’t help you get there
The Jund version isn’t really a proper “Jund” deck, but it splashes red for Mayhem Devil. The deck doesn’t have nearly as many sacrifice outlets as the Standard Jund Sacrifice did (some people play Cauldron Familiar and Witch’s Oven but I don’t like that in Historic), so Mayhem Devil is not as individually powerful as it was there, but you still have Gilded Goose, Priest of Forgotten Gods, and Woe Strider, so it can still be relevant in fair games even outside of the combo turns. It’s also a relatively beefy creature to hit from Collected Company, which helps in the games where you have to just beat down.
All in all, I would say that Mayhem Devil is not very impressive. It’s not a bad card, but it does nothing to get you to your gameplan, and once you’ve assembled Bolas’s Citadel, there are similar alternatives in other colors (or even in Golgari). Splashing in this deck is costly, as you don’t run that many lands, you really need both black and green mana, and each point of life you lose could mean one fewer card once you get Bolas’s Citadel on the battlefield. This results in people splashing Mayhem Devil with very few red sources and hoping that Gilded Goose and Paradise Druid can do the heavy lifting (which works most of the time but not always).
The biggest upside of Mayhem Devil is definitely how strong it is against other people’s sacrifice effects — namely any sort of mirror match and the Rakdos Kroxas builds, both of which are very popular decks right now. Since Mayhem Devil triggers off any sacrifice, yours or your opponent’s, it becomes almost impossible to win the game in the mirror once your opponent has resolved one. Given that these are combo decks which don’t have a lot of room for removal (the Citadel decks often have zero in the maindeck, for example), having this card in your deck makes you highly favored in the matchup. Aside from that, though, I simply don’t think it’s worth it. So, to me, if you expect a lot of Bolas’s Citadel decks or other decks that sacrifice their own permanents, then you can play Mayhem Devil, but against an open field you should not, and I currently don’t play it.
Abzan Citadel
Creatures (31)
- 4 Llanowar Elves
- 4 Blood Artist
- 2 Midnight Reaper
- 4 Priest of Forgotten Gods
- 2 Paradise Druid
- 3 Cruel Celebrant
- 4 Gilded Goose
- 4 Woe Strider
- 4 Llanowar Visionary
Lands (17)
Spells (12)
Sideboard
Pros:
- Harder to fizzle
- You get another strong hit for Collected Company mid-combo
Cons:
- Three colors
- The card you’re adding is not very strong outside of the combo
The Abzan Citadel deck is similar to the Jund version in that it’s only lightly splashing for a combo piece (in this case, Cruel Celebrant as Blood Artists five through eight).
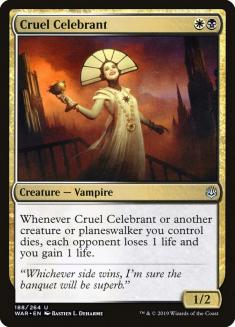
Cruel Celebrant is a better card than Mayhem Devil when you’re going off, as the extra life means it’s harder to fizzle. It is, however, a much worse card when you’re not going off, and a much worse Collected Company hit when you’re not mid-combo. Mayhem Devil at least enables a more aggressive gameplan by being a 3/3 attacker that can kill blockers and utility creatures such as Hushbringer, and Cruel Celebrant does none of that.
All the issues from the red splash still apply here — you can’t play too many white sources and the extra damage you take can be harmful during the combo (though that’s diminished because Cruel Celebrant gains life during it). Overall, I don’t think the white splash is quite worth it; if I’m going to add a third color to my deck it’ll at least be for a different effect (such as the ability to kill creatures in Game 1).
Golgari Citadel
Creatures (28)
- 4 Llanowar Elves
- 4 Blood Artist
- 1 Jadelight Ranger
- 4 Priest of Forgotten Gods
- 3 Paradise Druid
- 4 Gilded Goose
- 4 Woe Strider
- 4 Llanowar Visionary
Lands (15)
Spells (17)
Pros:
- No mana problems
- No excessive damage from your lands
Cons:
- Worse Collected Companies
- No way to deal with hate Game 1
- Worse in mirrors
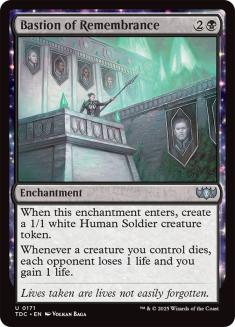
The other potential build of the deck is straight Golgari. Instead of Mayhem Devil and Cruel Celebrant, it maxes on four-ofs of some of the creatures (such as Llanowar Emissary) and then fills the remaining slots with Bastion of Remembrance, which is actually a better card than Cruel Celebrant except for the fact that you can’t hit it with Collected Company.
This version is also weaker to any hate in Game 1, as it cannot remove a creature. I think this is an acceptable weakness, as most of the hate cards come in in Game 2, but if Mayhem Devil decks become popular (mostly the Jund mirror) then you cannot play the straight Golgari version as you almost auto-lose Game 1 (or you can but you need to adapt it and play some removal).
Explore Citadel
Creatures (30)
- 4 Llanowar Elves
- 3 Blood Artist
- 4 Wildgrowth Walker
- 4 Merfolk Branchwalker
- 4 Jadelight Ranger
- 4 Gilded Goose
- 4 Woe Strider
- 3 Llanowar Visionary
Lands (15)
Spells (15)
Pros:
- A potentially stronger Plan B
- More reliable at going off
Cons:
- It’s slower since you don’t have as much acceleration
- Sideboarding is harder
This is another Golgari build of the deck, except it doesn’t play as much on the “sacrifice” angle and instead relies on Wildgrowth Walker with the two explore-mechanic mainstream selections, Jadelight Ranger and Merfolk Branchwalker, to gain life and keep the combo going.
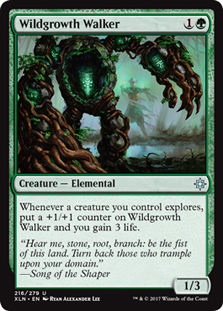
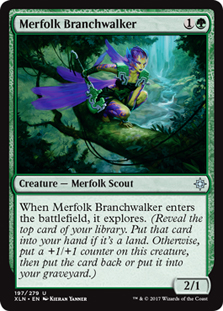
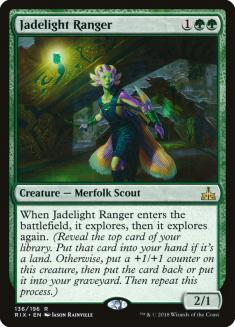
The explore creatures help you while going off not only because they gain you life, but also because they filter the top of your library — if you hit a land, it’s going to come to your hand, and if you hit a spell you can leave it there to cast with Citadel. By casting a Jadelight Ranger, you almost guarantee that you’re going to hit a spell next, which is pretty good.
On top of that, the explore creatures are actually capable of winning the game. People who played Standard a couple of years ago probably remember the Sultai decks of the time, who were capable of stealing wins just by going Turn 2 Wildgrowth Walker, Turn 3 Jadelight Ranger, and this start is still possible here. Of course the format is more powerful, so it’s unlikely to be enough, but this deck will do a better job of punishing a non-functional draw than the other versions, and sometimes you really just do steal games versus damage-based decks with Wildgrowth Walker.
In return, your deck is slower; you can’t play as much acceleration because you’re playing the explore package. The biggest downside of this version, however, is that you’re including a twelve-card package that really needs all the pieces to work, which means sideboarding is a nightmare. No version of the deck is actually good at sideboarding, but the other versions can at least take out some of the elements, whereas this version can’t just take out its four worse cards (Merfolk Branchwalker) without making the Wildgrowth Walkers significantly worse. At this point, your deck is all combo pieces, acceleration, or the explore package, so you have to take out acceleration, which doesn’t feel great considering you started with less acceleration than the other builds to begin with.
Overall, I think the pros don’t outweigh the cons compared to the regular Golgari version. There are certainly benefits to both lists, but I think being a little faster and having more flexibility during sideboarding means the regular version takes the edge.
Sideboarding
Sideboarding with this deck is quite tricky, because you really do need all the pieces together. Take out acceleration and the sacrifice package and your Citadels start not winning the game anymore, take out creatures and your Collected Company doesn’t work as much, etc. You should make sure you have answers to their hate cards – Hushbringer, Grafdigger’s Cage, Rampaging Ferocidon, Harsh Mentor, Mayhem Devil – so that you can still win the game, but you cannot take out enough cards that your core engines don’t function. Sideboard minimally (I usually take out the Jadelight Ranger, then one Paradise Druid, and then one Bastion of Remembrance if there’s nothing that’s obviously bad).
I’m going to do a sideboard guide for the Golgari version, since that’s the one I like the most, but it shouldn’t be too hard to adapt with the other ones.
VS Goblins
Out:
In:
VS Azorius Auras
Out:
In:
VS Citadel Mirror
Out:
In:
VS Azorius Control
Out:
In:
VS Mono-Red Aggro
Out:
In:
VS Rakdos Sacrifice
Out:
In:
Some tips to playing the deck:
- Casting Bolas’s Citadel is your top priority in every game and you should go to great lengths to accomplish it.
- In Game 1, it’s usually better to hope they don’t have a sweeper than to try to beat it.
- Don’t forget that Blood Artist triggers from both players. In mirror matches, if it’s your turn, then yours will trigger first, which means theirs will be put on the stack last and therefore resolve first. This means that, if you want to kill them with Bolas’s Citadel, you need to do it on their turn or you’ll die to their Blood Artist.
- If your opponent cycles a Shark Typhoon for zero, it will trigger Blood Artist!
- If you cast Llanowar Visionary with Bolas’s Citadel and see an instant such as Collected Company, you can cast it before the draw trigger resolves.
- You can target yourself with Priest of the Forgotten Gods (as well as them – you can target any number of players). This can be useful if you need a Blood Artist or Mayhem Devil trigger and don’t have a sacrifice outlet.
- Try to play Phyrexian Tower last if you can, so that you can use it to surprise them with a Bolas’s Citadel one turn earlier than they expect.
Overall, if I were to play a Bolas’s Citadel deck in Historic right now, it would be the regular Golgari version, even if it’s worse in the mirror — I think it’s just better across the board. If I expected a lot of mirrors, I would just not play this deck, rather than playing an inferior version because it’s advantaged there. If you expect a metagame without a lot of sweepers and without a lot of mirrors, then you should check this deck out!