
One of the overlooked aspects of Magic, especially in the context of Standard, is the importance of the mana curve. It’s been decades since the concept was brought into the community with the advent of Sligh decks, but somehow it still gets ignored in favor of fitting as many powerful, flashy cards in a deck as possible.
Of course, those powerful cards don’t do much when you can’t cast them in time, a lesson many a player has learned over their early days in Magic. A proper curve increases your deck’s consistency and ensures you can either end the game quickly or get to your more powerful cards without falling too far behind.
Because of this, most players will at least acknowledge how important curves are for aggro decks, but even in more reactive strategies, you want your answers to line up against theirs, so to some degree your curve has to mirror or best theirs.
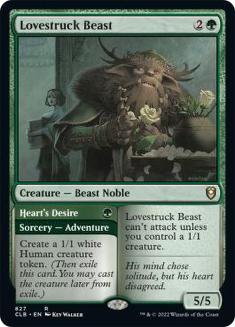
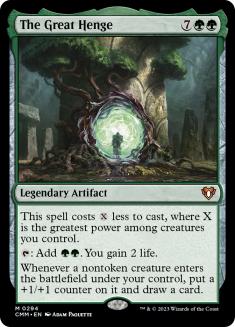
Building your deck in such a way that your natural sequences lead to an advantage is a huge part of winning in Standard. Part of the reason Lovestruck Beast and The Great Henge have had so much success over the past three months is not just because they’re powerful cards, but because the threat of curving Lovestruck Beast into The Great Henge forces the opponent to kill Lovestruck Beast even if they don’t want to.
Knowing how important a consistent curve is, I often look to cards that are flexible as to where they can be cast. This versatility allows you to compensate for some of the variance in your draws and ensure that you’re making powerful plays as often as possible and using your mana efficiently. Typically, these kinds of cards are less efficient themselves — that’s the cost of getting that versatility — so when I see a card that grades well on rate as well, it jumps off the page.
The triumvirate of Lovestruck Beast, Bonecrusher Giant, and Brazen Borrower demonstrate how powerful cards can get when costed efficiently while also being versatile on the curve. And there’s a card from Kaldheim that also fits into that mold:
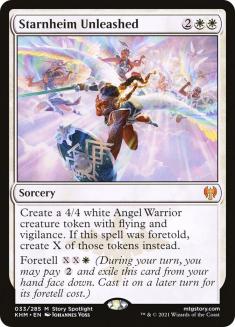
Foretell as a mechanic is great for those who are mindful of their curve, since it gives you more options for how to pay for a spell. Starnheim Unleashed goes even further with the variable foretell cost, allowing it to scale as the game goes long should you have better things to do early. Making multiple tokens also provides a source of card advantage, a key aspect of the Adventure creatures as well.
When it comes to building around Starnheim Unleashed, it’s important that you take into account where it best fits into your curve. You can be aggressive with the card: foretell it on Turn 2 and cast it on Turn 3. You can cast it normally on Turn 4. Or, and this is my favorite mode, you can foretell it sometime in the first four turns while setting up to get multiple Angels on Turn 5 or later.
Since it fits in so many points on the curve, you aren’t forced to use it in any given way, but you should consider the context of your deck and tune it towards where you’d like to cast the card most often. Take, for example, this Selesnya Tokens list:
Creatures (22)
- 2 Scavenging Ooze
- 4 Lovestruck Beast
- 4 Giant Killer
- 4 Edgewall Innkeeper
- 4 Skyclave Apparition
- 4 Kazandu Mammoth
Planeswalkers (1)
Lands (10)
Spells (27)

Most Adventures decks have a notable hole in the curve at two. Stomp and Petty Theft often fill that spot for Gruul and Temur variants but Selesnya has to resort to weak cards like Shepherd of the Flock. This list uses the foretell on Starnheim Unleashed to fill that spot on the curve so you can catch up on a later turn with some Angel tokens.
Because I’m planning to use Starnheim Unleashed as my five-drop as well, I went down to one copy of Vivien, Monsters’ Advocate in the maindeck. But that five-mana play also works very well with Esika’s Chariot. You can curve the two into each other, hopefully after your opponent has used their interaction on Edgewall Innkeeper and Lovestruck Beast, only to find themselves facing down an ever-growing army of Angel tokens.
Even if your opponent has sweepers, this curve is still going to be a problem. You just have to exercise some patience. Rather than go immediately for the Angels, you grow an army of Cat tokens until you force the sweeper from their hands, at which point you still have the Chariot and can immediately rebuild with the Angels. Against Extinction Event specifically, Starnheim Unleashed varies your curve away from the mostly odd-costed creatures.
Normally a deck like this which is trying to amass a wide battlefield of creatures would cower in fear at the threat of sweepers, so having a built-in way to insulate yourself from them is invaluable.
Of course, you won’t always have the early foretell, so this deck is also built with the natural cost in mind. A 4/4 Angel token for four mana curves naturally into The Great Henge on Turn 5, and it also curves perfectly with Battle for Bretagard, demanding an immediate answer lest you duplicate it when the third chapter triggers on the following turn.
So it’s easy to look at a deck like this and think Starnheim Unleashed is just here as a powerful payoff for the token generators, but if you want those synergies to come together, you need to be able to execute them quickly and efficiently so you minimize your opponent’s chances to meaningfully disrupt your gameplan. I think this list does that well.
This next list goes in an even more aggressive direction, using Starnheim Unleashed as the top-end of the curve. The plan won’t be to foretell it on Turn 2 since you’ll want to be developing your battlefield on those early turns. Instead you’ll either cast it on Turn 4 for its normal cost, or foretell it along with another spell to set up for Turn 5:
Creatures (28)
- 4 Giant Killer
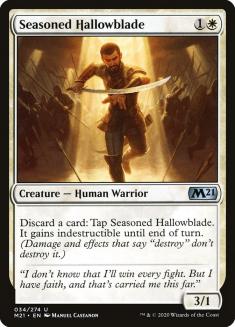
- 4 Seasoned Hallowblade
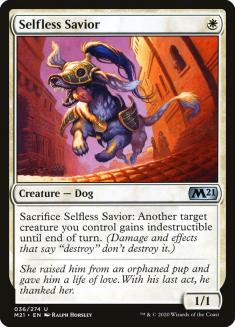
- 4 Selfless Savior
- 4 Skyclave Apparition
- 4 Archpriest of Iona
- 4 Luminarch Aspirant
- 4 Usher of the Fallen
Planeswalkers (2)
Lands (19)
Spells (11)
My favorite Turn 4 play with this deck is Kabira Takedown on a blocker along with foretelling Starnheim Unleashed. If you’ve curved out properly on the first three turns, then your opponent should be under pressure to protect their own life total, thus forcing them to interact with your early creatures and leaving them vulnerable to the Angel tokens.
You can also foretell along with another creature, extending just far enough to force the sweeper before you deploy your most powerful threat. Much like the Selesnya Tokens list, this is an aggro deck designed to play through sweepers with how you curve and cards like Selfless Savior and Seasoned Hallowblade.
In any racing matchup, you can just go for the Angel on Turn 4, which importantly is a Warrior as well, offering just enough that I’m willing to try Archpriest of Iona with just two of the creature types. It’ll be a 1/2 some amount of the time, but the games where it’s a 2/2 will make this deck much more aggressive.
The last aspect of Starnheim Unleashed that’s important for this deck is it being a mana sink going long. Aggro decks, especially those without reach, need to have some plan for when they aren’t able to end the game early, and that can be hard to flesh out without sacrificing your early curve. Starnheim Unleashed can win a game by itself when cast for two or three, making this deck much more resilient than it otherwise would be.
And far from relying only on Angels, this deck has plenty of mana sinks for longer games. Usher of the Fallen pumping out some 1/1s may not look like much, but when you’re paying Luminarch Aspirant, Maul of the Skyclaves, and Basri Ket, every creature can become a threat. Giant Killer can also lock down a blocker should you want to go wide with tokens from Usher, Basri, and Castle Ardenvale.
For a deck with sixteen one-mana creatures, there’s plenty of power here to contend in longer games. And given how hard it’s been to succeed as a linear deck in Standard in recent years, that’s what you want to see.
The last home I found for Starnheim Unleashed is less focused on using the card in specific spots on the curve. Instead, it uses the versatility of the card to compensate for the added variance of playing 80 cards:
Creatures (10)
Planeswalkers (2)
Lands (31)
Spells (37)
When you add twenty cards to your deck, even if you keep the ratios relatively unchanged, you’re going to add variance to your draws. So it becomes even more important to have cards that can fit into multiple spots on the curve. That’s primarily what Starnheim Unleashed does here, though the Angel synergies are also important.
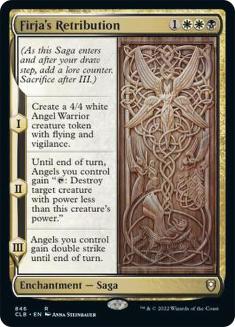
With Firja’s Retribution, you can use a Turn 3 Angel to great effect. It’ll attack for four damage on Turn 4, then destroy an extra creature with the second chapter on Turn 5 before representing a lethal attack after the final chapter triggers, leaving you with two 4/4 double strike Angels. A Yorion deck that can kill two creatures while also ending the game on Turn 6 is not something my aggro-loving heart wants to think about. You even have all your mana available on that turn to remove any pesky blockers.
The ability to make multiple Angel tokens also goes nicely with Righteous Valkyrie, letting you immediately gain enough life to turn on the static ability. And when you throw in Firja’s Retribution, the curve can look downright silly:
- Turn 2: Foretell Starnheim Unleashed
- Turn 3: Righteous Valkyrie
- Turn 4: Firja’s Retribution
- Turn 5: Starnheim Unleashed for X=2
With this curve, you can potentially gain up to fourteen life, since by the time the last Valkyrie trigger resolves your Angel tokens might be 6/6s. You also have the option to kill two creatures with the second chapter of Retribution. And then on Turn 6, the final chapter can set up an attack for 44 damage.
And most importantly, in these curves your opponents need to interact immediately or they will be punished. There’s no room for them to stumble because the cards naturally curve into each other.
These are the aggressive curves for the deck. Of course, you still have the attrition capability of Yorion and the various enchantments. Only now, those enchantments also bring 4/4 Angels with them and potentially a bunch of life as well. You could certainly add blue to gain access to Omen of the Sea and maybe Dance of the Manse, but for this first pass I stuck to Orzhov, which allows you to fit several utility lands into the deck. All that extra life means you can activate Castle Locthwain very aggressively.
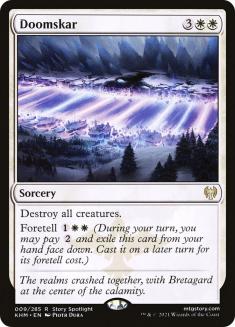
Lastly, I want to highlight the three copies of Doomskar in the sideboard, which offer this deck a second foretell card to inject some uncertainty into your opponent. Against an aggro deck, a Turn 2 foretell will now force them to slow down in the face of a potential sweeper, but doing so only plays into a later Starnheim Unleashed, so there isn’t anything for your opponent to do other than pick a lane and hope they guess correctly. You could push the deck in a more controlling direction by maindecking the new sweeper, but I think the lifegain from Righteous Valkyrie offers enough defense and I want to be open to the more aggressive curves this deck is capable of.
So when you’re building a deck and considering your curve, remember that maximizing your deck’s potential on this axis is about more than just making sure you have eight two-drops, ten three-drops, etc. It’s also about finding sequences that are powerful and naturally curve into each other so that your opponent is forced to interact as quickly as possible.
With the versatility of Starnheim Unleashed, finding those sequences is easy.